
Online shopping, a term that is popular more than ever. While you must consider the pandemic crisis to be one of the reasons, a major role is played by the simplicity and flexibility to shop, anytime, and from anywhere.
WooCommerce stores are designed solely for the customers giving them the ease to purchase products on the go. However, one thing that haunts most of the customers is the product efficiency. What this means is that often what we see and what we get are two different things. This applies both in terms of the quality as well as the size of the product.
While the quality is one thing that needs to be up top and in fact, it is the job of the store owner to assure good quality products, sizing requires additional information to be provided to the customer.
Wondering why?
An online store has multiple products from different brands and not all brands follow the same sizing convention. While a few adhere to the standard rules of sizing, others have their own definition for the same. Also, the sizing rule differs from country to country. For instance, UK 9 is different from US 9. So if a customer from the UK places an order for size 9 without knowing the actual measurements, he/she might end up buying the wrong size product.
This is where WooCommerce store managers need to rethink their strategies and probably integrate a Product Size Chart Plugin for WooCommerce.
About WooCommerce Product Size Chart Plugin

Adhering to the need for providing users with sizing information, the WooCommerce product size chart plugin is an excellent solution. The plugin allows you to customize your store settings and add an additional size chart to be displayed on to the product page. Irrespective of whether you are a small scale start-up owner or an established WooCommerce store manager, adding a size chart is a must and so the need for the above-mentioned plugin.
WooCommerce has an expanse of solutions from different companies. What’s important to note is that you can go for a free version or even opt for a paid/premium version. The choice depends upon you. The core of the two would be the same with a few add-ons in the premium version. In case you aren’t sure, you can start with the free version and then later, upgrade the same by buying the premium plans.
How to add a size chart?
Now that we are aware of the solution to the grave problem of not knowing the right size or ordering the wrong product, the next hurdle that comes in our way is how to add the size chart? Even though we have the plugin, we must have a decent understanding of how to use the plugin or configure it to be embedded in the online store. Without much ado, let’s get started with the detailed guide.
Prerequisites:
- To begin with, you must have the plugin downloaded and installed in your online store. For this, log in to your WordPress dashboard. Enter the login credentials and sign in to the site.
- Next, move to the left side corner of the dashboard and scroll down to the plugin section.
- Click on Add New.
- In the search bar, type the name of the plugin i.e. Product Size Charts Plugin For WooCommerce. Y. For free opt for Woo-advanced Product Size Chart. To download the premium version, you can visit the official page Advance product size chart plugin here to download the plugin.
- Click on download and install. Alternatively, you can take a live demo of plugin before downloading or installing it in your store.
- Once done, select activate the plugin.
With this, you are now ready to configure the plugin.
How to configure the plugin to add WooCommerce Product Size Guide in the store?
Follow the steps given below to add a WooCommerce size chart.
Step One: Add Size Chart
- Log in to your WooCommerce dashboard and scroll down to the plugin tab. Here click on the name of the plugin i.e. Advanced Product Size Charts for WooCommerce.

- The next page displays several options with respect to the WooCommerce size guide. Since we are creating a chart for the first time, the first tab would have a few default templates or will be blank.

- To create a product size chart, click on ‘Add new’ button. Here, we can enter the details of the product for which we want to create the size guide.

- As you click on the tab, a page opens with multiple fields to be filled.
Add New Size Chart: This is the first field and requires you to enter a unique name for the size chart. For example, if you are creating the size chart for Women’s Jeans and Jeggings, you can simply enter the Women’s Jeans And Jeggings Size Chart.

- Add Media: If you wish, you can add an image here. Remember the image must clearly highlight the product that we are talking about.

- Description: Next, we have a blank space that asks you to enter the description of the size chart of the said product, in this case, it is Women’s Jeggings and Jeans. Say, you can have something like:

Waist: Measure around your natural waistline, keeping the tape bit loose.
Hips: Measure around the fullest part of your body at the top of your leg.
Inseam: Wearing pants that fit well, measure from the crotch seam to the bottom of the leg.
This renders information on how to take measurements when determining the size of jeans and Jeggings. Note that you can also add an image depicting the above.
Also, you can choose the category for your size charts and assign products to it.

As per you choice(s), your product size charts for WooCommerce will appear in your shop for selective products and/or categories.
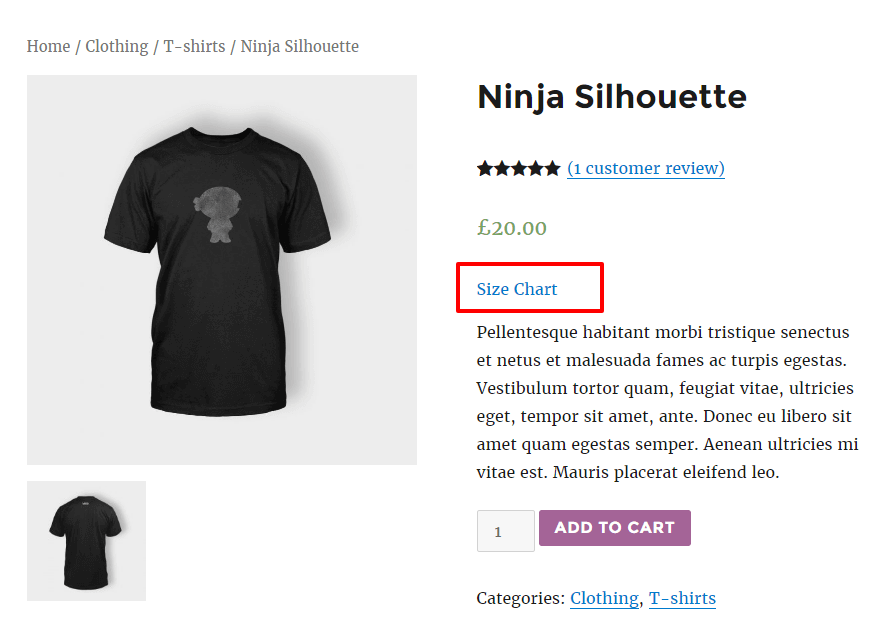
In the settings section, you can select whether you want to display your WooCommerce size charts as part of the product description or want to show it as pop-up when someone clicks ‘Size chart’ option.

Step Two: Size Chart Settings
Now that we have created a size chart, the next step is to change the settings so as to make it display-ready.

- Label: This is the title that is displayed on the top of the size chart. You can keep it simple and straightforward like Women’s Jeans sizes
- Primary Size Chart Image: If required, you can add an image of the size chart. Click on the upload button to either select one from the media library or import it from your device. You can also drag and drop files to add the same as the primary size chart image.
- Chart Categories: The category is something that specifies the product for which the chart is applicable. Here, we will have a category like Jeans, Jeggings, etc.
- Chart Position: The next tab is where to place the chart or how. Whether you want it to be displayed as a modal pop-up or in the form of an additional tab, you can pick them from here. Click on the drop-down to select one of the two.
- Chart Table Style: The plugin allows you to pick one of the five display styles of the WooCommerce size chart. Custom, Classic, Modern, Minimalistic, and default. Click on the drop-down to select one.
- Chart Table: This is the last thing you need to do when adding a size chart to your WooCommerce store. Click on the plus sign to add another row or column horizontally and the same is applicable vertically. Enter the details for each of the rows and respective columns.

Finally, click on save or update to publish the size chart on the site. Note that the chart is dispensable and you can edit and modify the same as and when required.
In general settings section, you will find the option to change colors and other display properties too.

Edit the WooCommerce Product Size Chart
Similar to adding a new WooCommerce size guide, you can edit the existing one. The steps to edit an existing size chart are given below:
- Log in to your WooCommerce dashboard and scroll down to the plugin tab.
- Here click on the name of the plugin.
- The next page displays several options with respect to the WooCommerce size guide. You will see multiple size guides displayed on the page.
- Click on the name of the size chart that you wish to edit.
- The next page will have all of the details saved by you. Simply delete and rewrite things that you want to change. It could be anything from changing the name to adding a different image or maybe another size row or column.
- Once you have made the changes, do not forget to click on the update tab to save them.
- Make sure you recheck the changes made by viewing it live on the website.

Easy, right?
Depending upon whether you want to buy the premium version or stick to the free version, you can now download the plugin and customize your WooCommerce store to have a dedicated product size chart. Make sure you double-check the figures and the sizes before entering them in the size chart. Also, take into consideration the different regions and gender when designing the size chart.
Want to see how a typical WooCommerce Size chart, created using the WooCommerce Advanced Product Size Chart Plugin, look like? See this:


Conclusion
Adding a WooCommerce size chart isn’t something difficult or rocket science. All you must know is the right step towards the same. Go through the steps mentioned above to get started with the process of adding a product size chart in your WooCommerce store.


