Chorus to WordPress Migration Guide
Explore the step-by-step process of migrating from Chorus to WordPress
Table of Contents
Having the right Content Management System (CMS) support your website is what helps it remain competitive. In 2022, Vox Media announced that the media giant would no longer license the Chorus CMS and advised its users to migrate away from it within 18 months.
While most businesses and enterprises have already migrated away from the platform, if you haven’t, it is high time you do so!
While Chorus was known for its inimitable features, WordPress is a more robust CMS with myriad benefits to offer. WordPress has thousands of plugins and ready-to-use functional themes making it easy for businesses to create powerful websites. The active community support ensures that you will have enough support to tackle any issue you come across.
That said, if you have already made up your mind to migrate from Chorus to WordPress, this guide will help you navigate the entire process.
1. Pre-Migration Assessment
Before you initiate the migration process, you should first conduct a thorough pre-migration assessment to ensure minimal to no loss of data or errors during the actual migration. Regardless of the CMS you choose to migrate from or to, you must consider several parameters before starting the migration.
Content Inventory
Taking inventory of content before migrating your content is a crucial step in ensuring a successful migration. Content inventory refers to a list of all the content you have on your website. When maintained properly, your content inventory can help you understand the type of content you have, where it is stored, and the way it is organized.
Remember, your content inventory includes all the images, text, and video content on your website. Before you start migrating away from your current CMS, you must identify any gaps or duplicates in the content. You should also identify any outdated content that needs to be addressed, and eliminate all such instances.
Taking inventory of your content typically includes the collection and analysis of different kinds of data about your content. This information will generally include the publishing date, author, content format, and URL of content, as well as the status of the content and any necessary action required.
The purpose of taking inventory of your content before a CMS migration is to minimize the risk of overlooking or losing any content during the process.
Functionality Analysis
A CMS migration’s success lies in ensuring that the chosen CMS is an improvement over your current one and fills the gaps and inadequacies you currently experience. That said, you must also check whether the new CMS supports the features or offers equivalent ones for the features that work well for you.
To ensure that you upgrade your functionality by moving to WordPress and don’t lose any important features in the process, consider conducting a thorough functionality analysis.
A functionality analysis entails first listing all the necessary features you require from your CMS. You can do this by diving deep into your current CMS and identifying potential areas of improvement. More importantly, look at the primary functionalities that are missing in your current CMS and the ones that would help you streamline your workflow.
Once you figure out the current as well as additional features that you want in your new WordPress website, it is time to check whether the theme you chose facilitates them. Ensure that it can offer the functionalities that are required for your business to grow and scale up. Plus, you must ensure that the custom content blocks that you have created in Chorus must be transferred as Gutenberg blocks along with their data during the migration.
SEO Considerations
Not all CMSes are created equal. While some are conducive to Search Engine Optimization (SEO) and provide all the necessary features, others may lack the functionalities that could help you level up your SEO performance.
#1 Conduct an SEO Audit
The first SEO task you must keep in mind is conducting a comprehensive SEO audit on your current website. The results of this audit will tell you more about the strengths and weaknesses that you need to address in your website to maximize its SEO performance.
Check out the Site Audit Checklist by Moz, if you are looking for a comprehensive SEO audit template to guide your efforts.
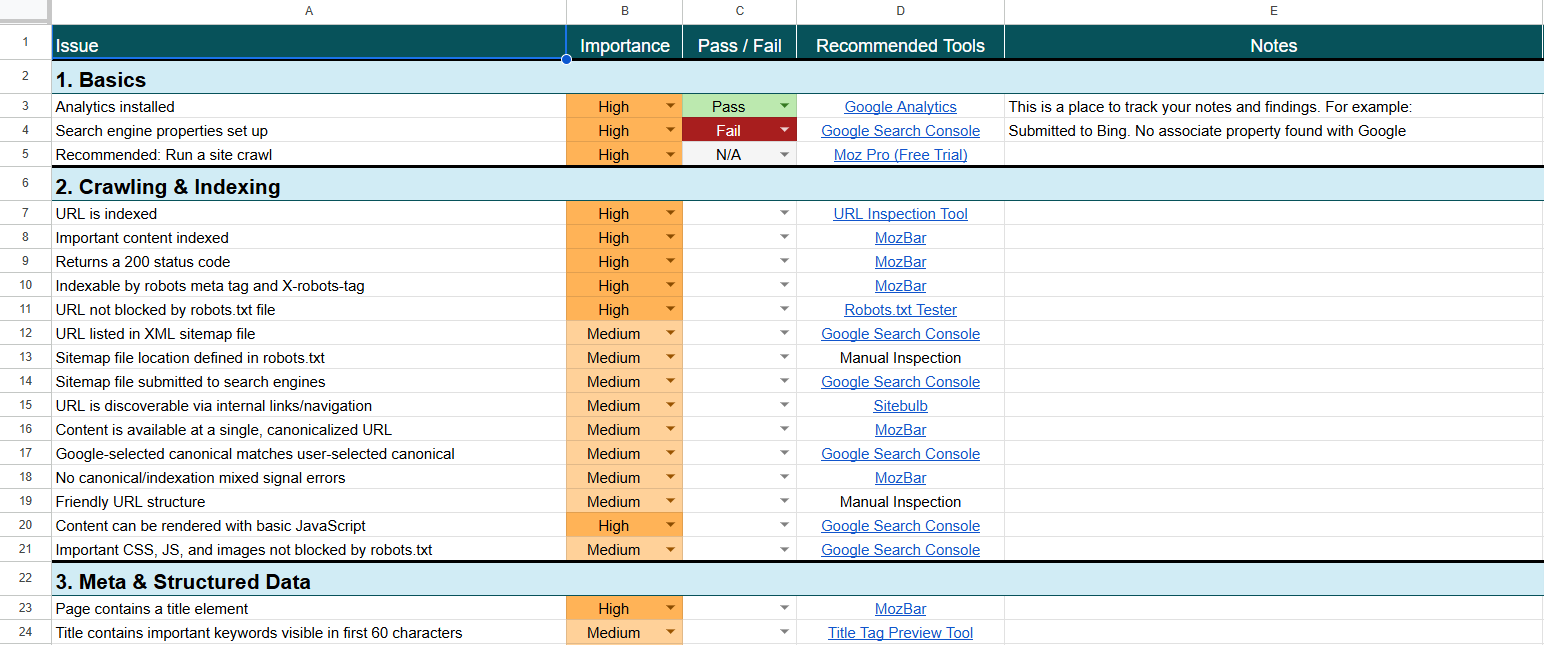
Site Audit Checklist
You can also identify the high-performing webpages on your website and any outdated content to mark them in your migration plan and content inventory. All this will help you decide what you should include, improve, or remove during the CMS migration process.
#2 Establish Benchmarking Metrics
Before you initiate your Chorus website’s migration to WordPress, you must benchmark the current metrics that you use to measure your SEO performance. Then, you should pick the common key performance indicators you use in the process such as:
- Organic Traffic
- Bounce Rate
- Conversion Rate
- Qualified Leads Generated
These may be the primary metrics your business relies on for measuring your website’s SEO performance and plan to even after the migration. Before moving forward with your CMS migration, you must establish a baseline that you can later use for comparison once the migration is complete.
#3 Create an SEO Checklist
Once you have the current SEO performance and baseline metrics out of the way, consider creating a checklist of parameters you need to address during and after your Chorus to WordPress migration process.
For instance, you want to ensure that any third-party scripts or other ad-related scripts are accounted for during the migration, as a part of your SEO checklist.
Your SEO checklist can be as detailed as you want it to be and can even include any changes or improvements you want in your new website. You should also include all the parameters and metrics you must test and measure your new WordPress website and compare it with your old Chorus website performance.
Taking a Backup
Perhaps one of the most important tasks you can accomplish as a part of preparing your website before migration is taking a proper backup of all your website content and assets. A content backup ensures that you don’t end up permanently losing data in the migration process.
A comprehensive content backup ensures your content’s integrity, security, and your website’s operational continuity. Backups can protect your content against corruption, safeguard all your sensitive information, minimize downtime, and even streamline the content recovery process post-migration.
2. Setting Up the WordPress Environment
Once your pre-migration assessment is successfully done, you must start setting up your WordPress environment and website. Not only this, migrating your CMS and content successfully depends on setting up your WordPress environment properly.
You can follow the following processes to set up your WordPress environment successfully:
Install WordPress and Choose a Reliable Hosting Provider
Choosing the right hosting provider is important for your WordPress installation and you can choose from options such as Hostlinger, Kinsta, or WP Engine, some of the popular hosting providers. Some of these hosting providers will help you install your WordPress environment in just a few clicks and make the whole process more convenient.
As such, there are two ways to approach the installation of your WordPress environment: using a one-click installer and using manual installation. However, the choice of installation method relies on your choice of hosting provider.
Let us look at the steps involved in both the installation methods:
Using One-Click Installers
Most managed hosting providers such as Kinsta or WP Engine provide a straightforward and convenient one-click installer that can be used to install WordPress in no time. Here are the steps you can follow when using a one-click installer:
- Navigate to the control panel or settings page of your hosting provider’s dashboard
- You will find a "WordPress Installer" or a similar option on this page
- Use the instructions and prompts on the screen to get guided through the process and install WordPress
Installing WordPress Manually
If your hosting provider does not offer a one-click installer, you can always navigate the whole process manually. You can follow these steps to install WordPress manually:
Step #1: Download WordPress
Downloading WordPress is as simple as installing an app on your phone or a plugin to your browser. Considering it is an open-source platform, you can access and download it for free.
Visit the official WordPress website to ensure you can get access to the latest version of the CMS. You can then find the relevant option and proceed to download it. Ensure to unzip the file safely within a folder on your computer.
Step #2: Upload WordPress to the Server
It is time to upload your freshly downloaded WordPress and related files to your hosting account. After unzipping the downloaded WordPress environment on your computer, you must have a folder named ‘wordpress’ containing all the content and files required to be uploaded to the hosting account for it to work properly.
You can use one of the following three ways to accomplish this:
- Upload via SSH Access
- Upload via File Manager
- Upload via FTP
Step #3: Create a Database on the Server
The next step in the process of installing WordPress correctly is creating a database on the server containing your WordPress environment. By default, WordPress saves all its information and content onto a database that needs to be created separately.
While most hosting providers provide you with an option to access the cPanel from your dashboard, we will look at the process to access cPanel directly. Here is a simple process you can follow:
- Gain access to important server information such as its IP address, hostname, and domain name.
- Access the cPanel URL using a secure connection and the cPanel secure port number. Then, use the server information fetched earlier to pull up the cPanel through your browser.
- Log in to your cPanel by entering your username and password on the login page. While you will get your username from your hosting account dashboard, you may have to reset your password when you use this direct URL method for the first time.
You can now create an SQL database with PHPMyAdmin, and set a secure username and password to access it using the cPanel. Store these details safely for later use. Note that in some cases, the website host will create an SQL database for you automatically once you sign up and provide you with the necessary credentials directly.
Step #4: Complete the Installation
Now that your WordPress website, all the related files, and SQL database are already on your server, it is time to complete the installation of your new CMS environment. Visit your website domain to access the default WordPress installation wizard and proceed with the steps.
Choose your preferred language and enter your database details such as username, password, and other necessary credentials including database host and table prefix. Once done, run the installer and complete the installation. In the next step provide the necessary authentication information to access the backend admin panel of your WordPress website.
You can now start designing and editing your new WordPress website.
Developing a Custom theme and Configuring the Backend
As such, you will find plenty of WordPress themes in the WordPress Theme Directory that will help you get your new website up and running in no time. However, the more specific your requirement, the more need you will have for designing a custom theme. Fortunately, the process is fairly straightforward.
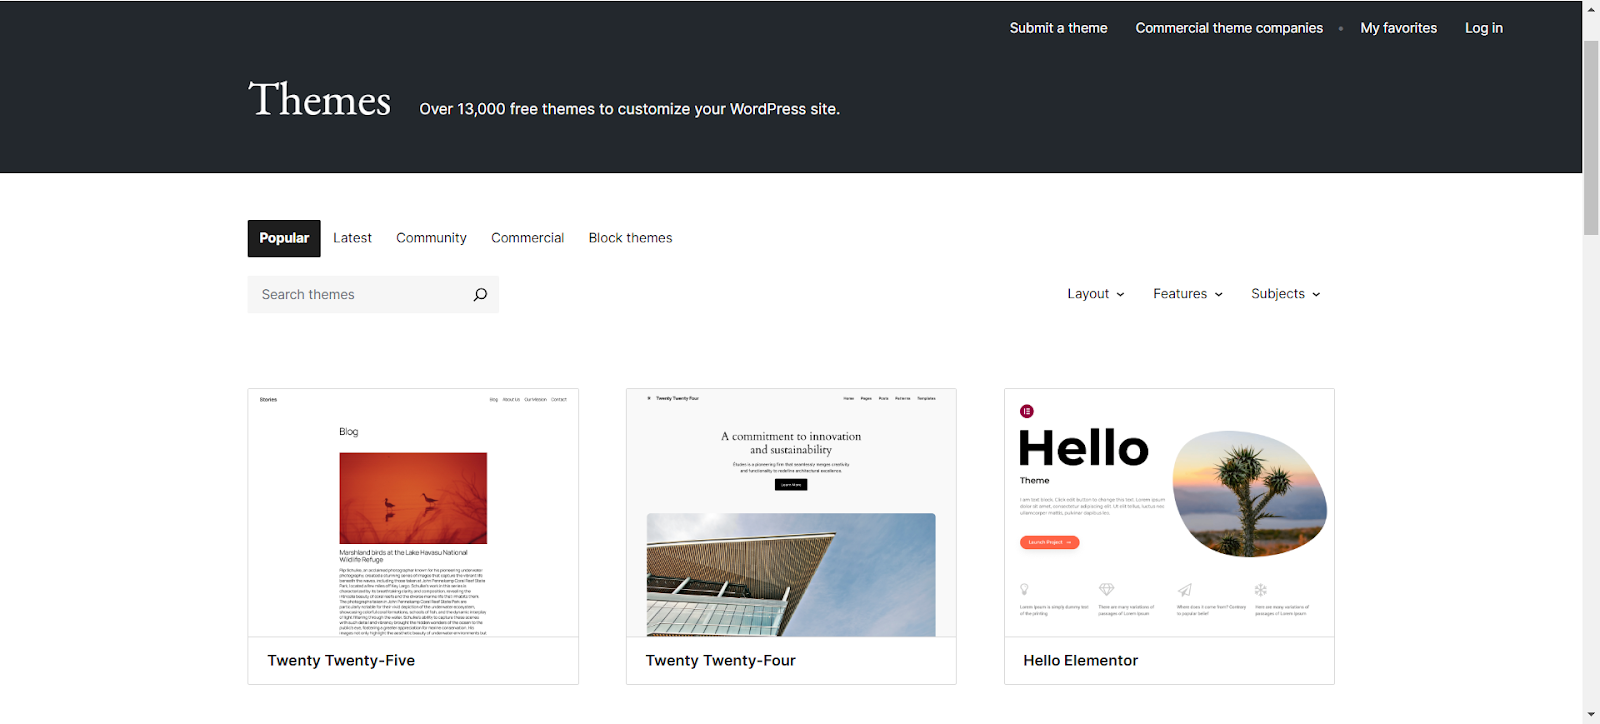
WordPress Theme Directory
If you choose a customizable theme, you get to completely revamp the look and feel of your website, even if you don’t have much technical expertise. You can then utilize the WordPress Customizer and Theme Options panel to adjust various design elements such as the color scheme, layout, and typography on your website.
Your decision to customize your theme can be motivated by your desire to incorporate specific elements into your theme to coordinate with your branding guidelines or just a plain desire to change or update elements on it.
Installing Essential Plugins
WordPress is a great CMS in terms of its versatility and features, but you can truly unlock its fullest potential and extend the functionality of your website theme using the right plugins.
For instance, if you want to level up or add specific kinds of web pages to your WordPress website, you can use a page builder plugin like Brizy or Elementor. These plugins will let you update or rearrange a page on a theme according to your needs with the help of drag-and-drop controls.
Plus, the best way to close out a comprehensive WordPress website installation is to ensure that you have the right plugins in place to get more out of it. You can accomplish essential actions such as website performance, security, analytics, and backups.
3. Content Migration
By the time you reach this step, you will have already wrapped up all the necessary preparations during the pre-migration stage and the installation of the WordPress environment. Now for the most important and tricky part of it all — the content migration process itself.
Exporting Content from Chorus
When exporting your content from Chorus CMS, you can either take a manual approach or use a third-party tool to automate most parts of the process. Let us look at what both approaches entail and the steps that each approach consists of.
Using Manual Export
- When exporting content from Chorus manually, you will start by logging into your Chorus CMS account.
- Next, you want to access the Content section on your CMS dashboard so that you can get access to all the stored content such as collections, projects, or entries.
- The next step is to identify and select the content items or entries that you want to export from this content repository. You can do this by checking the box next to each content item.
- You will then search for the Export option on your dashboard, most likely to be found in your toolbar or dropdown menu. You can then choose whether you want your content to be exported in a CSV or Excel format.
- Once you have finalized your export choices and options, you can initiate the export process. All you have to do is download the content files to the local file or drive on your computer when prompted.
- Once you have downloaded the required files, you need to ensure that all the selected data has been correctly and completely exported.
However, you should consider that this manual export option is not available to all users. If it is not available to you, you can reach out to Chorus’ customer support and request a complete export of your content in the JSON or XML format.
Using Third-Party Tool
- You can start by selecting the right third-party tool that can support you in the process of exporting data from Chorus CMS. We will consider Contentstack CLI for this example.
- You must install the required software on your machine. For Contentstack CLI to run smoothly, you must ensure that you have Node.js installed on your machine.
- You can install the CLI tool by running this command on the terminal:
npm install -g @contentstack/cli - You can then log into your Contentstack account by opening your terminal and using this command:
csdx login - You can now use the Export command to export your content according to your parameters. You can then export your entries into a CSV file by running the relevant command including the locale, engagement token alias, and content type. The command will look something like this:
csdx cm:export-to-csv --action entries --locale <locale> --alias <management-token-alias> --content-type <content-type> - After this point, you can follow the prompts in the terminal to select the additional export options such as organization, stack name, and branch, if applicable.
- The previous step indicates the end of the export process. All you have to do now is locate the exported files in the data folder of your current working directory in the format chosen by you. Lastly, verify all your content to ensure that it has been exported correctly.
Importing into WordPress by Using Plugins
While WordPress has a native importer that makes content import pretty easy, and you can use your server’s control panel, you can also utilize a WordPress plugin to do the whole thing more conveniently.
Some of the most popular WordPress plugins that you can use to import content from Chorus are:
- WP All Import
- Export Media With Selected Content
For this guide, we will look at the process of importing content using WP All Import. WP All Import is a simple and powerful plugin that can help you import any CSV, Excel, or XML file to WordPress. Here are the steps involved in it:
- The first step involves initiating your WordPress import by uploading the export file you have on your computer or pasting the URL to your export file.
- Next, you will be prompted to choose between New Items or Existing Items. In case of a migration, the correct choice will be ‘New Items’. You will then select the type of items you are looking to import including posts, pages, taxonomies or users, and even certain types of plugin data.
- In the next step, you will map the incoming content and data to the right WordPress fields.
- Next, you get to specify and inform WP All Import how to handle specific content or pieces of data. Once done, you can click on ‘Continue’ to run your WordPress Import.
- The next step involves confirming all the choices you have made so far in the process and running your import. You will see the Import Summary which will help you figure out the changes or important information about the import. Once done, you will see an ‘Import Complete’ message.
Double-checking Whether the Transfer Was Accurate
Once the import is complete, all your content will be transferred to your server and website. You must double-check whether the transfer was accurately completed or whether any kind of content was lost in the process. If you find a lot of these files transferred incorrectly, you can Bulk Edit them right away so it does not affect your website performance negatively later on.
Organizing Content to Replicate or Revamp the Old Structure
Now that you have transferred all the necessary files and content from Chorus to WordPress, it is time to really lock down this migration by organizing your content. In a typical content migration, you want to divide all the content into three major categories:
- Replicating: If the content on your Chorus website was performing well for your business, you don’t need to get rid of it and start again. Instead, you can accurately replicate content and attempt to reconstruct your old website.
- Redeploying: While a simple replication is an ideal scenario, that is seldom the case in CMS migrations. More often than not, you will want to redirect content from your old website to different parts of the new website where it is more effective or performs better.
- Restructuring: You can take content redeployment a step further with the help of content restructuring. Essentially, you will make more significant changes to your content and restructure several parts of your website.
Once you have divided all your content into these categories, you can make more informed decisions about the way you want to restructure your new WordPress website to be an improvement on your old one.
4. Post-Migration Testing
The last step key to a successful migration is the post-migration testing and analysis. It not only ensures that your migration is successful but also that the new CMS is functioning as expected. With comprehensive post-migration testing, you can test the functionality, performance, security, compliance, and integration with the rest of your systems and tech infrastructure.
You can use tools like Screaming Frog SEO Spider to conduct a comprehensive analysis of your website and its features pre-migration and compare it with its performance post-migration.
That said, let us look at some parts of the post-migration testing in detail:
Functional Testing
While you would have likely conducted initial verification as part of your actual migration process, you need to test out the functionality of your website. As a part of this process, you will attempt to execute some pre-defined test cases you may use in your legacy website.
As part of this process, you should also compare the old and new data to ensure that all the functionalities work as they should. However, the most important goal of functional testing is confirming whether all the features on your new website work without degrading your performance and functionality in any way.
In a typical functional testing process, there are three primary areas to be addressed:
- Data Integrity
- User Acceptance Testing
- Feature Functionality
Performance Testing
Performance testing helps you figure out how your website works in different conditions after migrating to your WordPress environment. Performance testing ensures that your website not only functions properly but also meets the performance benchmarks and expectations.
Some of the common areas you want to address during performance testing are load handling, response time, stability, scalability, and resource utilization. The best way to conduct performance testing is by using the following steps:
1. Test Planning
To begin with, plan the right performance tests to understand your actual website performance. You need to set up clear objectives, goals, and success criteria for performance testing. You should also identify some of the key scenarios that also reflect real-world usage patterns.
2. Environment Setup
You must set up a test environment to run the post-migration testing so that your actual website does not get impacted in the process. When setting it up, you must ensure that your test environment mimics the actual production environment. This will include hardware specifications, network configurations, and even software versions to keep differences to a minimum.
3. Test Script Development & Execution
You can create automated test scripts with the help of performance testing tools such as Gatling or JMeter. These scripts will help you simulate user interactions so you can test out your website more thoroughly.
Finally, you can run tests according to those predefined scenarios and monitor some of the key system performance metrics such as:
- Throughput
- Response Times
- Resource Utilization
You can analyze the test results to identify potential bottlenecks and generate detailed reports that summarize the findings and recommendations.
Mobile Responsiveness
Post the introduction of mobile-first indexing, mobile responsiveness has become an important parameter to be checked, in a website. After all, it ensures that users are more engaged and satisfied with your website and offers a plethora of SEO benefits.
Some of the common testing strategies you must implement for mobile responsiveness after your Chorus to WordPress migration are:
1. Device Testing
A preliminary test to ensure that your website works uniformly on different types of mobile devices is to conduct a device test. You can do this by accessing the website and using it on different operating systems such as iOS and Android. You can then ensure that the layout and functionality of your website remain consistent across multiple devices and operating systems.
2. Cross-Browser Testing
Aside from testing out the website on multiple devices and operating systems, you must also test it out in multiple browsers such as Chrome, Firefox, and Safari. Some of the website elements could be rendered and loaded differently on each browser, making a cross-browser test even more important.
3. Screen Resolution Testing
You must also conduct screen resolution testing to ensure your design loads and adapts seamlessly to different screen sizes and resolutions. You can either use various tools to simulate different kinds of screen sizes or manually resize browser windows to adjust the layouts for testing.
4. Core Web Vitals Assessment
Core Web Vitals include important performance metrics such as First Input Delay (FID), Largest Contentful Paint (LCP), and Cumulative Layout Shift (CLS). All these metrics can help you assess the responsiveness of your website, page loading speed, and stability from the user’s perspective. Use PageSpeed Insights to get an accurate picture of your Core Web Vitals performance.
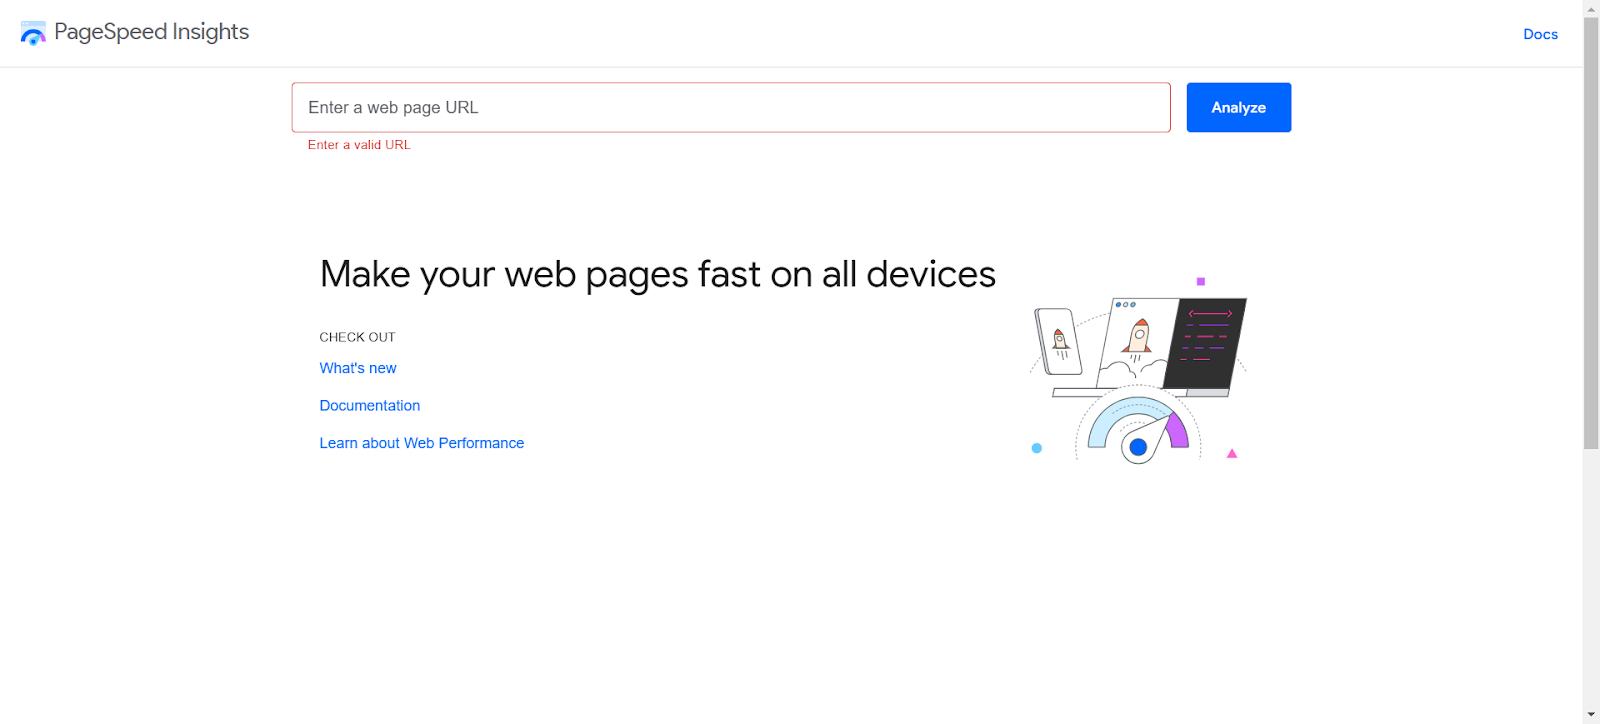
PageSpeed Insights
Continuous Monitoring and Troubleshooting
Once the migration is complete, it is recommended that you monitor the new website continuously to identify any errors and resolve them in advance. By continuously monitoring your website, you can ensure that you are always on top of your website and SEO performance. Timely troubleshooting can help you prevent major issues and even save you a lot of time and resources.
Wrapping Up
For your Chorus to WordPress migration to be successful, you must carry out each step of the migration process meticulously. The success of each step contributes to the overall success of the CMS migration and your new WordPress website’s performance. That said, the success of the process is determined by the expertise and experience of the team working on it.
While finding this kind of talent in-house or hiring so many resources just for CMS migration does not make sense, you can always choose the option of outsourcing the project to a trusted service provider. Moreover, even a small mistake in the process can cause data loss or worse.
Multidots is one of the most well-known and trusted WordPress development companies in the world and has extensive experience guiding large-scale CMS migration. Consider partnering with an experienced team like Multidots, and contact us to ensure that your CMS migration is successful and seamless.
FAQs
-
Chorus was a platform started by Vox Media to support the websites associated with the brand. It was later opened up and promoted to the public and gained as much popularity as WordPress. In 2023, Vox Media discontinued the platform, making it important for you to migrate now as you will stop getting support for it soon.
-
It is common for websites to experience a little volatility in SEO rankings and performance in the event of a CMS migration. However, WordPress is a highly SEO-friendly platform and with the right technical support and expertise, you can restore your website’s SEO performance in no time.
-
The duration of your Chorus to WordPress migration process depends on the scope of the website being migrated. However, in most cases, it can range between a few hours to a couple of days.
-
While migrating your website from Chorus to WordPress is possible in-house without any professional help, it is not recommended. The migration process can get tricky and even the smallest error can cause your new WordPress website to malfunction or result in data loss. It is always a good idea to instead opt for an experienced agency to help you navigate the process.
-
If you are conducting the Chorus to WordPress migration manually and in-house, you have to consider the hourly wages of the team involved in the process. The final cost will depend on the complexity and scope of the migration project. Additionally, you must consider the costs associated with the WordPress theme you have selected.
If you opt for migration using a plugin, your resource costs would be much lower, however, the plugin itself might be a paid one. Lastly, you can hire an agency to handle the CMS migration process.
Feel free to schedule a quick call with our migration expert.
Contact Us