Advanced WordPress Full-Site Editing: A Comprehensive Developer Guide
Master full-site editing in WordPress with this in-depth developer guide to creating fully customized websites

Table of Contents
A lot has changed in the WordPress development space over the past few years, and it can all be summarized with one prominent feature: Gutenberg Block Editor. What started as a revamped post editing experience has now expanded to support editing everything across the site.
The block editor lets you build your site by stacking various blocks, like in Jenga or Lego, to achieve the desired shape or design. Its primary goal is to better user experience, making it possible for anyone to build and manage sites—even those who don’t know web development.
This approach seems at odds with developers who like to hand-code their websites to create custom solutions for each client. So, where does that leave them?
If you or your team is still on the fence about embracing Full-Site Editing, this article is for you! Once you’ve finished reading, you’ll understand better how to use WordPress Full-Site Editing to become a better and more productive developer.
What Is WordPress Full-Site Editing?
Introduced in WordPress 5.9 (2022), Full-Site Editing (FSE) lets you add, move, and customize every element on your WordPress site, including headers, navigation menus, and footer. It was part of the now-finished phase 2 of the Gutenberg project, but it still receives more features and updates.
Notably, FSE is made explicitly for Block themes, which use Blocks as elements for all parts of a site. To use these features, you must use the new Template Editor or Site Editor interfaces.
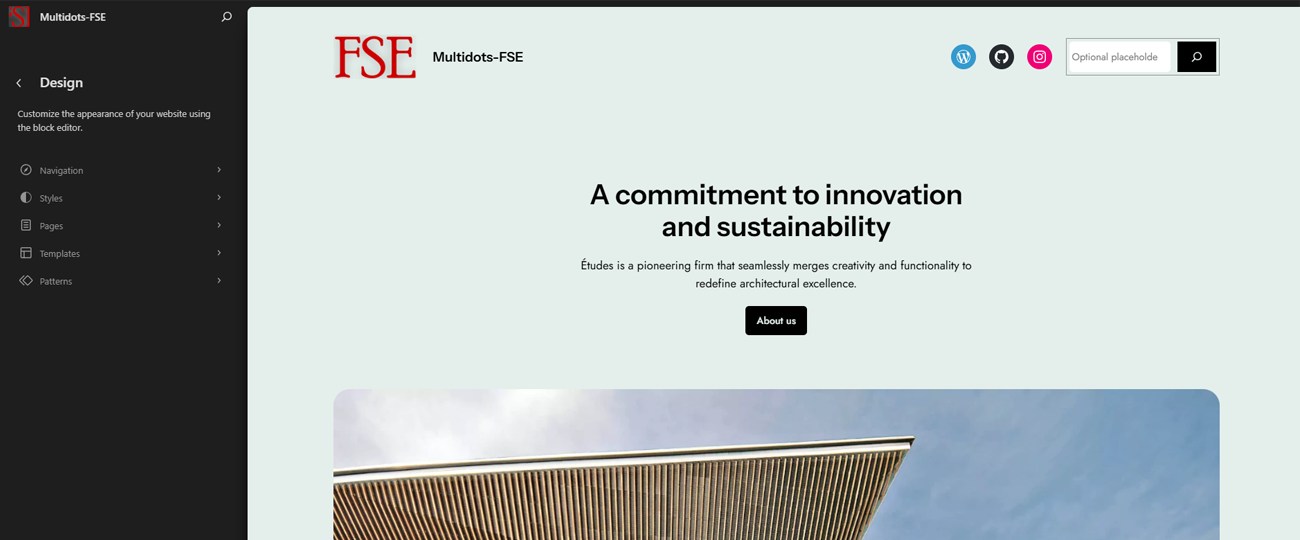
Full-Site Editing in WordPress
Full-Site Editing makes managing a WordPress site much more straightforward. For example, if you want to modify a page template or change the global styles, you can do it all from the same screen without jumping through different panels or custom code. Doing this was just not possible in the pre-FSE era.
In that respect, WordPress is now more like a page builder design tool, making it more accessible for non-technical users. However, that’s not the only demographic it helps. Even web developers and designers can benefit greatly from the features FSE provides.
Why Opt for Full-Site Editing Over Other Options as a Developer?
Full-Site Editing empowers you as a developer to build and manage sites better. Here are some of its standout benefits:
1. Building Block Themes is Faster and Easier
Classic WordPress themes have served well for years, but they relied on PHP files to create all templates. You then had to manually code the colors, typography, styles, page templates, etc. That’s a typical manual process familiar to most developers.
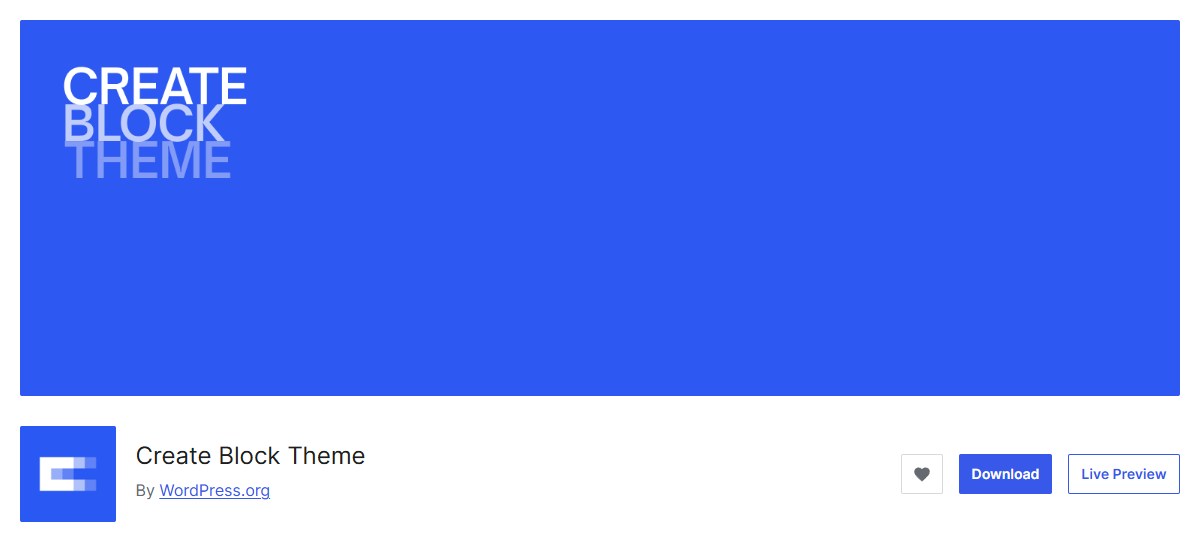
Create Block Theme WordPress plugin
Building a Block Theme is as easy as installing the official Create Block Theme plugin. It’s a great way to start off with a boilerplate or empty theme. Even without the plugin, it’s still faster and simpler. You mainly use HTML and one theme configuration file to set it up, or you can use the Site Editor directly. A mix of both is ideal for most developers.
The free WordPress Block Themes directory is also a great resource to scout for starter themes.
2. Better Developer and User Experience
Full-Site Editing allows you to create and edit page templates, headers, footers, and any website element directly from the Site Editor. You can move page elements around, add new blocks or delete existing ones, change their colors, fonts, typography, alignment, etc., and immediately set the site’s look and feel.
You can also lock Blocks and Templates if you don’t want the client to mess around with your preset values.
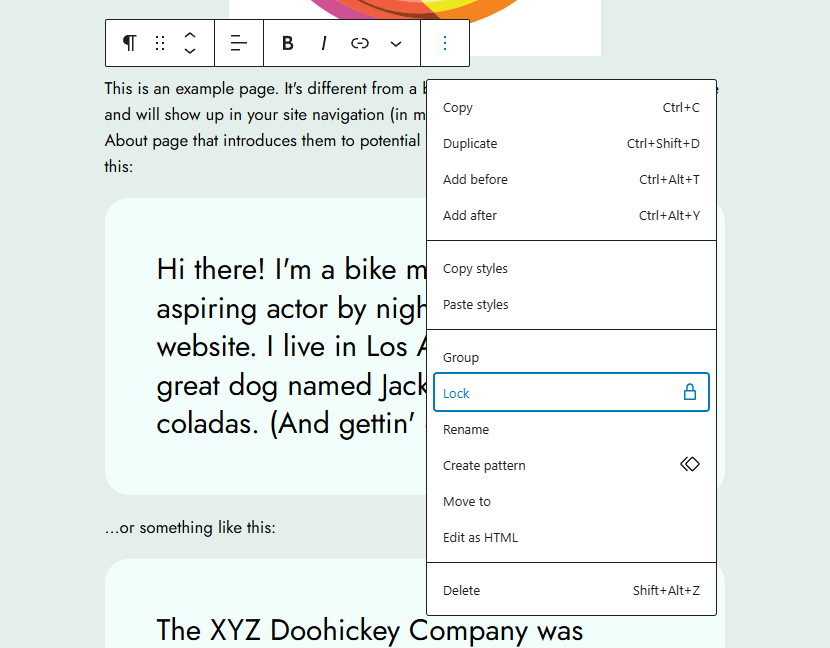
Locking a Block in the Page Editor
However, the full power of FSE is realized when you can control the entire experience programmatically by configuring or restricting the usage of different FSE features. Read the WordPress documentation on Block Fliters to understand this subject better.
You can also use the FSE interface to create templates, set design parameters, and export them as a theme. If you’re a theme publisher, this will also help immensely. We’ll discuss how to do this in a later section.
3. Real-Time Editing and Collaboration
The primary aim of Gutenberg’s Phase 3 is real-time collaboration. While it’s not fully available yet, most features are already baked in. It’s similar to our already available Multicollab plugin. You can give it a try here!
WordPress real-time collaboration mockup (source)
With FSE, there’s no need to toggle back and forth between the editor and the live site. You see the changes you make in real-time, and so will your clients. Tweaking a font, color, or even the entire page layout is much more intuitive with this approach.
Future updates to FSE will make it even easier for clients to leave feedback directly on the page, allowing you to collect feedback and collaborate with them better.
4. Global Styles and Settings
WordPress 5.8 introduced Global Styles with theme.json to configure all your site’s styles and settings in a single place. It gives you fine control over your entire site.
With the theme.json file, you can define various site-wide styles and settings. Some examples include:
- Various settings for the Block Editor, like what customization options should be available for users: default colors, fonts, font sizes, styles, style variations, etc. You can also define the editor layout here (widths, alignments, etc.).
- Block level settings to use a specific preset for a Block but use a different preset for all the other Blocks.
- Manage CSS styles better. For instance, if the theme sets the font size for a heading and the user overrides it, the style the user sets takes precedence.
- CSS Custom Properties (or CSS Variables) to set presets and create your own custom properties.
- As no extra CSS has to be loaded, this also increases performance.
Ultimately, having a unified place to control your site’s styles and settings streamlines the development process. We’ll discuss all of these in more detail below.
5. Block Patterns, Template Parts, and Templates
Block Patterns are a group of predefined Blocks you can insert anywhere on your site and customize further. You can also set these Patterns to be synced (Synced Patterns), so changing them in one place will reflect all across the site.
For example, you can use Patterns to create a Call-to-Action (CTA) Block. If you want the same CTA across your site, you can set it to a Synced Pattern. However, if you want to modify it slightly on a single page, you can also do that with the new overrides in Synced Patterns.
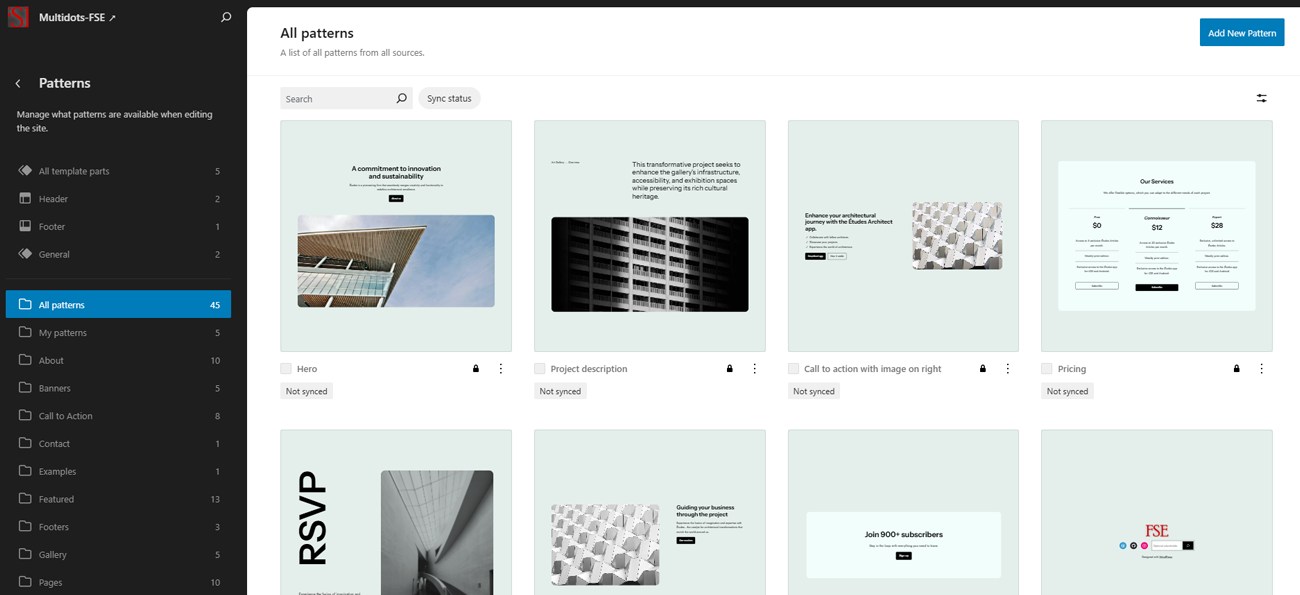
The Patterns panel in the WordPress Site Editor
Template Parts are advanced Blocks you can use to organize and display your site structure, like headers, footers, navigation menus, etc. Finally, Templates set the layout of your site pages and posts.
All these features work together to create a coherent development experience, helping you churn out sites more efficiently.
In later sections, we’ll explore how to create and manage Patterns and Templates.
6. More Control, Less Dependency
FSE gives you complete power over site customization without relying on third-party themes and plugins. The native WordPress Blocks are good enough to start the development process. Being less reliable on third-party themes and plugins makes updating and maintaining the site easy.
Furthermore, giving clients complete control over site modifications isn’t always ideal—unless they explicitly ask for it and understand the risks. However, you can give them partial control over changes they can make without doing anything untoward. WordPress, along with FSE, makes that possible.
Exploring WordPress Full-Site Editing Features
Now that we’ve discussed why you should go for Full-Site Editing, let’s explore how you can use it to make it part of your everyday development process.
To access the Full-Site Editing features, you need a Block Theme and go to Appearance ➡️ Editor in your WordPress dashboard. We’ll use the latest WordPress version (6.6, as of now) and its default Block Theme (Twenty Twenty-Four) to showcase FSE features.
Editing the Site Header and Footer
With FSE, editing the site header is as easy as going to Patterns ➡️ Header and choosing the Header you want to edit. If you’re using a Block Theme already, you will see its Header here. Click on that to start editing.
If you’re new to this workflow, the Block Editor Handbook is a good resource for understanding the editor's UI and workings.
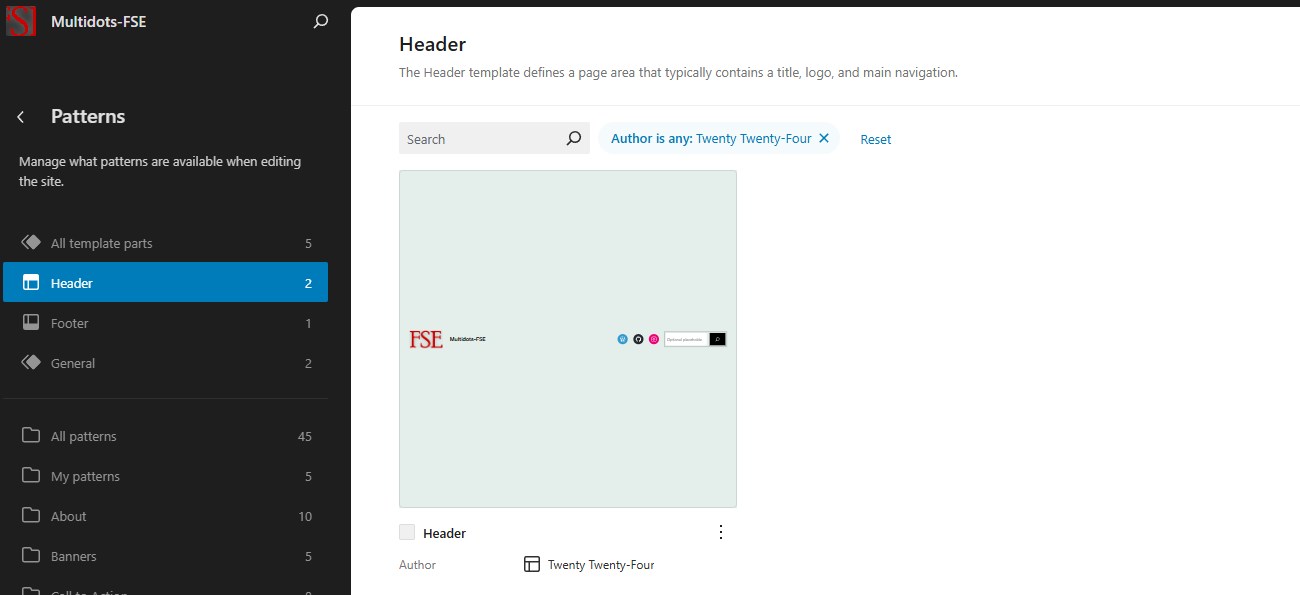
The Patterns ➡️ Header panel
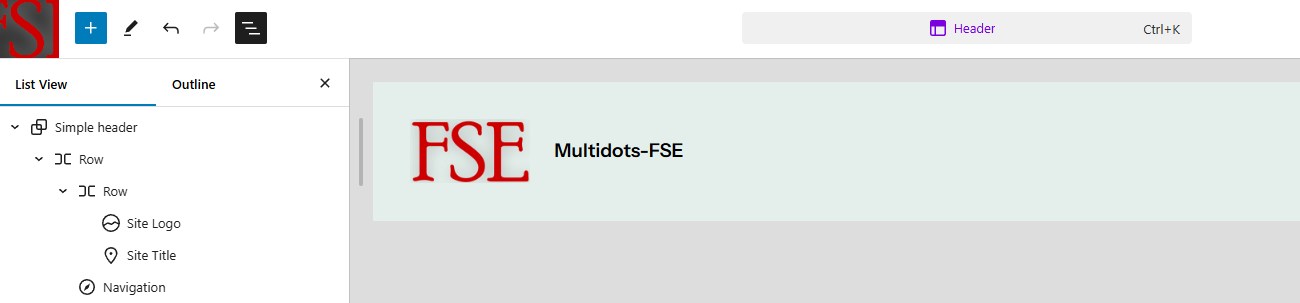
You’ll now see the Template Editor screen for the Header block. Note that it’s a Template Part.

FSE’s Header editor
Let’s add a logo to the Header. The theme already has a placeholder. All you need to do is click on it to upload your logo. We added a placeholder logo to show you how it looks. After making changes, hit the Save button to see them across the site.
Adding a logo to the site Header
Navigating the Block groups is easier by clicking the Document Overview button on the top-left. You’ll now see all the Header block’s elements here.
The Document Overview panel
Note that the entire Header block is nothing but a Group block with nested Row blocks under it. Clicking the Site Logo block here will open new Block settings on the right sidebar for this particular block. That’s one way you can access all Block’s settings.
Accessing a Block’s settings
Here, you can set the Image Width, whether the logo links to the homepage, and if the same logo should also be the Site Icon (aka favicon).
Next, let’s fill the empty Navigation Menu by selecting the Navigation block. We’ll add a few social links and a search bar by adding some Social Icons blocks and a Search block. Make sure to add the social links by clicking on their respective blocks.
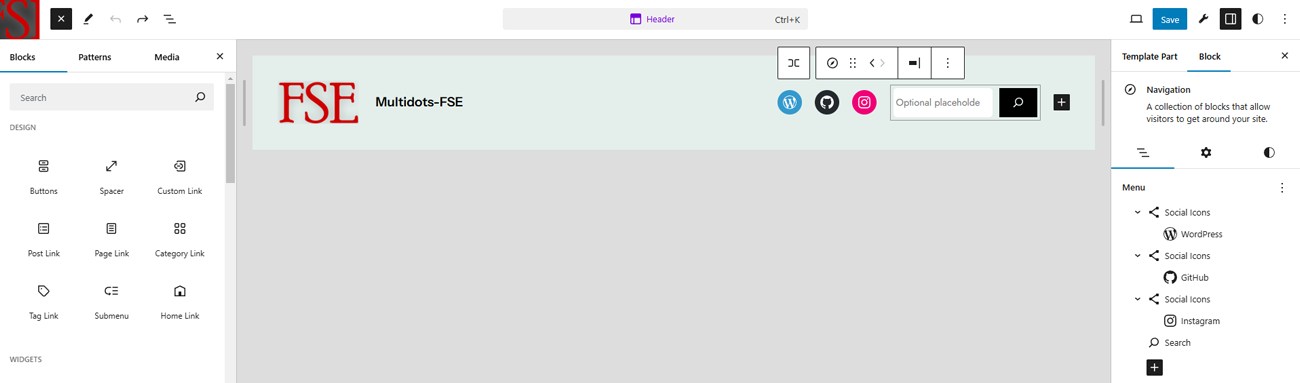
Editing the navigation menu in the Header
Save the changes and refresh the website to see the updated Header. It should look like this:
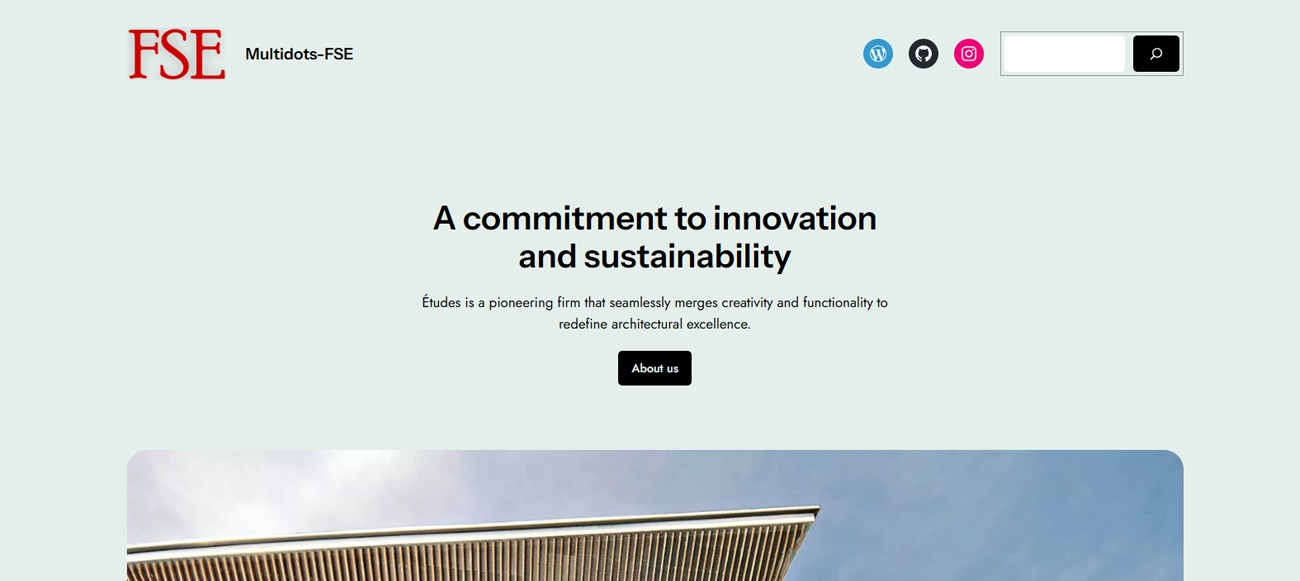
The new site Header
But what if you want to set a custom Header? You can do that by going to the Patterns screen, clicking the Add New Pattern button, and then choosing the Add New Template Part option.
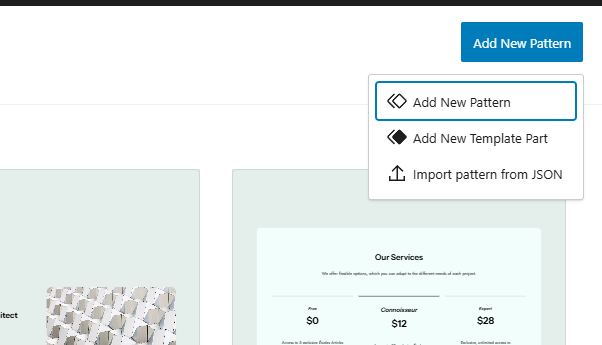
Click Add New Template Part to create a new Header
There are three types of Template Parts. We’ll set a name for our Template Part and choose the Header option here.
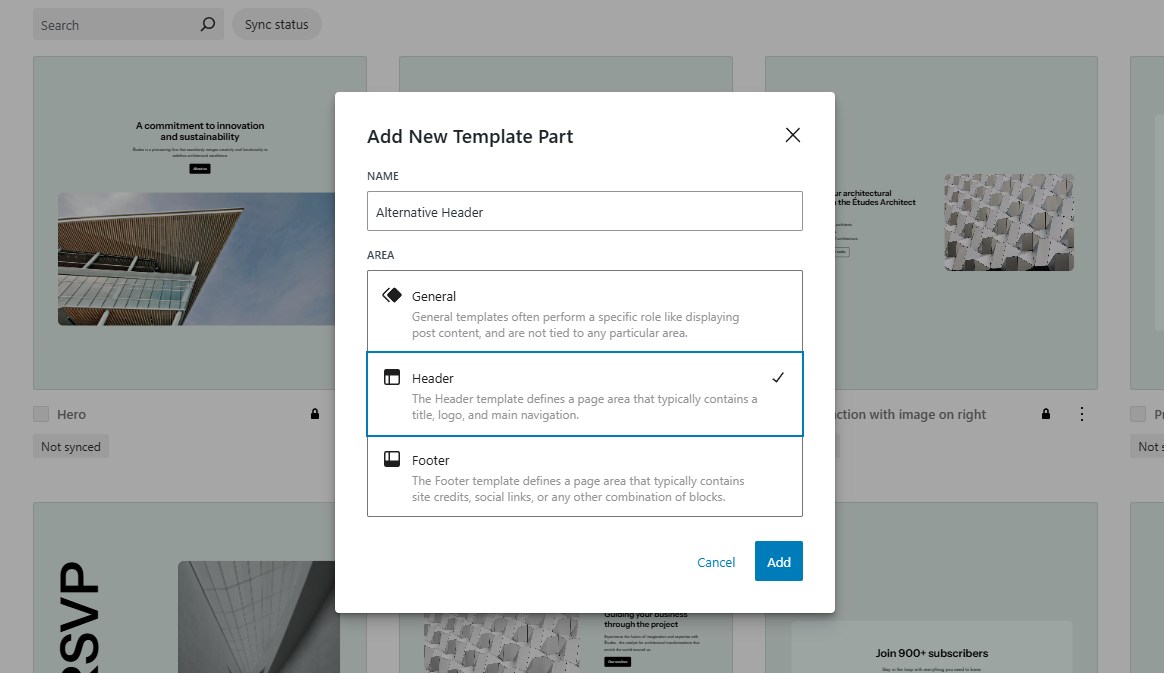
Adding a new Template Part in FSE
Now, you create the new Header like any other page element. We opted for a center-aligned logo and navigation menu.

New Header Template Part
Save the Header and exit the Template Editor. It’s now available for insertion as a Header block in all your Templates. You can do that by going to the Templates screen.
The Templates panel in FSE
Choose any of the templates here and edit the Header block inside there. The Twenty Twenty-Four theme already comes with various design style variations for the Header.
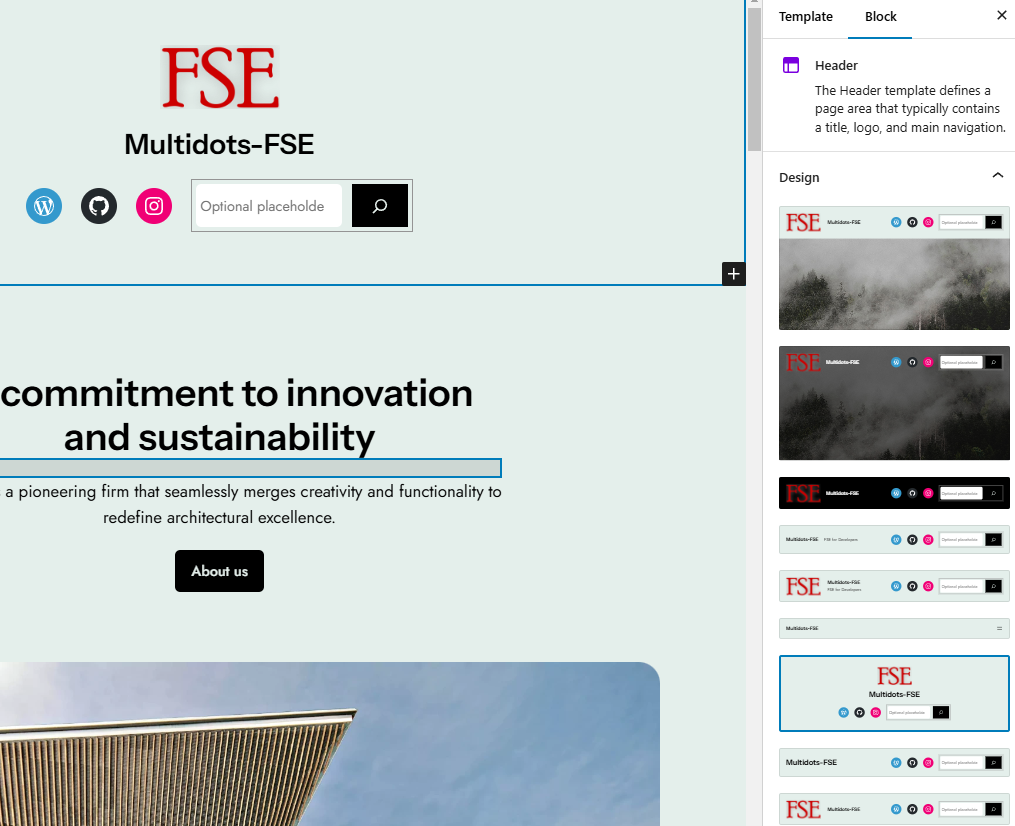
Design styles for Header in Twenty Twenty-Four theme
The theme developers set these header variations to give users controlled choices. You can do the same for your clients.
Editing the Footer block also works similarly. You choose the Footer Template Part and get editing. Like with the Header, you can choose from various design variations for the Footer.

Choosing Footer designs with FSE
Take this course on Template Parts to learn more about using this FSE feature to supercharge your development process.
Creating and Using Block Patterns
Introduced in WordPress 5.4, Block Patterns are one of the most powerful features in the Block Editor. They open up a wide range of possibilities for developers and designers.
You can manage Patterns by going to Appearance ➡️ Editor ➡️ Patterns in your WordPress admin dashboard. Once you’ve defined a Pattern in your Theme, users can insert them into their content or templates from the Post Editor or Site Editor, respectively.
To create a Pattern, click the Add New Pattern button in the panel here and click the same option again.
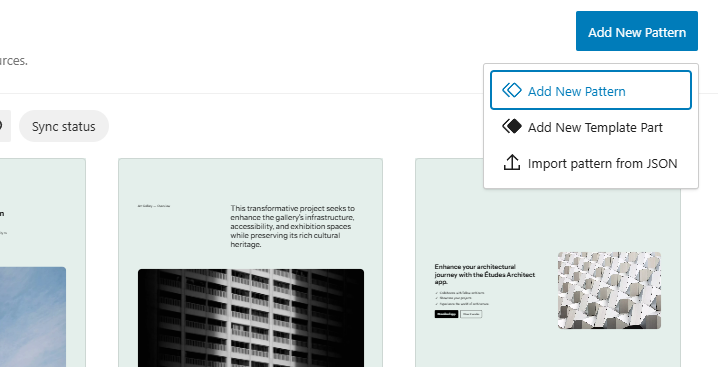
Click Add New Pattern
Next, you add the Pattern Name and set its Categories. You can also choose whether it’s a Synced Pattern here.
We’re creating a Business Hours Pattern to insert anywhere on the site.

Creating a new Pattern
You’ll now be taken to the familiar Template Editor screen, where you can create this new Pattern. It took just a few minutes to set this up.

Our new synced pattern
You can insert this new Pattern anywhere on your site while editing the content. All you have to do is search for it while adding a new Block.

Searching the newly created Pattern
Since this is a Synced Pattern, making changes to it will apply across the site wherever it has been used. You can use the synced pattern overrides feature to change its contents on just one page.
You can view and edit Patterns you’ve created via the Patterns ➡️ My Patterns panel in the Site Editor sidebar. These custom Patterns will also appear in their assigned Categories section (if you’ve assigned any).
However, you should note that you cannot bundle Synced Patterns with your theme. However, this feature is under consideration for WordPress 6.7.
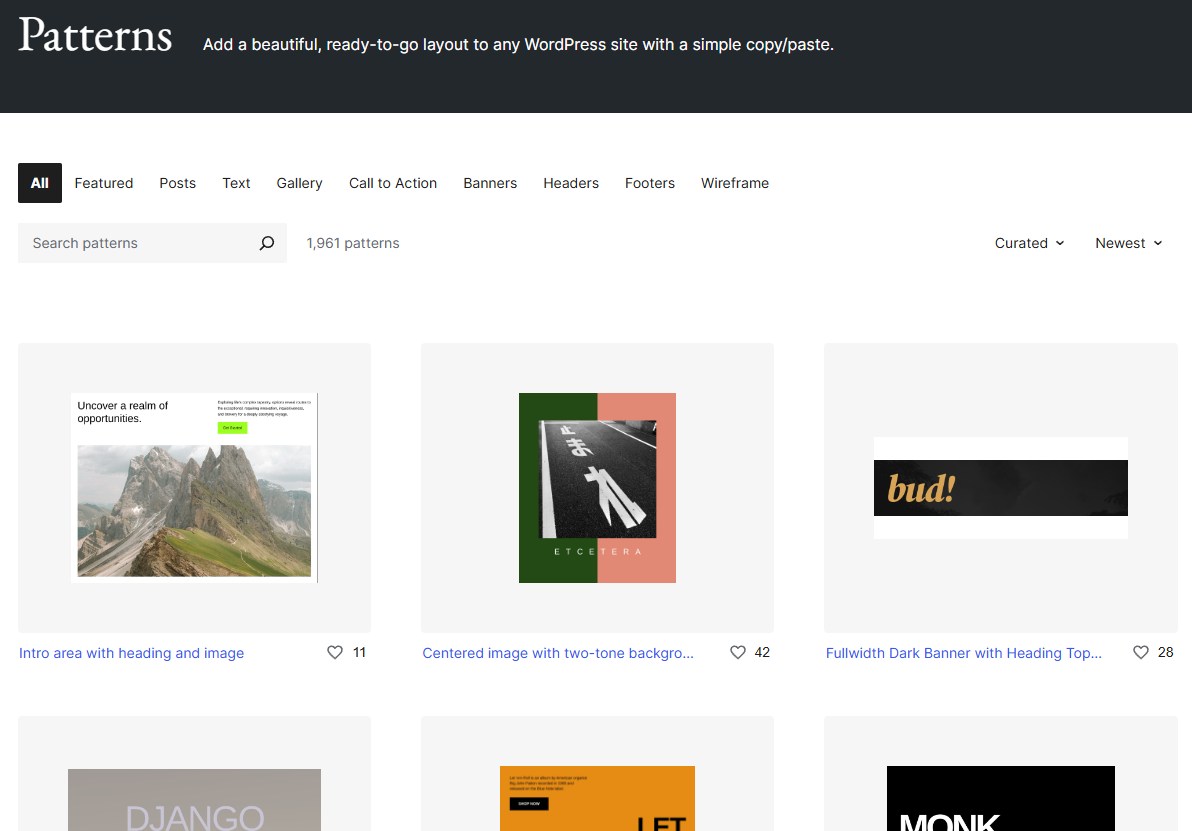
WordPress Block Pattern Directory
Explore the official Block Pattern Directory for inspiration and ready-made Patterns for your projects.
Creating New Templates with the Template Editor
The layout and structure of WordPress posts, pages, and custom post types are controlled by their templates. For instance, the Home template controls the site’s homepage, the Index template manages the page showing blog posts, the Page template oversees standalone pages, and the Single Post template controls how single blog posts are displayed.
Most Block Themes also ship with other templates, like a 404 error page, a Search results page, an Archive template for categories/archives, and other custom templates.
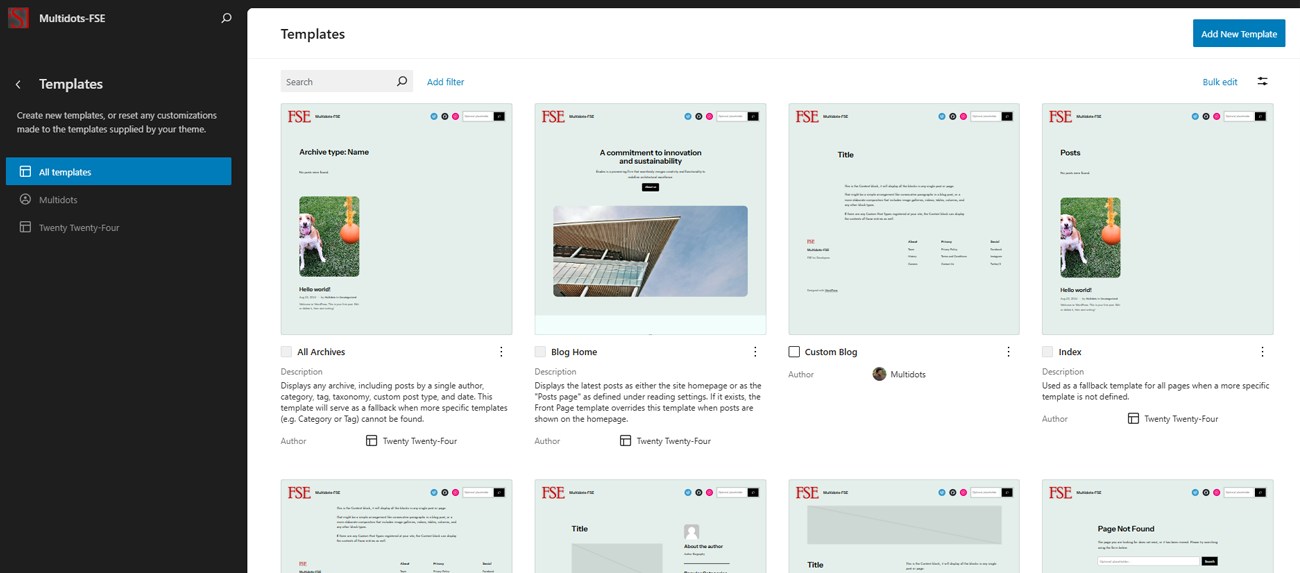
You can check all the templates available for your theme by going to Appearance ➡️ Editor ➡️ Templates.
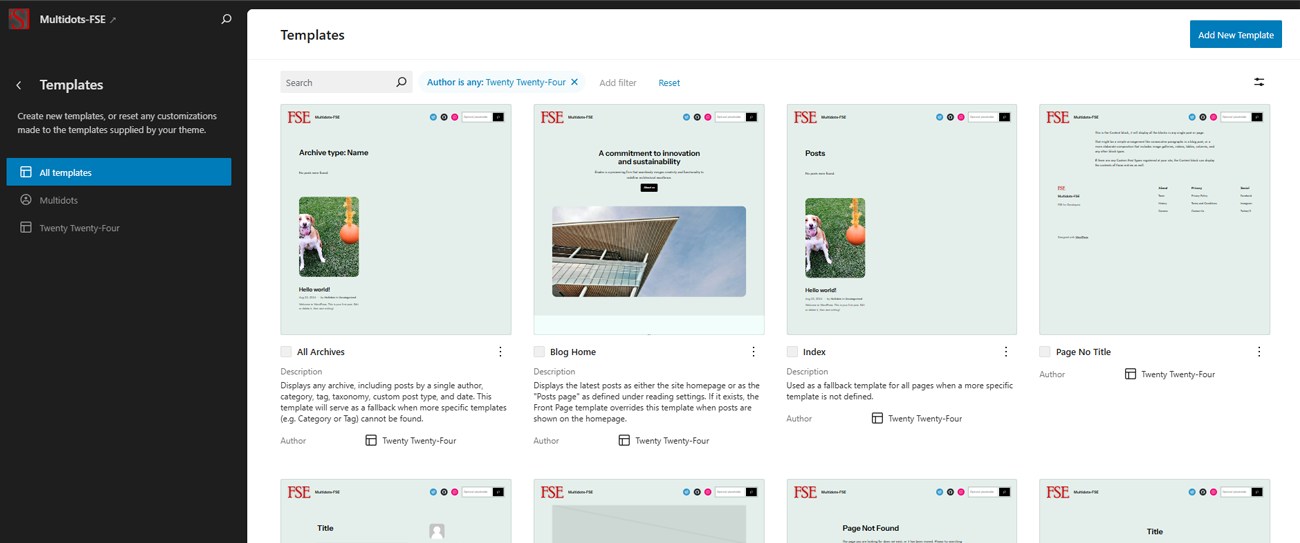
Exploring the Templates in FSE
From here, you can use the Template Editor to create and edit Templates with Blocks. Note that it’s only available for Block Themes or Classic Themes that have enabled it.
Here, click the Add New Template button and select what it applies to.
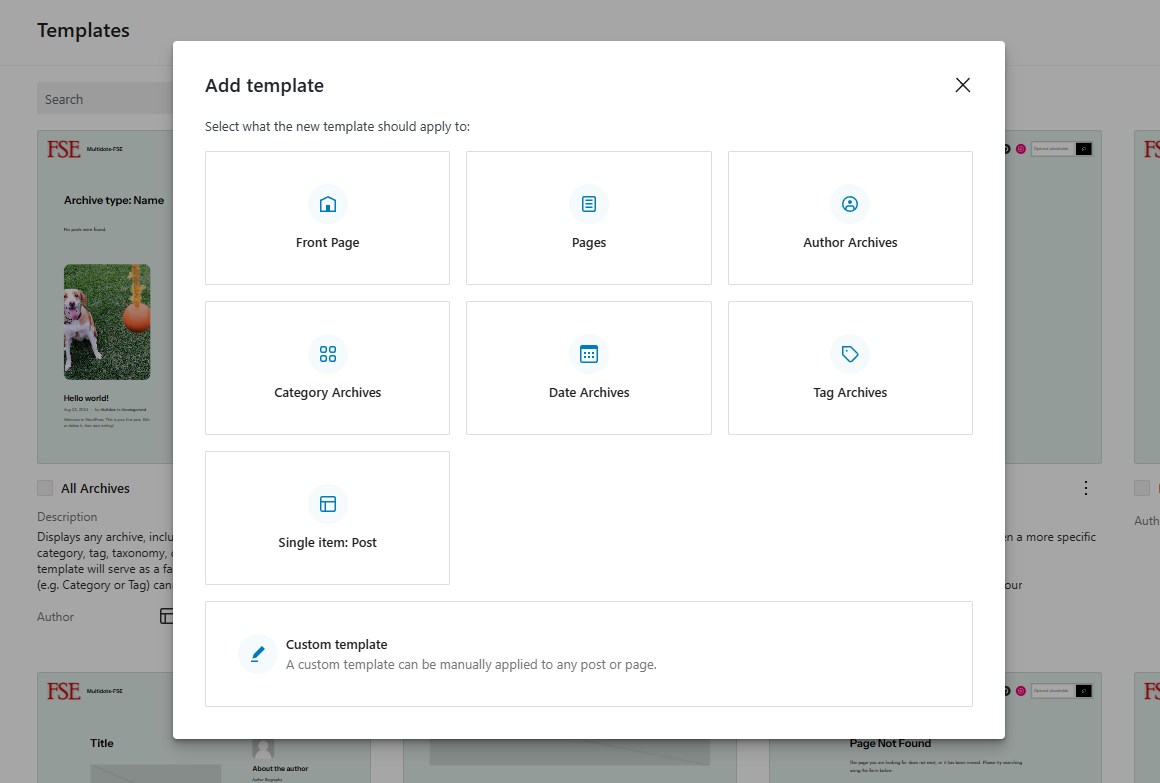
Choose the new Template type
We’ll go with the Custom template option. Enter a name for this template to get started with the template creation process.
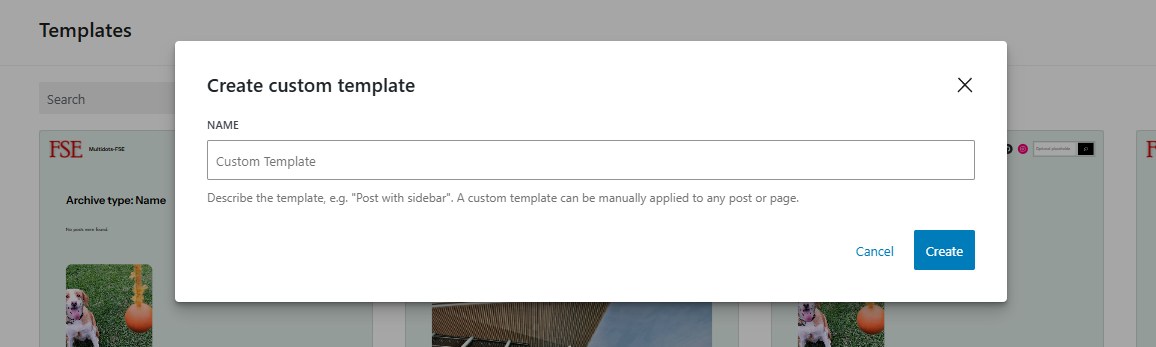
Enter your custom template’s name
You can manually assign this custom template to any post or page. If you have any Patterns to import from, you will be given options to select from here.
The below screen is how the sample blog post layout looks now:
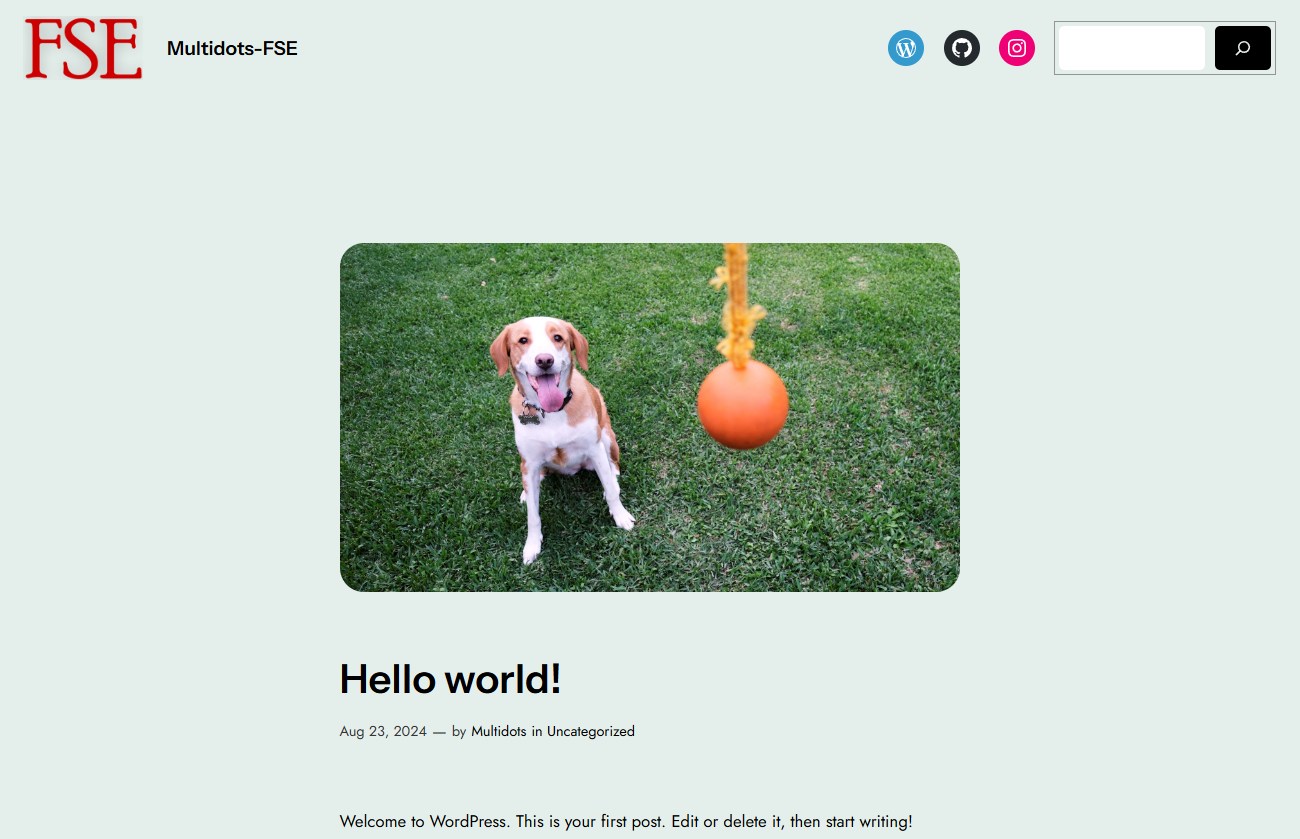
How the blog looks with the current template
For this tutorial, we kept it simple and created an alternative blog layout with a side-by-side Title and Featured Image blocks. It’s not clear in the image, but seeing the Document Overview will give you a better picture.
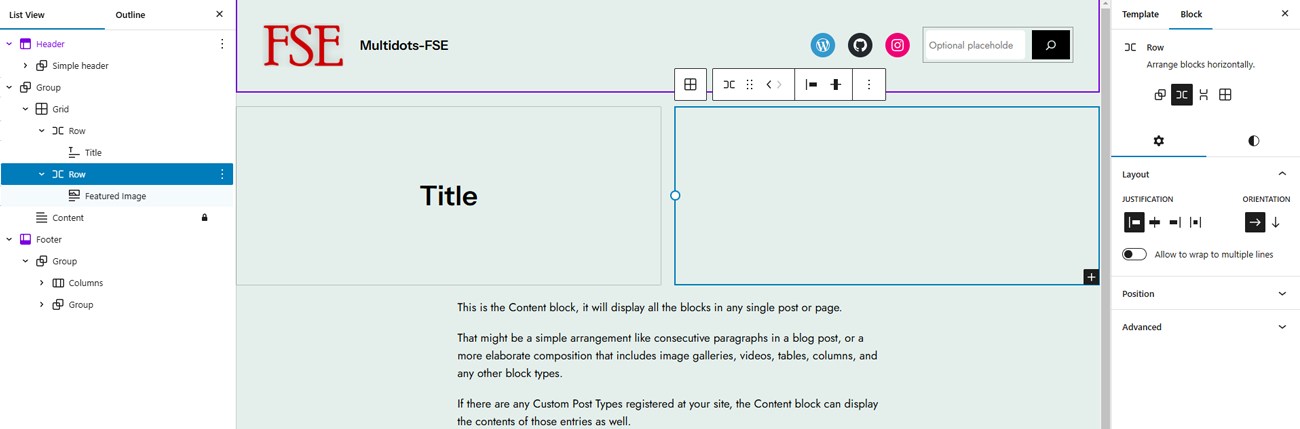
The new custom template layout for the blog
Save the template and head to the blog post where you want to apply this new custom template. You’ll find the option on the right sidebar under the Template option.
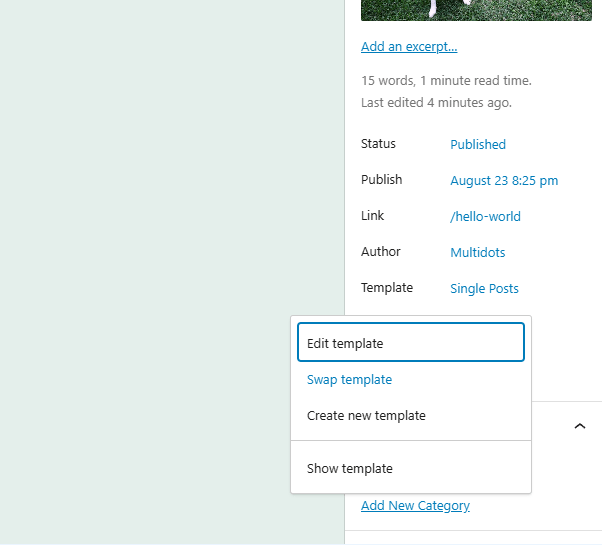
Applying the new template to a single blog post
You can see that this theme also comes with another blog post layout with a sidebar. Let’s choose our new Custom Blog template and save the post.
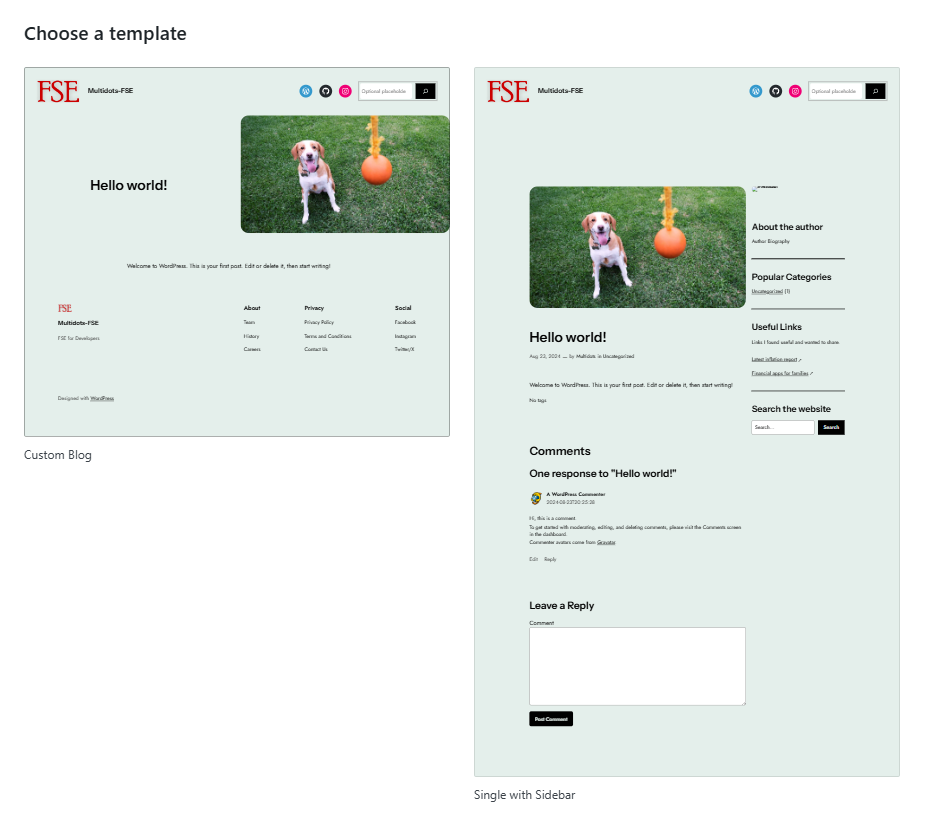
Choosing a new template for the blog post
View the post again to see the new layout. The Title and the Featured Image are now next to each other.
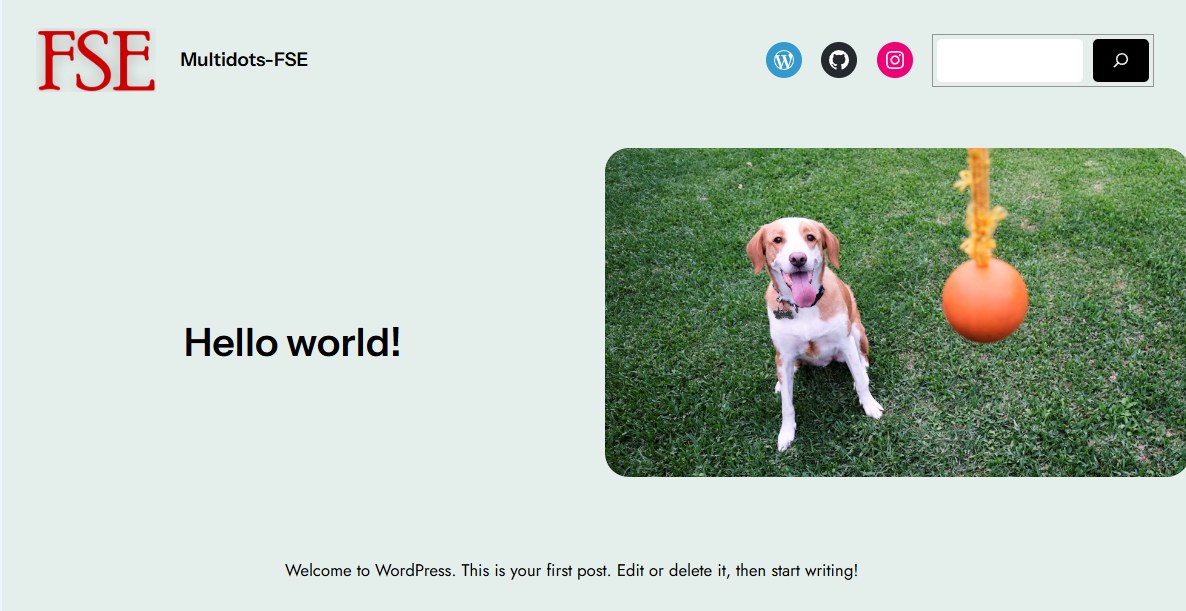
How the blog looks with the new template
Here, we’ve shown a simple demonstration of how you can leverage the power of FSE to create custom templates straight in the editor. The WordPress YouTube channel has a tutorial on how to make custom templates with FSE.
Setting Global Styles and Settings (theme.json)
As discussed before, you can override Core’s defaults with the theme’s theme.json file. The basic structure of this theme.json file looks like this:
{
    "version": 3,
    "settings": {},
    "styles": {},
    "customTemplates": {},
    "templateParts": {}
}
The version field defines the theme.json file format. Here, it is version 3, the latest supported version introduced in WordPress 6.6.
Next, the settings field is where you describe your global settings. For instance, here, you can set the layout and colors used on your site. Here’s an example of the settings you can use:
{
    "version": 3,
    "settings": {
        "color": {
            "custom": true,
            "customDuotone": true,
            "customGradient": true,
            "duotone": [],
            "gradients": [],
            "link": actual,
            "palette": [],
            "text": true,
        },
        "layout": {
            "contentSize": "800px",
            "wideSize": "1200px"
        },
        "spacing": {
            "margin": true,
            "padding": true,
            "blockGap": null,
            "units": [ "px", "em", "rem", "vh", "vw" ]
        },
        "typography": {
            "customFontSize": true,
            "lineHeight": true,
            "dropCap": false,
            "fluid": true,
            "fontStyle": false,
            "fontWeight": false,
            "letterSpacing": false,
            "fontSizes": [],
            "fontFamilies": []
        },
        "blocks": {
            "core/paragraph": {
                "color": {},
                "custom": {},
                "layout": {},
                "spacing": {},
                "typography": {}
            },
            "core/heading": {},
            "others": {}
        }
    }
}
These top-level settings affect all Blocks, but you can also set these separately for each Block within the same file, giving you precise control over how a Block behaves and looks.
There’s also a special setting variable called appearanceTools that you can use to enable UI controls on the frontend. Additionally, you can show certain Presets to users by defining them in the file. For example, you can set the color gradients, palette, font sizes, font families, etc.
The user sees a name for the preset on the dashboard, which translates to the styles and settings you’ve defined in the file.
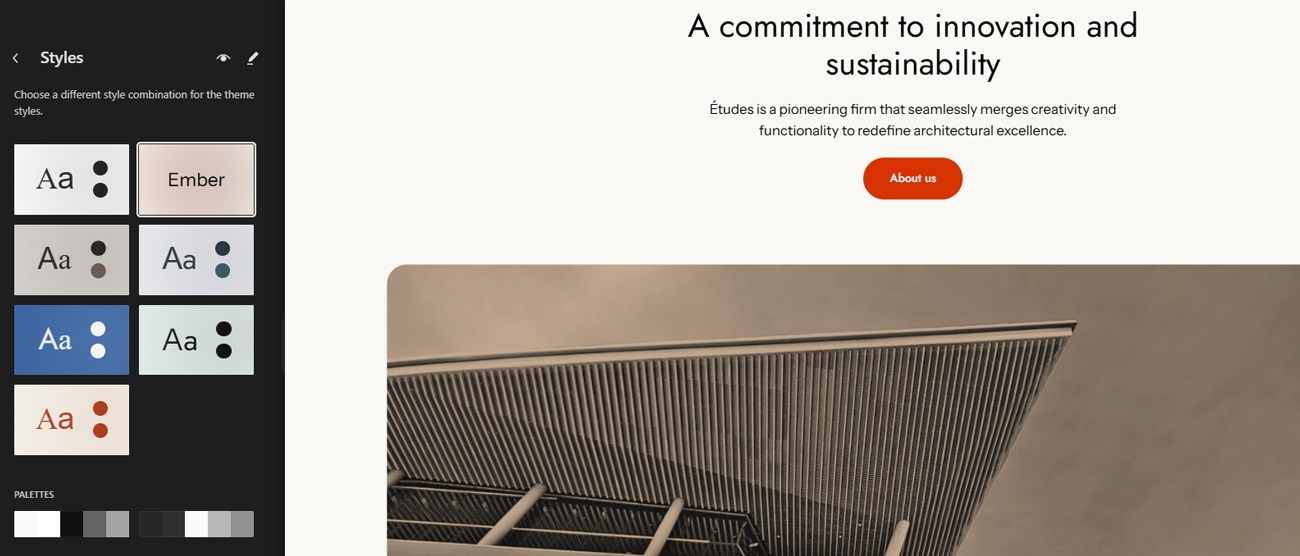
An example of theme Styles and Palettes
You can define the theme Styles and Palettes users can choose from, providing options while still maintaining control. That’s one of the most powerful functions of this new approach.
If you want to enable custom colors for all Blocks except for paragraphs, it would look something like this:
{
    "version": 3,
    "settings": {
        "color": {
            "custom": true
        },
        "blocks": {
            "core/paragraph": {
                "color": {
                    "custom": false
                }
            }
        }
    }
}
Likewise, the styles field defines the top-level and block-level styles. Below is an example showcasing border and typography fields being defined.
{
    "version": 3,
    "styles": {
        "border": {
            "radius": "90px",
            "color": "#111111",
            "width": "2px"
        },
        "typography": {
            "fontSize": "1rem",
            "fontStyle": "normal",
            "fontWeight": "400",
            "letterSpacing": "0em",
            "lineHeight": "1.15",
            "textDecoration": "none",
            "textTransform": "none"
        },
        "elements": {
            "link": {
                "border": {},
                "color": {},
                "spacing": {},
                "typography": {}
            },
            "h1": {},
            "h2": {},
            "h3": {},
            "h4": {},
            "h5": {},
            "h6": {}
        },
 }
Sometimes, you want to style individual elements within a Block or apply unique styles to all heading levels. You can do this with the element attribute. Blocks can also have style variations, which you can define here for individual Blocks.
And that’s not all. You can define custom templates, template parts, patterns, and more in the theme.json file.
All these features tie into what’s available on the frontend FSE. Discussing all of them is out of the scope of this article. You can refer to the Block Editor Handbook to learn how to use the theme.json file to its full potential.
Use the New Interactivity API
WordPress 6.5 introduced the Interactivity API to provide a standardized way of adding interactivity to the frontend of Blocks. It also powers many of WordPress's Core Blocks, including Search, File, Navigation, and Query.
While you can use the new Interactivity API without Blocks, its true power comes alive with Blocks, which form the basis of FSE.
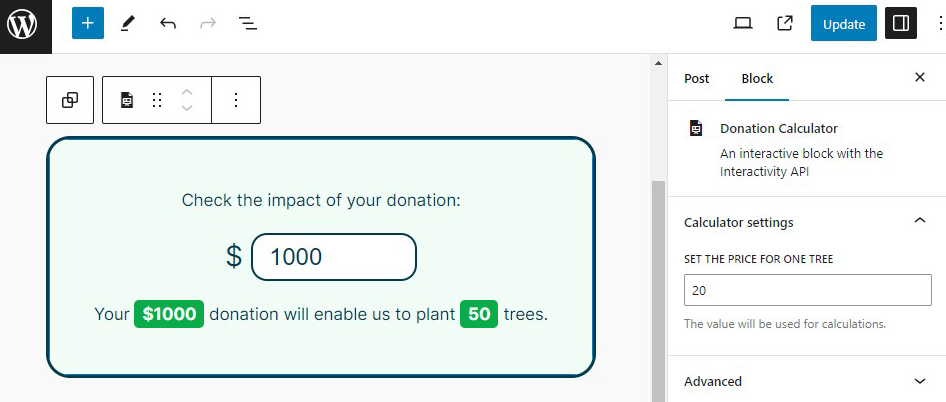
A donation calculator powered by Interactivity API (source)
The WordPress Developer Blog has a great tutorial on getting started with Interactivity API. It shows how to build the above interactive block.
Locking Blocks and Templates
The pre-FSE WordPress was good at separating concerns. It took a lot of work for clients to mess up website pages and post designs without dabbling with code. Well, almost!
The introduction of FSE changed that, giving developers and users more power over modifying the website. To paraphrase a certain fictional character, with great power of FSE comes great responsibility not to botch it up. That advice holds good for all web developers, both real and fictional.
WordPress added the Block Locking API to combat this specific issue. With it, you can prevent users from accidentally inserting, removing, or moving Blocks. It also comes with a visual interface to lock and unlock blocks.
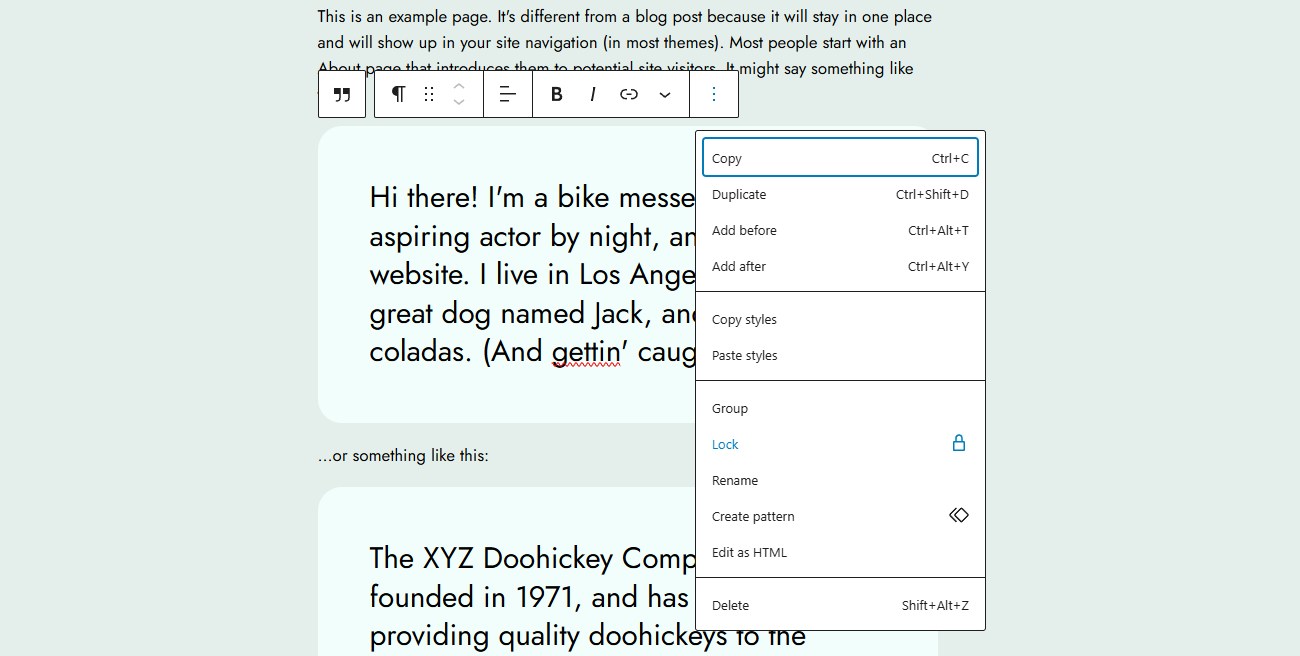
Locking blocks in the Editor
To lock a block, click its three-dot menu and select the Lock option. Here, you can choose two locking options: Disable movement and Prevent removal.
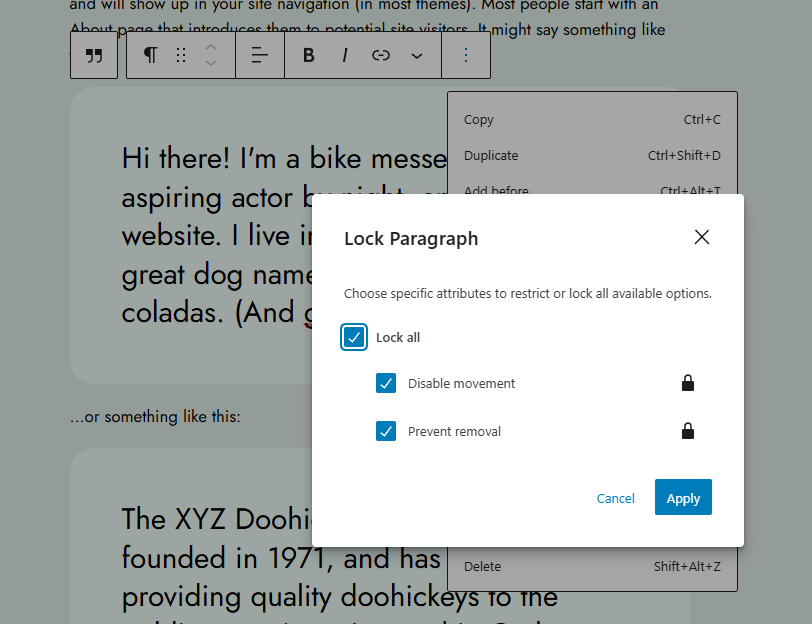
Block locking options
If you lock a nested block, you can also select the Apply to all blocks inside option to apply the same locking options to all child blocks.
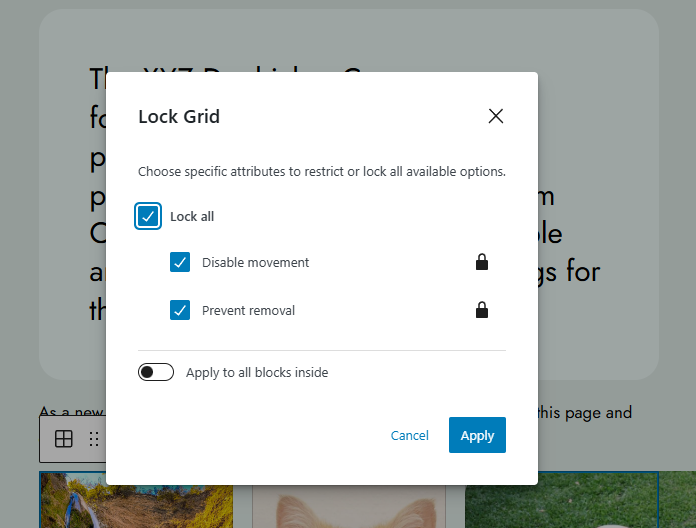
Locking options for a nested block
Patterns and Templates can use the same method to define the default lock state of blocks. Note that the Navigation Block and Patterns have an additional locking capability: restrict editing the contents of the block.
In the Editor, you can identify a locked block by looking for the lock icon:
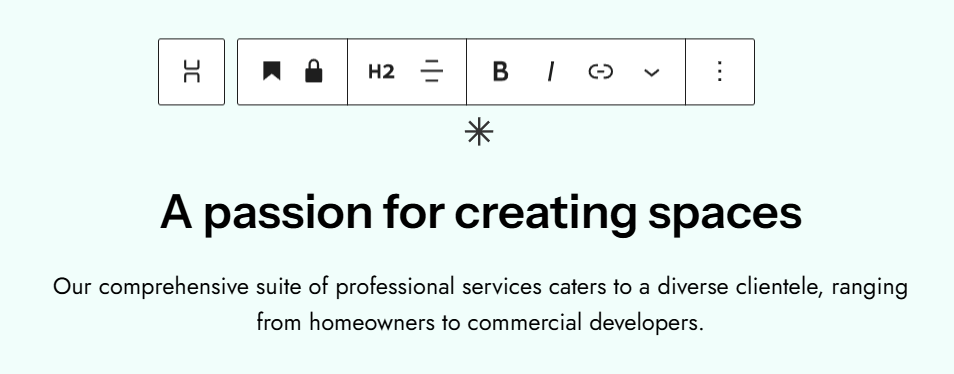
Keep a look out for the lock icon
You can also lock a block with code in Templates, Patterns, and Template Parts. For this, you must use the block attribute called lock, which has two boolean value options: move and remove. Here’s an example locking down the paragraph block:
<!-- wp:paragraph {"lock":{"move":true,"remove":true}} -->
<p>This is an example paragraph block. Have fun!</p>
<!-- /wp:paragraph -->
There’s also a way to restrict the template of inner blocks using the templateLock property. The only blocks that support this property are Cover, Navigation, Group, Column, and Columns.
<!-- wp:group {"templateLock":"all","lock":{"move":true,"remove":true},"layout":{"type":"constrained"}} -->
<div class="wp-block-group"></div>
<!-- /wp:group -->
Sometimes, you may want to lock the template on the frontend so that users cannot manipulate the blocks they see. You can do this with the template_lock property. It accepts three options:
- contentOnly: All non-content blocks are hidden from the list view, and you cannot access them by clicking them either. You can edit the content (text and media), though.
- all: Restricts all operations, including inserting, moving, and removing blocks.
- insert: You cannot insert or remove blocks, but you can move existing blocks.
Here’s a boilerplate code to use this function:
function myplugin_register_template() {
	$post_type_object = get_post_type_object( 'post' );
	$post_type_object->template = array(
		array( 'core/heading', array(
			'placeholder' => 'Add Your Description...',
		) ),
	);
	$post_type_object->template_lock = 'all';
}
add_action( 'init', 'myplugin_register_template' );
You can also disable a block’s locking UI by setting its supports.lock option to false.
{
	"name": "namespace/block",
	"title": "Block",
	"supports": {
           // Remove support for locking UI.
		"lock": false
	}
}
And finally, you can block certain users from unlocking blocks by filtering the block_editor_settings_all filter using the canLockBlocks attribute. By default, this attribute is set to true for all users.
add_filter(
	'block_editor_settings_all',
	static function( $settings, $context ) {
		// Allow for the Editor role and above.
		$settings['canLockBlocks'] = current_user_can( 'delete_others_posts' );

		// Only enabled for specific User(s).
		$user = wp_get_current_user();
		if ( in_array( $user->user_email, array( 'user@example.com' ), true ) ) {
			$settings['canLockBlocks'] = false;
		}

		// Disable for Posts/Pages
		if ( $context->post && $context->post->post_type === 'page' ) {
			$settings['canLockBlocks'] = false;
		}

		return $settings;
	},
	10,
	2
);
Here’s the source for the above code.
You can lock down your blocks thoroughly and protect them from user-caused chaos by combining all the above features.
Exporting a Block Theme
If you want to export your custom Block Theme, share it with others, or use it elsewhere, Full Site Editing has you covered there, too.
All you need to do is open your Site Editor, click the three-dot menu on the top-right corner, and click the Export link. Make sure to test your theme for any inconsistencies and bugs before exporting.
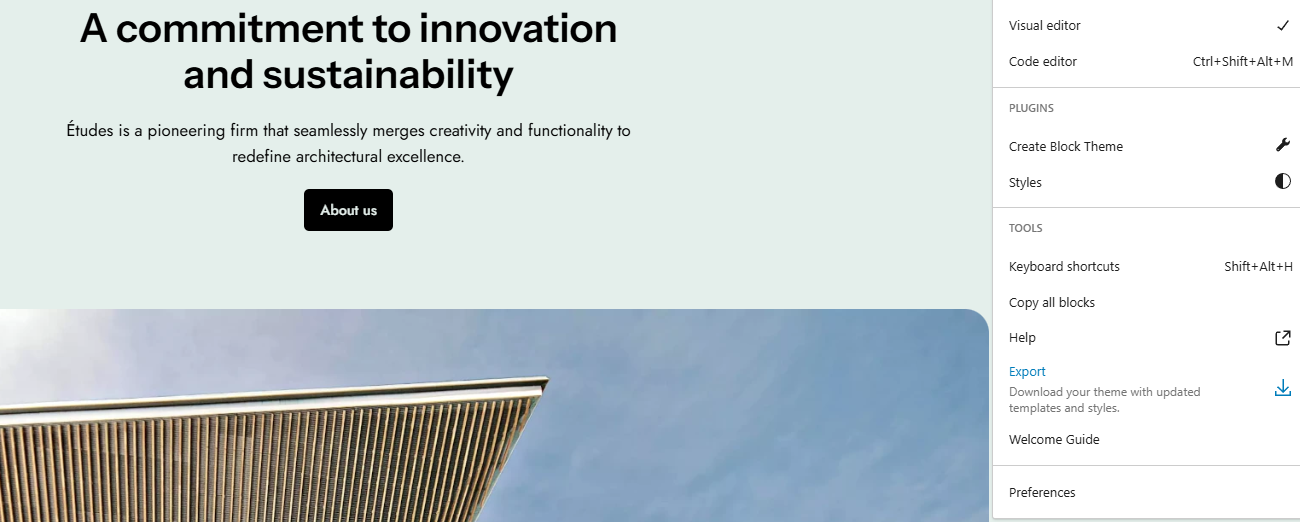
Exporting a WordPress Block Theme
Want to publish your theme on the WordPress repository? You have to follow a few more steps. Read the requirements and submission process thoroughly to help you get started.
Blocks Themes to Explore Full-Site Editing Further
Full-Site Editing is supported only by Block Themes. While you can get started with a blank slate to create your vision from scratch, it’s helpful to build on existing themes to speed up the process. You can also use them as design inspiration for your custom themes.
Here are some of the best we’ve come across:
Default WordPress Block Themes
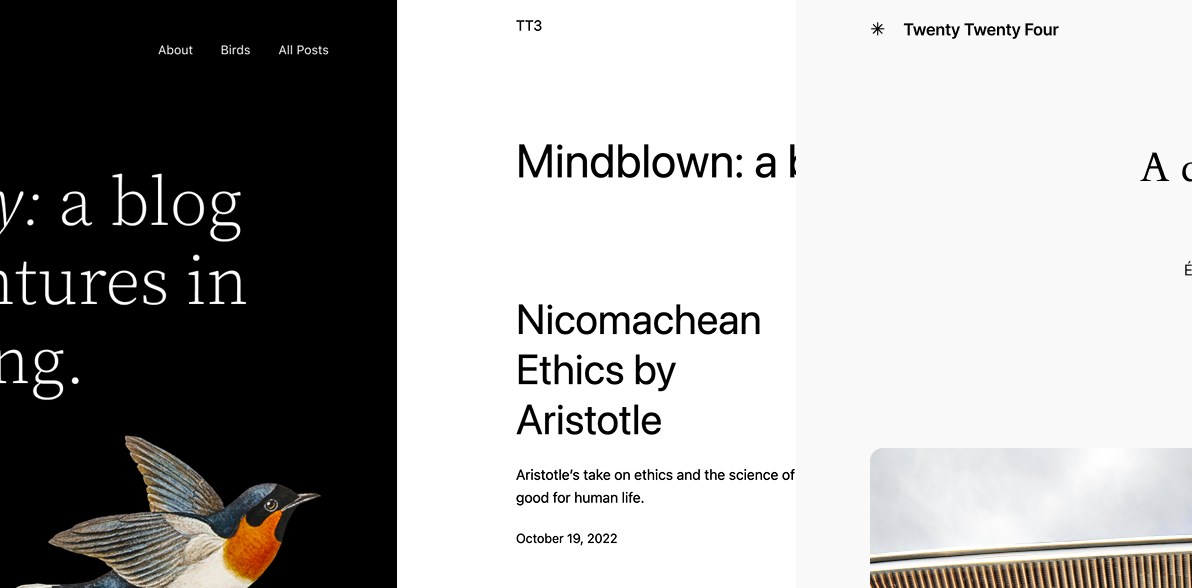
Default WordPress Block Themes
Twenty Twenty-Two, Twenty Twenty-Three, and Twenty Twenty-Four are the default WordPress Block Themes. All these themes feature a diverse collection of patterns and templates tailored to various needs. They’re a great starting point for exploring Block Themes.
Poe
Poe Theme
Poe by Anders Norén is a clean and flexible Block Theme suited for Blogs and Portfolio sites. It comes with ten different theme styles and 30+ block patterns, allowing you to mix and match them to create distinct page designs. It’s worth looking into.
Blockbase
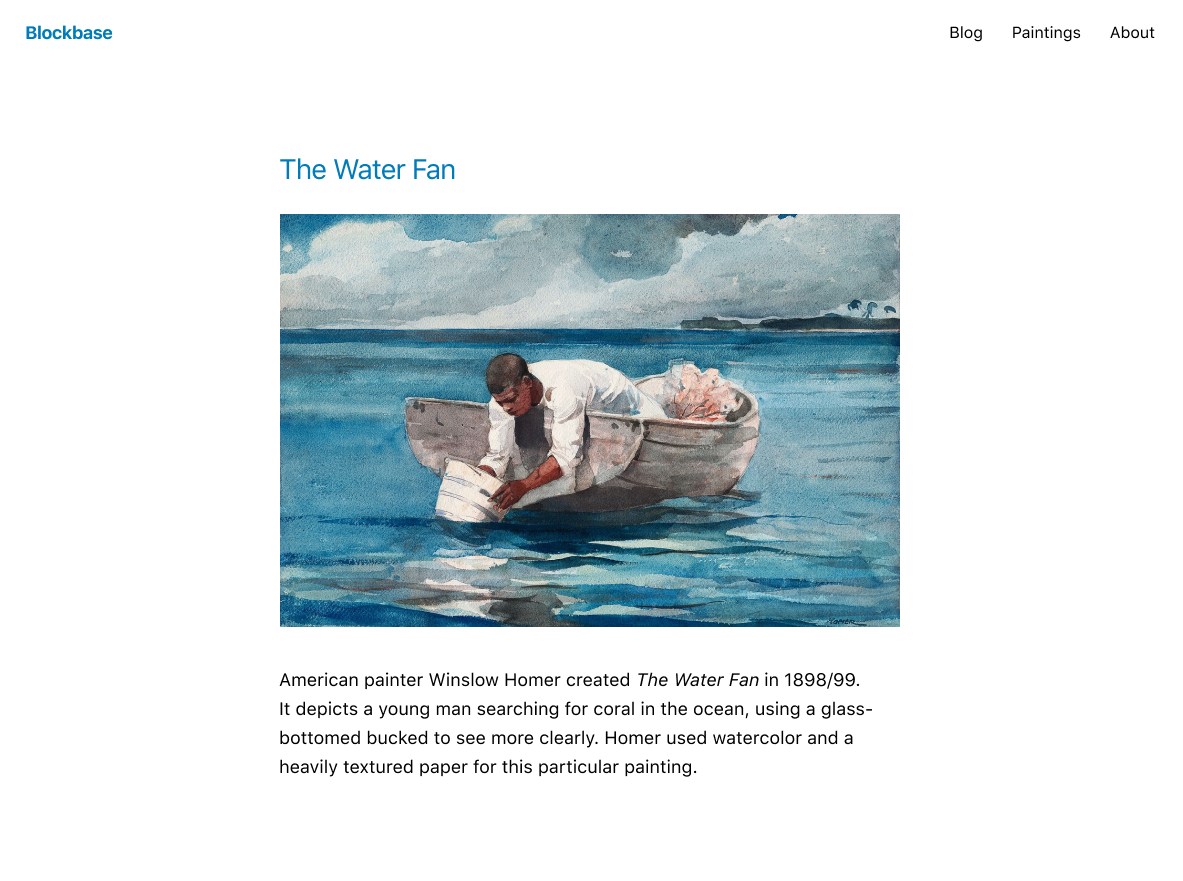
Blockbase Theme
Blockbase is a perfect boilerplate theme for Block Theme developers. It’s based on the Blank Canvas project by Automattic, which served a similar purpose at a smaller scale. It includes minimal templates and design settings, allowing you to express your design completely. You can read more about its design philosophy on its GitHub repo.
Quadrat

Quadrat Theme
Quadrat is a child theme of Blockbase and perfectly showcases what’s possible with it. It’s designed for blogs and podcasts and has many preset palettes that work great with the theme. This theme includes 9 Patterns and comes bundled with its typical startup-esque illustrations.
Frost
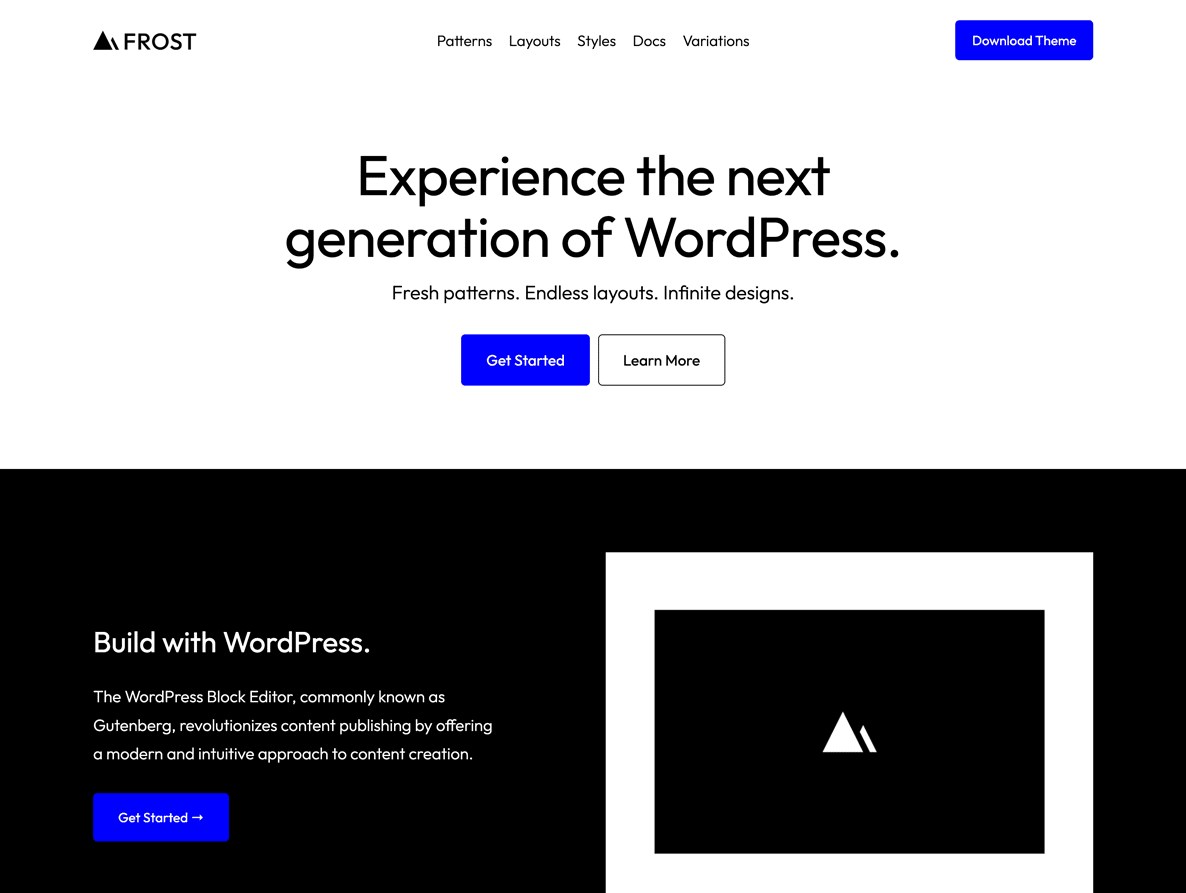
Frost Theme
Frost is a starter Block Theme by Brian Garner of StudioPress fame (now owned by WP Engine). Its minimal design and varied Patterns, Templates, Styles, and design variations make it great for starting your next custom theme project. You can also check out Powder by Brian Gardner, another theme with a similar purpose.
Spectra One

Spectra One Theme
Spectra One by Brainstorm Force is one of the most feature-rich Block Themes. It’s from the same team behind the super popular Astra theme and is supposed to be a companion theme for their Spectra page builder plugin. However, it works fine with FSE. You’ll find dozens of Patterns and 9 Styles to create your new site.
Full-Site Editing is the Future of WordPress
We’ve seen how Full-Site Editing can supercharge your development process. It’s one of the most exciting features to hit the WordPress world in a long time. Using Block Patterns, Template Parts, Global Styles, Templates, etc., with FSE can save you tons of time, making working with WordPress sites much more effortless.
Whether you’re a developer or an agency, it also gives users or clients more freedom to do as they choose, opening up more opportunities for you to expand your services.
And it’s not done yet. FSE continues to receive new features and updates with every WordPress release. As it evolves, it will only get better and more feature-rich.
If you want to explore more about WordPress Full-Site Editing, we recommend you start with the Block Editor Handbook and the Theme Handbook.
Schedule a consultation call and discuss your migration requirements.
Contact Us