A Deep Dive Into HubSpot Analytics vs WordPress Analytics
Analyze the strengths and weaknesses of HubSpot Analytics and WordPress Analytics to optimize your data strategy

Table of Contents
Having access to data is the easy part, but the main goal of collecting data is using that data to make data-driven decisions to improve your marketing campaigns, website design, and overall user experience.
Just a few years ago, there were fewer analytics options, but with changing privacy policy laws and user behavior, there are now many more options available in the market that comply with the new laws and help you collect the necessary data.
Google Analytics and Google Search Console are still popular choices. But, there are many more free, open-source, closed SaaS-based analytics solutions available that can be integrated with your websites.
Best Analytics Tools
- Google Analytics
- Matomo
- Microsoft Clarity
- Adobe Analytics
- Kissmetrics
- Hotjar
- Piwik PRO
- Mixpanel
- Plausible
While having many choices is beneficial, you do not need to use multiple analytics tools on one website. Configuring one analytics tool correctly to fulfill your needs is sufficient, and most of the software listed above can be used on any type of website.
When it comes to the debate between WordPress and HubSpot, there are many comparisons and opinions available online. However, in terms of analytics and data collection, this blog will take a deeper dive into this specific area.
Why Using Analytics is Necessary
If you are launching a website, integrating analytics software is essential before going live. Analytics enables you to track the sources of your traffic, whether from search engines, social media platforms, or other referring websites. Continuous tracking is crucial for understanding user behavior and optimizing your site's design and compatibility across devices and browsers.
Key reasons to implement analytics software include:
Understanding User Behavior: Analytics tools provide insights into user demographics such as device preferences (desktops, mobile phones), operating systems, and browsers. This data helps tailor your website to user needs and preferences, identifying popular pages and improving overall user experience.
Measuring Performance: Operating marketing or sales campaigns without analytics is akin to a blindfolded aim. Analytics metrics track campaign success by measuring visitor numbers, sign-ups, conversions to paying customers, and the visitor journey. Setting up goals and events in analytics software provides critical performance indicators.
Informed Decision-Making: Access to comprehensive data facilitates data-driven decision-making. For example, analytics can reveal the effectiveness of Google Ads campaigns by tracking visitor origins, devices used, campaign keywords, and conversion rates to optimize marketing strategies.
We will cover how to install various analytics services on WordPress and HubSpot sites later in this article.
Deep Dive into WordPress Analytics
WordPress core doesn’t come with a built-in Analytics tool. However, there are several plugins, tools, and services that you can easily integrate and install on WordPress to track visitor behaviour.
In this section, we will cover some of the best WordPress analytics options available for your WordPress website, whether you have a simple blog or an e-commerce store. A properly configured analytics tool will give you the data you need to analyze and improve your website.
Top WordPress Analytics Plugins:
Site Kit by Google
Google Analytics is the most popular and free analytics service provided by Google. It offers comprehensive insights into your website's performance and user behavior. Configuring Google Analytics with WordPress is straightforward, and there are multiple ways to install it, one of them is to use Google’s official plugin called Site Kit. Here’s a step-by-step guide to get you started:
1. Create an Account on Google Analytics
- Go to the Google Analytics website.
- Sign in with your Google account.
- Click on "Start Measuring" and follow the prompts to set up your account, property, and view.

- Once your account is created, you will receive a tracking ID.

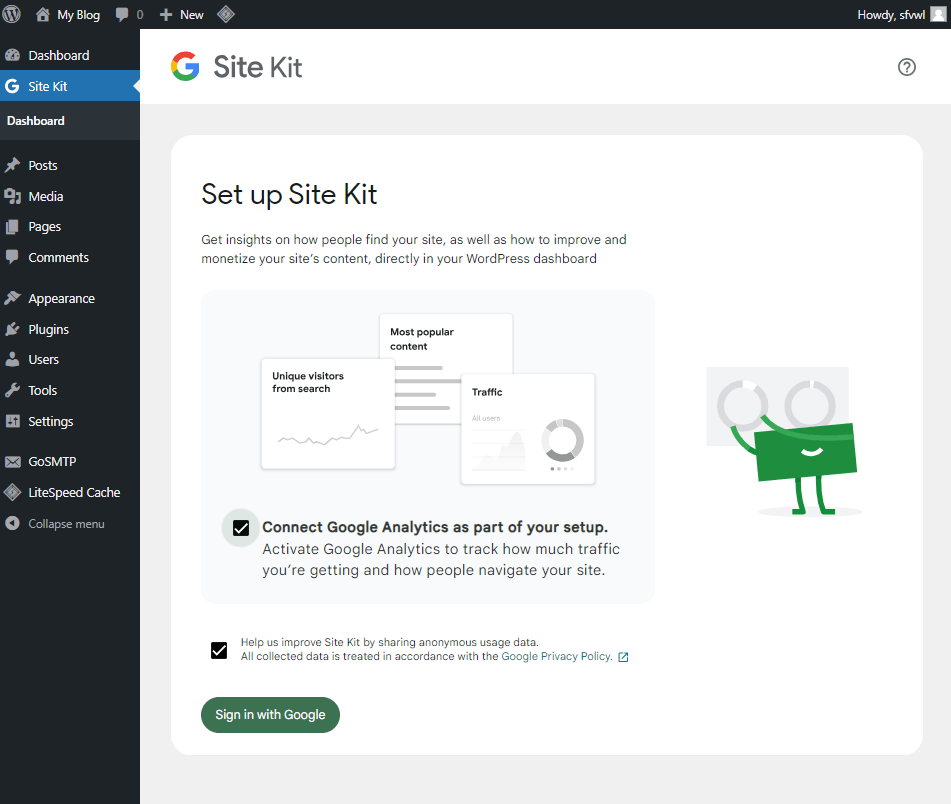
2. Install Google Sitekit Plugin
- Log in to your WordPress admin dashboard.
- Go to "Plugins" > "Add New."
- Search for "Google Site Kit."
- Click "Install Now" and then "Activate."
- After activation, you will see a new "Site Kit" menu item in your dashboard.
- Click on "Site Kit" and follow the setup instructions to connect your Google Analytics account to your WordPress site. Site Kit will handle the integration for you and ensure your tracking ID is correctly added to your website.
3. Test Google Analytics
- Once Site Kit has completed the setup, visit your website.
- Return to your Google Analytics dashboard.
- Navigate to "Real-Time" reports to see live data and confirm that Google Analytics is tracking your site’s visitors.
- Ensure that data is being collected properly by checking various reports like Audience, Acquisition, and Behavior over the next few days.
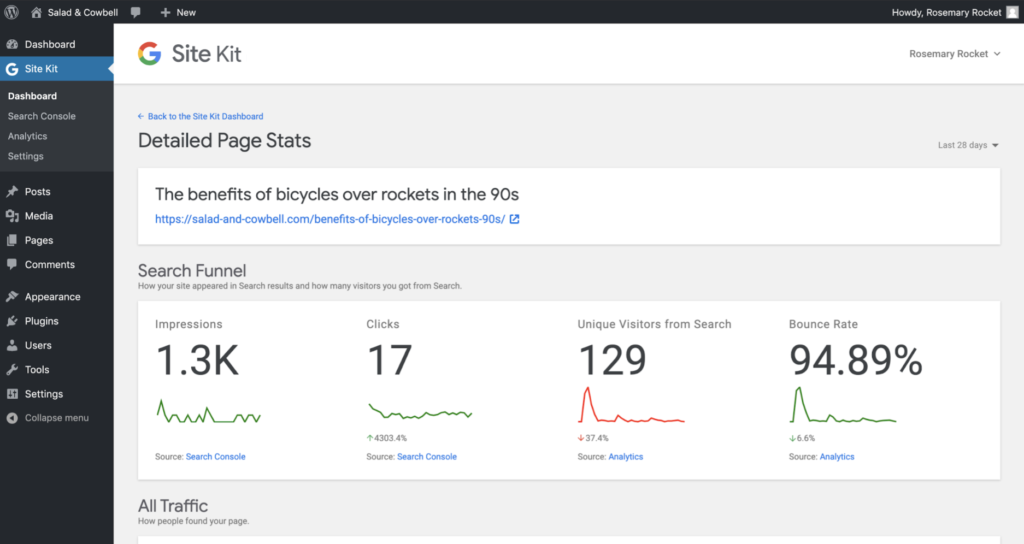
Using Google Site Kit is by far the easiest method to get up and running with Google Analytics on your website.
Using Jetpack Plugin for Stats and Analytics
The Jetpack plugin is maintained by Automattic, the company co-founded by Matt Mullenweg, who is also a co-founder of WordPress. Jetpack offers a comprehensive suite of features that enhance your website's performance, security, social sharing, and analytics capabilities. Jetpack is available in both free and paid plans.
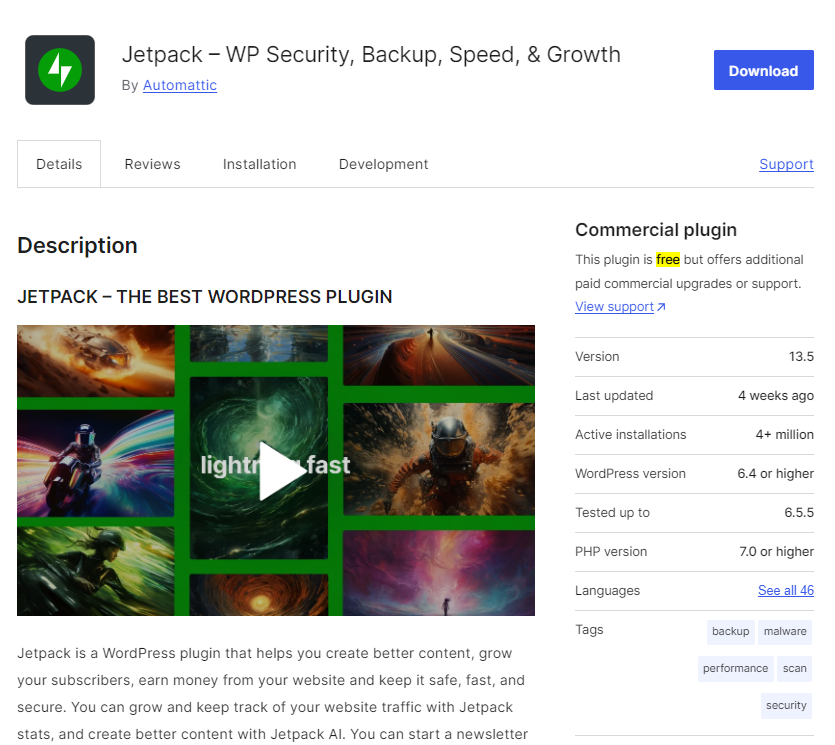
The free plan provides a solid foundation with basic features, suitable for small sites. However, for commercial websites looking for advanced features and greater functionality, the paid versions of Jetpack are highly recommended.
1. Install and Activate Jetpack Plugin
- Log in to your WordPress admin dashboard.
- Navigate to "Plugins" > "Add New."
- Search for "Jetpack"
- Click "Install Now" and then "Activate."
- After activation, you will be prompted to connect your site to a WordPress.com account. Follow the on-screen instructions to complete the setup.
2. Choose a Jetpack Plan
- Once Jetpack is activated and connected to your WordPress.com account, you must select a plan.
- Jetpack offers several plans:
- Free: Basic features for performance, security, and analytics.
- Pro: The Stats plan starts at $8.33 per month, which unlocks all the analytics features.

Source Jetpack Pricing
Choose the plan that best suits your needs and budget. You can upgrade your plan at any time as your site grows.
3. Checking Stats with Jetpack
- Once Jetpack is set up, you can access your site stats directly from your WordPress dashboard.
- Go to "Jetpack" > "Site Stats."
- Here, you can view various metrics such as the number of visitors, page views, search terms, traffic by page and more.
There are many other plugins available in the WordPress ecosystem that help you to add and integrate Google analytics on your website with proper configuration. Some of the two most popular plugins are
- MonsterInsights Plugin: Integration with Google Analytics and key features.
- Analytify Plugin: User-friendly interface and detailed reporting.
Open Source Analytics Software:
In recent years, there has been significant development in open-source data analytics tools, offering numerous options for measuring and tracking website traffic. In the WordPress community, several popular analytics tools include:
- Plausible
- Matomo
- Grafana
Setting up these open-source solutions can be complex, especially for beginners, as it involves installing them on your own server and integrating tracking codes into your website. Therefore, it's advisable to approach installation with caution and possibly seek assistance if you're unfamiliar with server management.
Analytics with Heatmaps and Visitor Recording
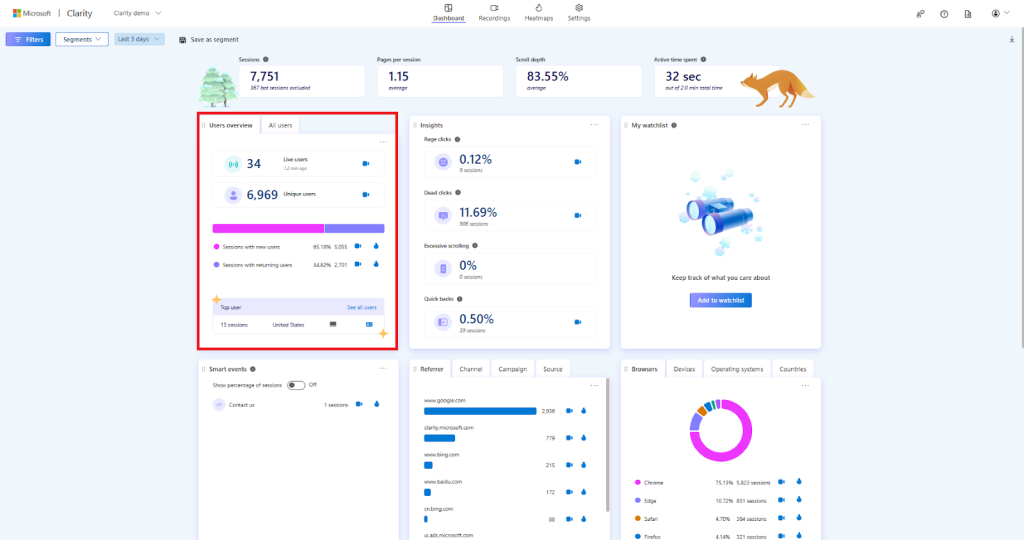
Microsoft has introduced a free analytics tool called Microsoft Clarity. While it may not be as advanced as Google Analytics, its standout features are heatmaps and visitor recordings.
Microsoft Clarity records entire user sessions, tracking clicks and other useful events such as quick backs, purchases, and form submissions. This tool provides invaluable insights into user behavior, helping you understand how far visitors scroll, where they click, and how they navigate through your website.
Installing Microsoft Clarity on WordPress
1. Create an Account
- Go to the Microsoft Clarity website.
- Click on "Get started" and signin. If you don’t have one, you’ll need to create it.
- Follow the prompts to set up your Clarity account.
2. Add Your Website and Install Tracking Code
- Once your account is set up, click on "Add a new project."
- Enter your website’s name and URL.
- After creating the project, you will be provided with a tracking code.
- Copy the tracking code and log in to your WordPress admin dashboard.
- Navigate to "Appearance" > "Theme Editor" or use a plugin like "Insert Headers and Footers" to add the tracking code to your website’s header section.
3. Test the Setup
- After adding the tracking code, visit your website to generate some data.
- Return to your Microsoft Clarity dashboard and check if data is being collected.
- Navigate to the "Dashboard" in Clarity to see initial data such as Heatmaps and session recordings.
- Ensure that events like clicks, scrolls, and form submissions are being tracked correctly.
On WordPress you have multiple options to add analytics to your website, the choice is really up to you, which tool you prefer that meets your requirements.
A look into HubSpot’s Analytics
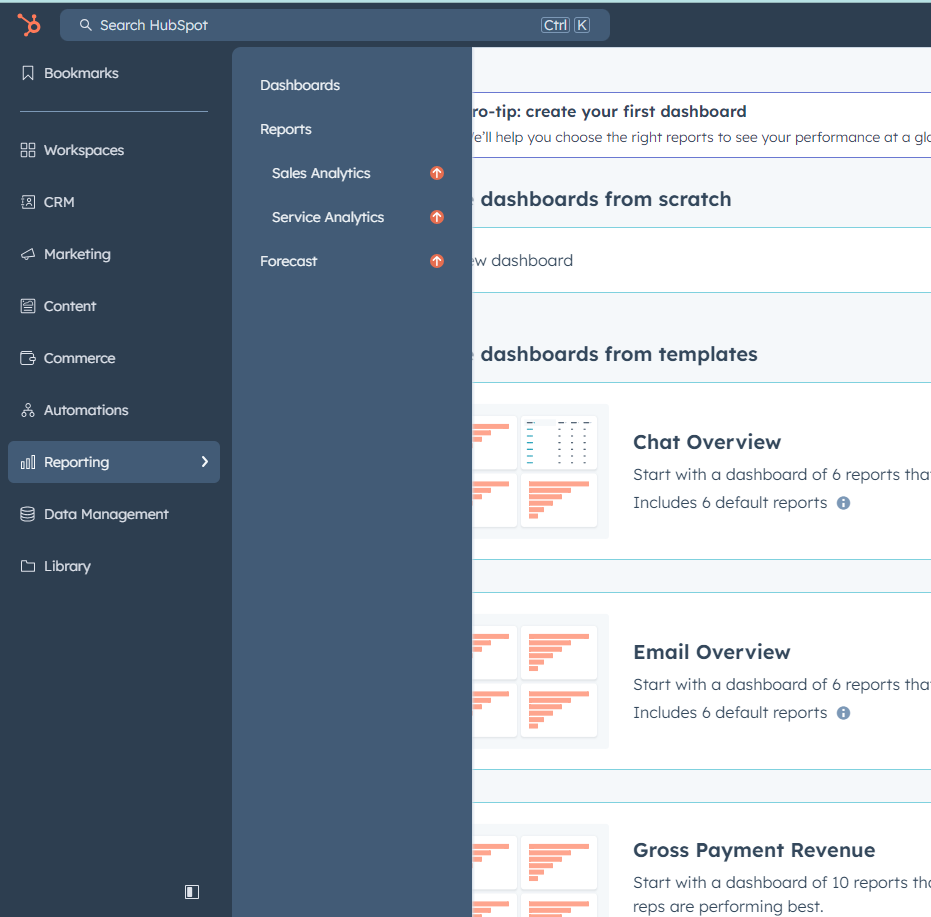
HubSpot offers a wide array of built-in tools, including robust analytics that track statistics across your website and CRM. However, it’s important to note that many of its advanced features are locked behind a paywall. With a free account, the analytics reports available are quite basic.
In order to access reports within HubSpot, navigate to Reporting > Dashboard after signing into your HubSpot account. There are plenty of options to select from.
Can I Install Google Analytics on HubSpot?
The answer is yes, you can install Google Analytics on HubSpot, but you will need to upgrade your HubSpot account to install the Google Analytics script in the website’s header. If you are tracking custom events with Google Analytics, upgrading your account is essential to fully utilize these capabilities.
Installing Google Analytics on HubSpot
Here’s how to integrate Google Analytics with HubSpot:
1. Upgrade Your HubSpot Account
Ensure that you have the appropriate HubSpot plan that allows for custom code installation. This feature is generally available in higher-tier plans.
2. Install Google Analytics Tracking Code
- Log in to your HubSpot account and navigate to your HubSpot Content Hub.
- Go to "Settings" from the top right menu and select "Website" from the left sidebar.
- Click on "Pages" and then "Tracking & Analytics."
- At the top of this page, click the "Choose a domain to edit its settings" dropdown menu and select a domain you'd like to track using Plausible.
- In the "Site header HTML" field, enter your Plausible Analytics tracking code.
- After adding your code, click on the "Save" button.
3. Verify Installation
- After adding the tracking code, visit your HubSpot website.
- Open your Google Analytics dashboard and navigate to "Real-Time" > "Overview."
- Ensure that your website activity is being tracked and that data appears in the real-time report.
You can also install open-source analytics software on HubSpot websites by adding their tracking code in the website header.
HubSpot vs WordPress Analytics Pros and Cons
So far, without a doubt both the platforms provide robust analytics tools, but they cater to different needs and preferences. To know more about your website visitors. Let’s talk about the advantages and disadvantages of the options available to both HubSpot and WordPress.
HubSpot Analytics
Pros:
Integrated Marketing Tools: HubSpot provides an all-in-one platform that integrates marketing, sales, and customer service tools. This integration allows for seamless data flow and comprehensive insights across all business functions.
User-Friendly Interface: HubSpot's analytics dashboard is intuitive and easy to navigate, making it accessible for users with varying levels of technical expertise. This user-friendly design simplifies the process of tracking and analyzing data.
Comprehensive Data Reports: HubSpot offers detailed and customizable reports that cover a wide range of metrics. These reports help businesses gain deep insights into customer behavior, campaign performance, and overall website effectiveness.
Cons:
Higher Cost: HubSpot’s pricing can be a barrier for small businesses or startups. The cost of its CMS and analytics tools is higher compared to many other platforms, which might not be justifiable for those with limited budgets.
Steep Learning Curve: While the interface is user-friendly, the depth and breadth of HubSpot’s features can be overwhelming for new users. It may require significant time and training to fully leverage all the capabilities.
WordPress Analytics
Pros:
Flexibility with Plugins: WordPress offers a vast array of plugins that can be used to add analytics functionality. Popular options include JetPack, MonsterInsights, and Analytify. This flexibility allows users to customize their analytics setup according to their specific needs.
Lower Cost: WordPress itself is free, and many of its analytics plugins are either free or low-cost. This makes it a more affordable option for businesses looking to implement robust analytics without a significant financial investment.
Ease of Use for Beginners: WordPress is known for its user-friendly interface and easy setup process. Even users with minimal technical knowledge can get started with analytics by installing and configuring plugins with just a few clicks.
Cons:
Requires Manual Setup of Analytics Software: While HubSpot offers built-in analytics tools, WordPress does not. It means that you will have to manually install them.
Potential for Compatibility Issues: Having various plugins and scripts running on your WordPress website may lead to compatibility problems, especially when plugins are not regularly updated or conflict with each other. These issues can affect website performance and the reliability of analytics data.
Additional Details While Using an Analytics Tool: In this section we are going to cover some important aspects that every web developer and content creator should know, like data reliability, and data protection laws and how you can make your online presence compliant and assure your website visitors that they are visiting a safe site.
Data Security and Reliability
It is crucial to discuss the reliability of data and the security of the collected data.
Data Reliability: If you use multiple analytics software on your website, then you will notice discrepancies in data between the tools. In most cases, the difference in data may be negligible, but in some cases, it may be more.
E.g. Google Analytics might show a different number of organic traffic compared to Microsoft Clarity. These analytics software are far from perfect, and they usually filter traffic that they may see as "Bots". Not all visitors on the web are real humans, which is why each tool has its own filtration.
The data on Google Analytics may seem less than the data shown by your self-hosted open-source platform; the total number of sessions may be categorized differently for repeated and new users, which is why there may be discrepancies in data.
Data Security: Many data protection laws, such as GDPR and CCPA, are in effect in many countries, states, and regions. To comply with them, you have to notify your website visitors which analytics software you are using and how you use the collected data. Regardless of which analytics tool you decide to use, you need to make sure it complies with data protection laws.
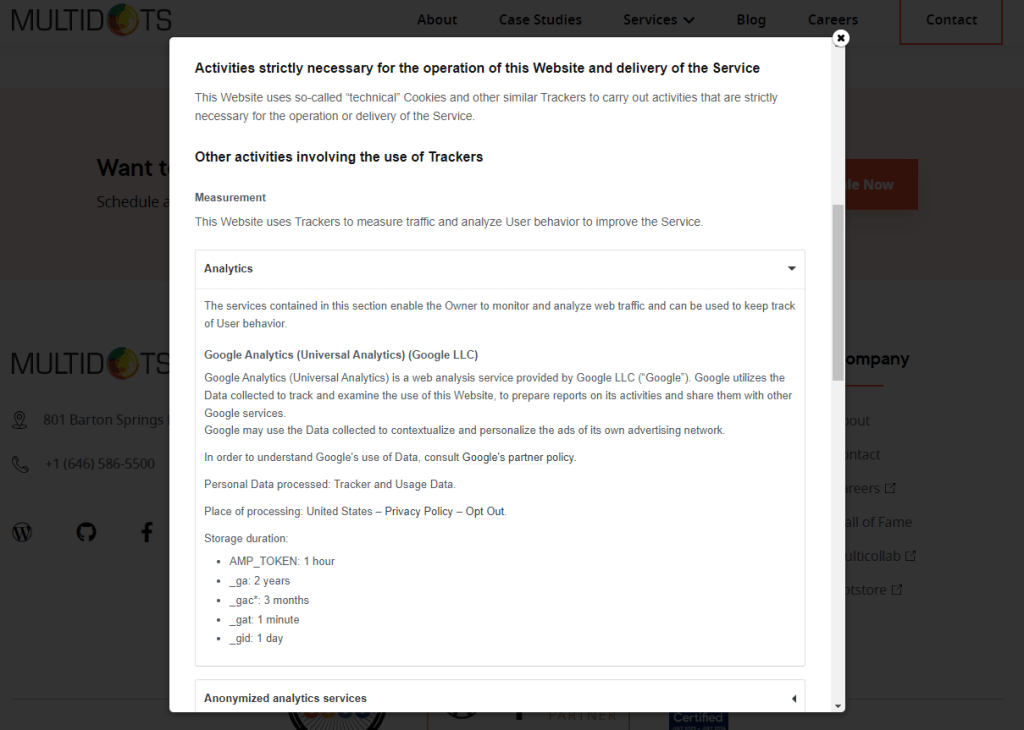
Cookie Policies: Clearly state on your privacy policy page which analytics tools are used and provide options for visitors to opt in or out of data collection. If a visitor opts out, ensure their data, including location, device information, browser details, IP address, and any other collected data, is not tracked or stored.

How to Add A Cookie Popup On Your WordPress Website
Adding a cookie popup on your WordPress website is essential for compliance with privacy regulations like GDPR and CCPA. Here’s a step-by-step guide to help you set up a cookie popup easily:
1. Choose a Cookie Consent Plugin
- Log in to your WordPress admin dashboard.
- Navigate to "Plugins" > "Add New."
- Search for "cookie consent" or "cookie notice."
- Popular options include:
- Cookie Notice & Compliance for GDPR / CCPA
- CookieYes | GDPR Cookie Consent & Compliance Notice
- Click "Install Now" on the plugin you prefer and then "Activate."
2. Configure the Plugin Settings
- After activation, you will see a new menu item related to the plugin you installed (e.g., "Cookie Notice" or "GDPR Cookie Consent").
- Click on this menu item to access the plugin’s settings.
- Customize the appearance of the cookie popup, including the message text, colors, and button styles.
- Configure the behavior of the popup, such as when it should appear and how long the consent should be stored.
3. Add Cookie Policy and Privacy Policy Links
- Most cookie consent plugins allow you to add links to your cookie policy and privacy policy within the popup.
- Ensure you have these pages created and published on your website.
- Copy the URLs of your cookie policy and privacy policy pages.
- Paste these URLs into the appropriate fields within the plugin settings.
4. Test the Cookie Popup
- After configuring the settings, save your changes and visit your website.
- Clear your browser cache or open a private/incognito window to see the cookie popup as a new visitor would.
- Test the popup to ensure it appears correctly and that the links to your policies work.
Add Cookie Consent Banner On HubSpot
Adding a cookie consent banner on HubSpot sites is easy and comes built in - you will only need to configure it and enable it.
1. Log in to Your HubSpot Account
- Go to the HubSpot website and log in to your account.
- Navigate to your HubSpot dashboard.
2. Access Privacy & Consent Settings
- In your HubSpot dashboard, go to the "Settings" icon (usually found in the main navigation bar).
- In the left sidebar menu, click on "Privacy & Consent" under the "Website" section.
3. Configure the Cookie Consent Banner
- Within the "Privacy & Consent" settings, locate the "Cookie Tracking" section.
- Click on the "Configure" button to set up your cookie consent banner.
- Customize the appearance of the cookie popup, including the banner text, colors, and button styles. HubSpot provides a preview so you can see how your changes will look.
4. Add Links to the Cookie Policy and Privacy Policy
- Most cookie consent banners allow you to add links to your cookie policy and privacy policy.
- Ensure you have these pages created and published on your HubSpot website.
- Copy the URLs of your cookie policy and privacy policy pages.
- Paste these URLs into the appropriate fields within the cookie consent banner settings.
5. Publish the Cookie Consent Banner
- After configuring the settings to your satisfaction, click "Save" to apply the changes.
- The cookie consent banner should now be active on your website.
6. Test the Cookie Popup
- Visit your HubSpot website to ensure the cookie consent banner appears as expected.
- Clear your browser cache or open a private/incognito window to see the cookie popup as a new visitor would.
- Test the banner to ensure it displays correctly and that the links to your policies are functional.
Why Choose WordPress?
WordPress not only starts free, but its main advantage is its ability to scale dynamically with complexity, feature set, and price. This flexibility makes it an ideal choice for websites of all sizes, from simple blogs to complex e-commerce sites.
When it comes to analytics, WordPress offers endless possibilities. You can choose from a variety of software and configure analytics in the way that best suits your needs.
At Multidots, we have helped numerous businesses of all sizes move from HubSpot to WordPress. With expert support and a job done by expert WordPress developers, we make sure that you feel right at home with your new WordPress website.
Contact us today for a personalized quote and start on your journey toward a successful migration to WordPress with Multidots.
Feel free to schedule a quick call with our migration expert.
Contact Us