Introduction
A “web page” is a page on a website that displays information, such as text, pictures, and videos. Web pages can also be interactive, so visitors can click buttons, fill out forms, and navigate the website using links.
This migration guide will show you all the steps to move your existing HubSpot pages to WordPress. This will allow you to use the vast features and options of WordPress CMS and the freedom it provides.
We have previously written a comprehensive guide detailing every step of the HubSpot to WordPress migration process, which is available for your reference.
Before moving forward, let’s understand some terminologies between the two CMSs, HubSpot and WordPress.
Website Pages Vs. Landing Page in HubSpot
You must have noticed in your HubSpot dashboard that HubSpot categorizes pages into two sections: Website Pages and Landing Pages.
Website Pages: These are the general building blocks of your website. They provide information about your company, products, services, contact details, etc. Think of them as informative brochures.
Examples include your homepage, about us page, contact page, and product category pages. These pages aim to inform and potentially guide visitors to different parts of your website.
Landing Pages: These are standalone pages designed with a specific call to action (CTA) in mind. They are laser-focused on driving a particular conversion, like capturing leads through signups, promoting a specific offer, or registering for an event.
Landing pages typically have minimal navigation to avoid distractions and keep visitors focused on the CTA. They often include compelling headlines, clear benefits, and strong visuals to encourage conversions.
What is a “Page” in WordPress?
Unlike HubSpot, which offers separate options for website and landing pages, WordPress keeps things simple with just one type: “Pages.”
This streamlined approach reflects the fact that landing pages and website pages often serve similar purposes – providing informative content and building trust with visitors.
The Migration Process
While migrating website pages and landing pages from HubSpot to WordPress might seem complex, following these steps will ensure a smooth transition:
1. Setting Up Your WordPress Site (if not already done)
Choosing a Theme: The first step is to select a theme that defines your website’s visual style and layout. WordPress offers a vast library of free and premium themes catering to various styles and functionalities.
Explore the theme options and choose one that aligns with your brand identity and website goals.
Looking for Functionalities: Consider any additional functionalities you might need once you have a theme. Many themes offer built-in features like contact forms, sliders, or image galleries.
If your HubSpot pages use specific functionalities, look for themes that offer similar features or plan to install plugins to achieve the desired functionality in WordPress.
2. Exporting Your Pages from HubSpot
Identify the Pages: List the website pages and landing pages you intend to migrate to WordPress.
Exporting the Pages: HubSpot lets you download Website Pages, Landing Pages, and Blogs as HTML. If you are familiar with HTML and CSS, these HTML pages will be helpful to you.
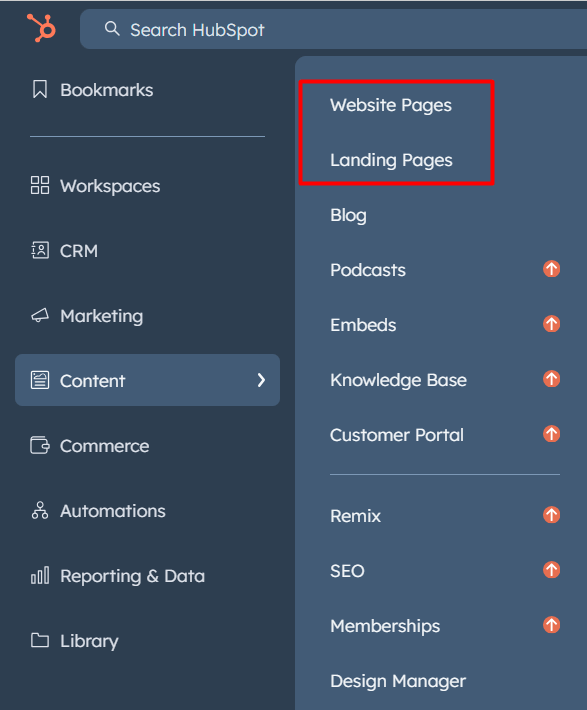
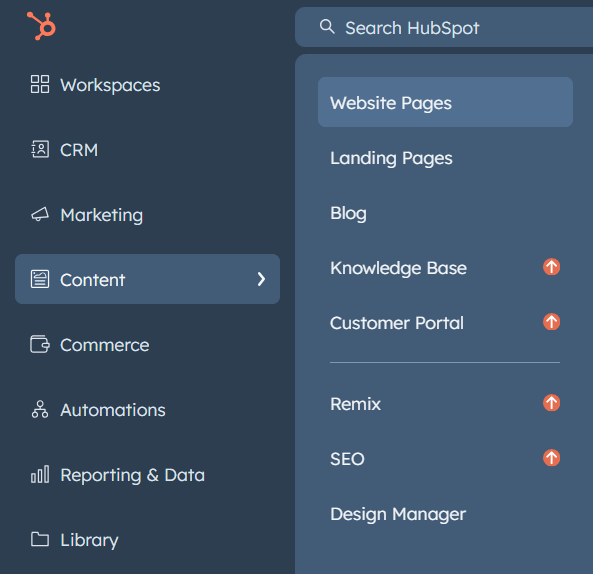
To export your website content as HTML, navigate to Content -> Website Pages or Landing Pages from your HubSpot dashboard.
Here, you will see a list of all “Website Pages.” Click the “Actions” button at the top-right, and then “Export all pages & blog posts (HTML).”
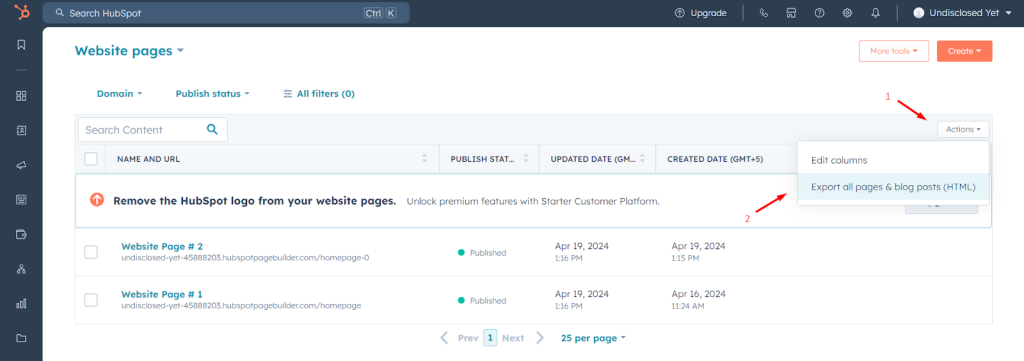
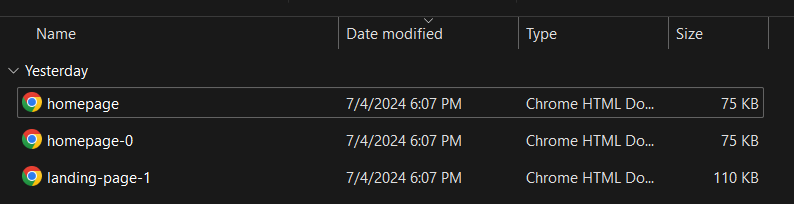
Once HubSpot processes your “Export,” it will notify you via email and in the notification center. Download the .zip file that HubSpot generated.

Unzip the downloaded zip file and navigate to
\unzipped_folder\com\hubspotpagebuilder\your_domain
Here’s an example for all Website Pages and Landing Pages.
If you open any of them in your browser, you will see a similar HubSpot layout design with text and some images.
This page may lack images or icons because it has been served from your local computer instead of HubSpot.
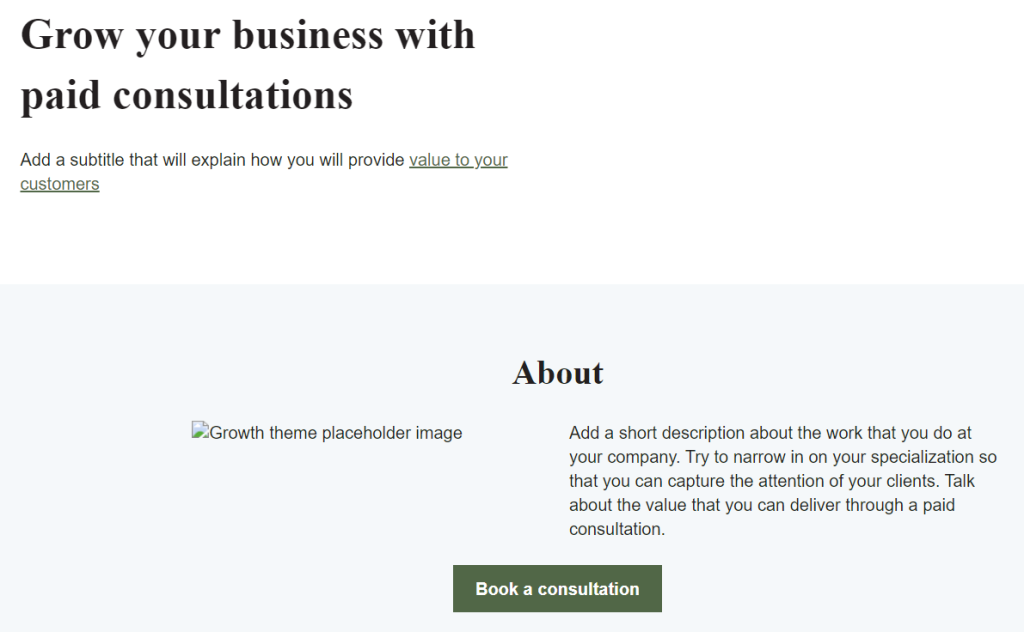
The reason for showing you this is that you get the HTML source code for each Website and Landing page, so you can play with the code to adjust it accordingly.
Heads up: Moving your blog posts from HubSpot to WordPress is more straightforward than moving pages. That’s because HubSpot builds pages differently than WordPress.
3. Create a Page in WordPress
Migrating your HubSpot pages to WordPress involves some do-it-yourself steps, or you can hire a professional.
But fear not; our comprehensive guide will equip you for success regardless of your chosen approach!
Now, let’s delve into the step-by-step process of creating a single page within your WordPress website.
Here’s where your theme selection (as discussed earlier) becomes crucial, as it will influence your page’s overall design and layout possibilities.
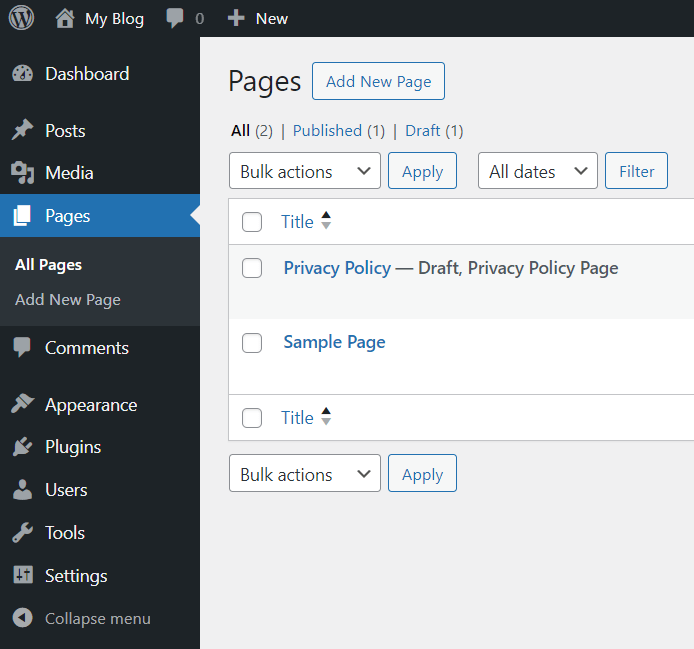
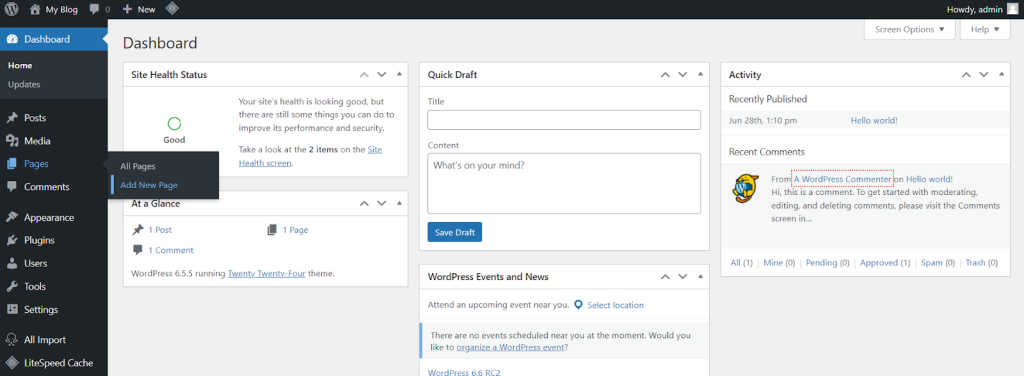
Within your WordPress dashboard, navigate to the “Pages” section and click “Add New” to begin crafting your page.
The next screen shows the default WordPress page editor, Gutenberg. This editor includes a selection of pre-built templates to help you jumpstart your web page creation.
For this demonstration of creating a WordPress page, we’ll use the default theme that comes pre-installed with WordPress, the Twenty Twenty-Four theme.
Let’s choose the first available page template.
On the next screen, we’ll see the template’s basic structure, which we can customize by adding elements like images, headings, and text.
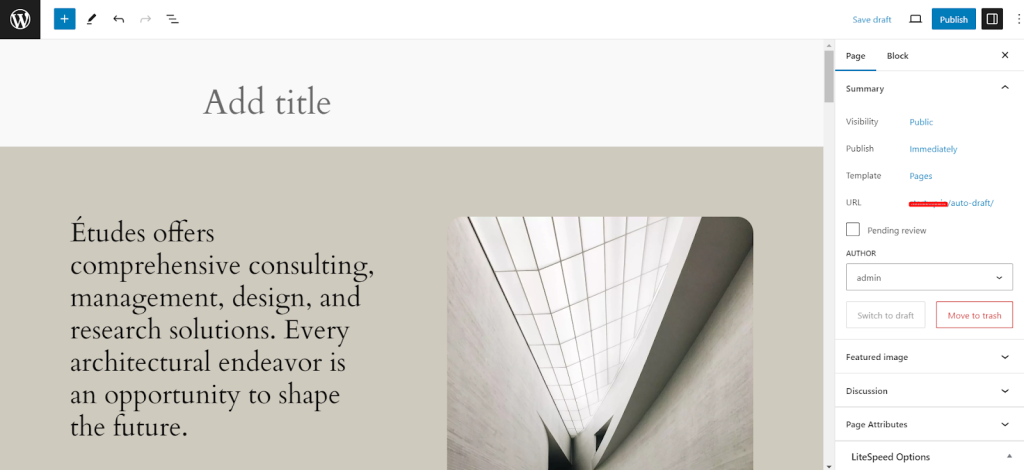
As you can see, the WordPress editor offers a user-friendly interface that will likely feel familiar to you as a HubSpot user.
Like in HubSpot, you can easily add a title, set a featured image, and manage the page status (draft or publish) – all within this intuitive editor.
This consistency makes transitioning from HubSpot to WordPress a smoother experience.
4. Matching the HubSpot Page Design
Migrating your website presents a golden opportunity to revamp your online presence! Consider this a chance to improve your user experience with a fresh, user-friendly design.
You can optimize your pages by removing unnecessary elements and incorporating new ones to enhance functionality and aesthetics.
However, we understand that replicating your existing HubSpot design might be your initial goal for this guide. Let’s explore how to achieve that.
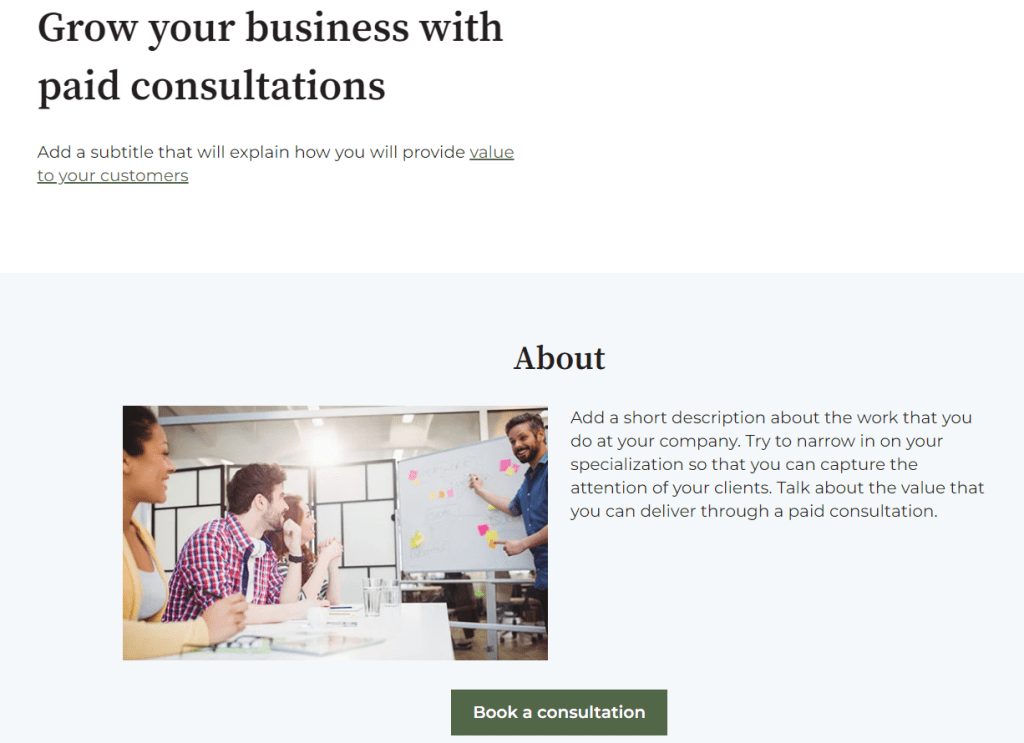
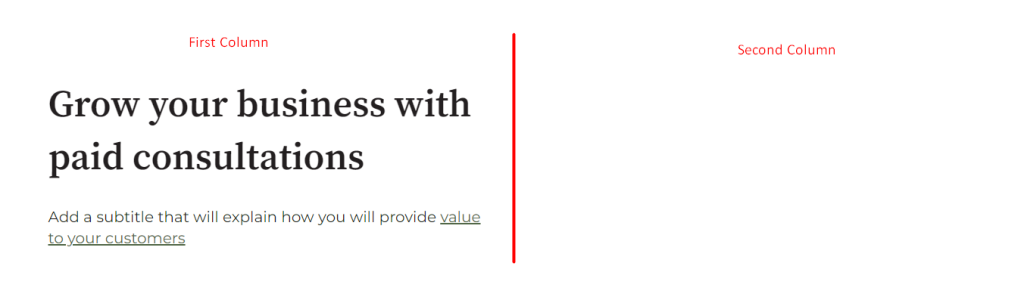
Here’s the HubSpot page design we will replicate on a WordPress page.
Before diving into customization, let’s explore some essential features within the WordPress editor that will make your process smoother.
Document Overview: Your Page’s Layout
WordPress’s “document overview” section is a navigator for your page, providing a hierarchical view of all the elements used to build your page. These page elements are called “Blocks” in WordPress’ default editor.
Think of it as a blueprint for your page’s structure.
Here’s how it simplifies content creation:
- Visualizing Hierarchy: Whenever you select an element on your main editing screen, the corresponding element (block) will be automatically highlighted within the “document overview” section.
- Quick Navigation: Similarly, clicking on an element within the “document overview” will instantly jump you to its location on the main editing screen. This eliminates the need to scroll through your content to locate specific elements.
Utilizing the “document overview” feature lets you quickly navigate, manage, and customize your WordPress page elements.

Building with Blocks: The Heart of WordPress Editing
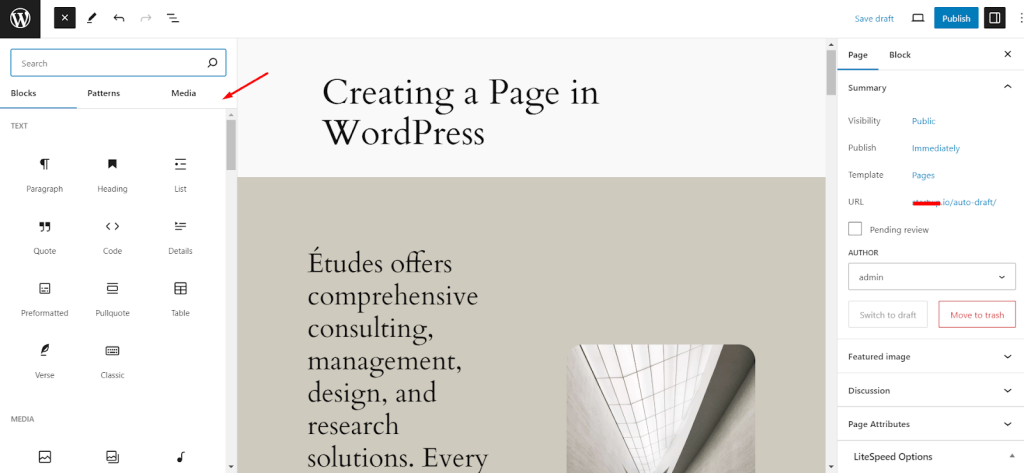
The little blue “+” button in the top-left corner of the WordPress editor is your gateway to a world of creative possibilities.
This section, known as the “block inserter,” holds the key to adding all the blocks you need to build your web pages.
Blocks: From simple text paragraphs to headings, images, buttons, and more, the block inserter offers a vast library of options to suit your content needs.
Simply click on the desired block to add it to your page.
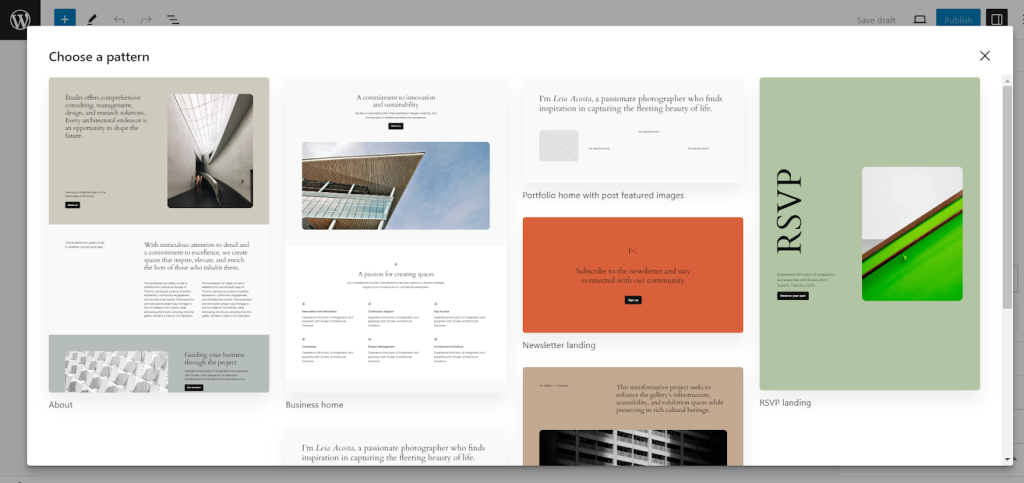
Patterns: Think of these patterns as pre-designed layouts combining various blocks to create specific page sections.
They offer a great starting point, especially if you’re looking for inspiration or a quick way to build common page elements.
Media: An additional perk within the media section is integrating with Openverse, a free stock image library.
This makes it convenient to find high-quality images for your website without leaving the page.
By mastering the block inserter, patterns, media section, and Openverse integration, you can add engaging and visually appealing content to your WordPress pages.
Now that you’re familiar with the essential tools in the WordPress editor, let’s use them!
We’ll begin by replicating the first two-fold design of our HubSpot page on this blank WordPress page.
First Fold
1. The first fold of our HubSpot page features a two-column layout.
The left column contains a heading and a paragraph, while the right column remains empty.
We’re well on our way since the chosen pattern already includes a “Columns” block with two internal columns.
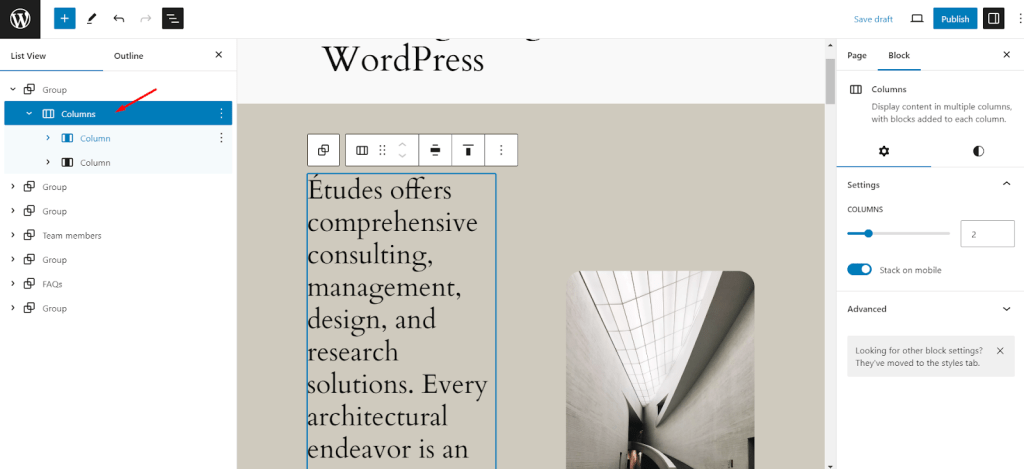
Before adding new blocks, ensure a clean slate in our first column by removing any unnecessary blocks. Now, with a clean column, it’s time to add the missing block to match our HubSpot page.
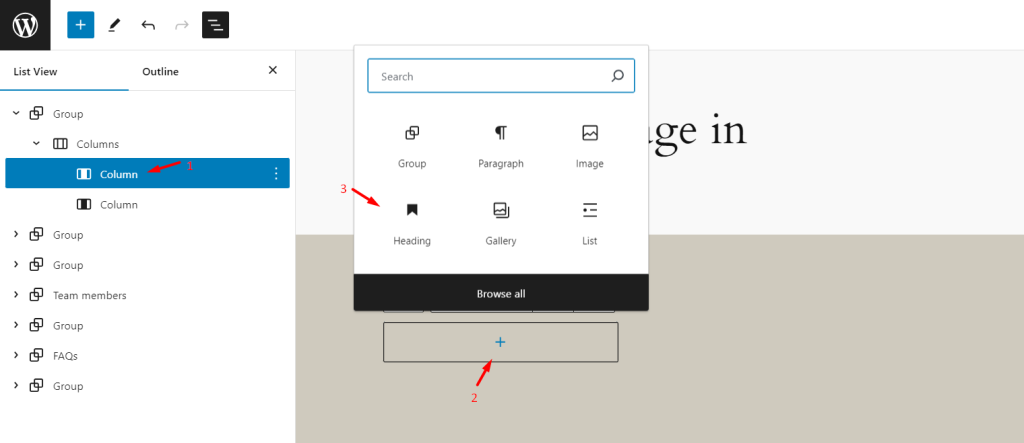
2. Add a Heading block
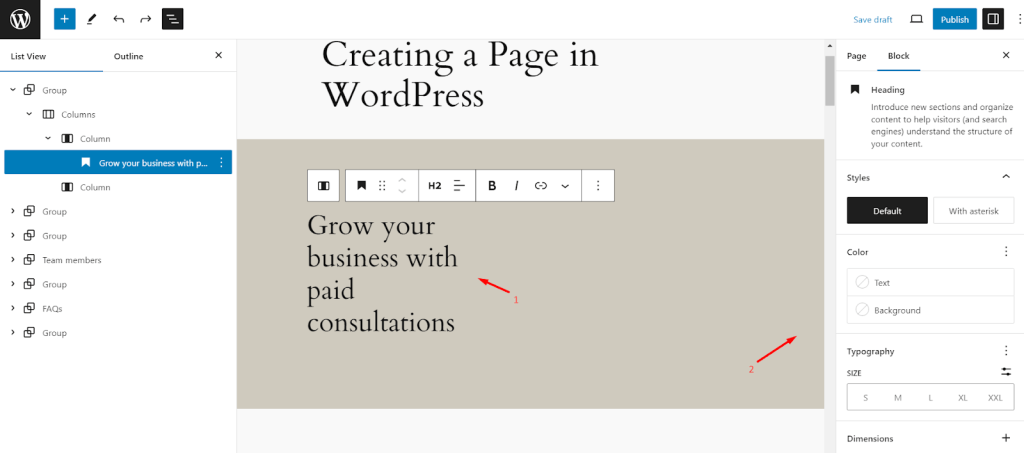
Select the first column and click the “+” icon. Then, click on the “Heading” block to insert it, and type in the heading text to match our HubSpot design.
After placing the heading, we have various customization options for the heading block.
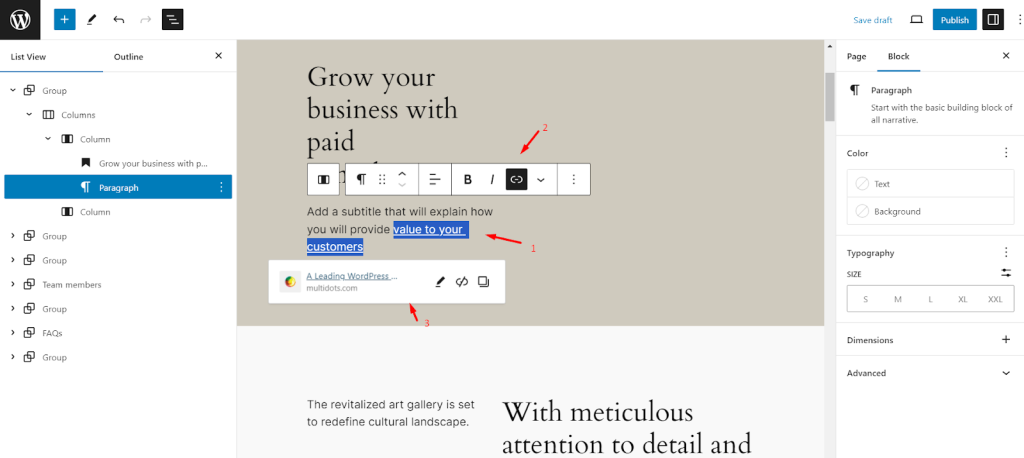
3. Add a Paragraph block
To add a paragraph right below the heading block, just click the three dots (…) on the heading block and choose “Add After.”
This will insert a new paragraph block directly underneath.
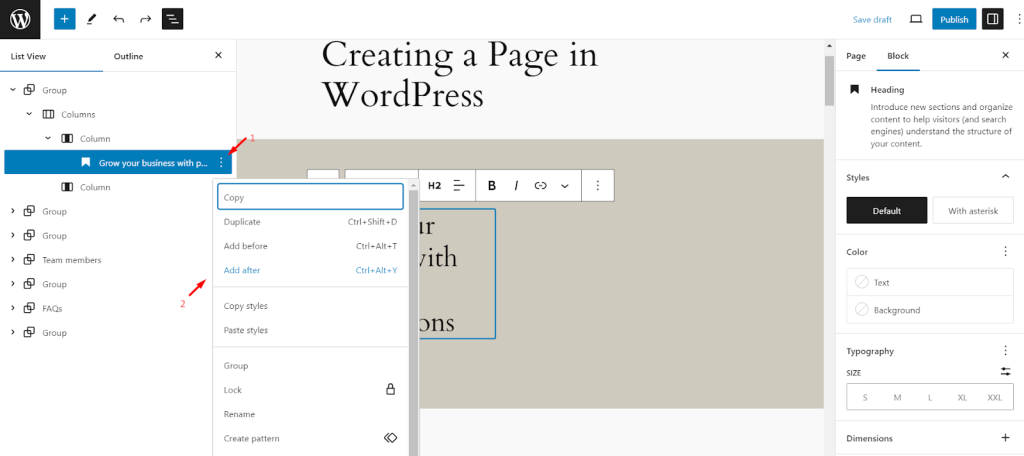
After adding the paragraph, we also added a link to the text, like on the HubSpot page.
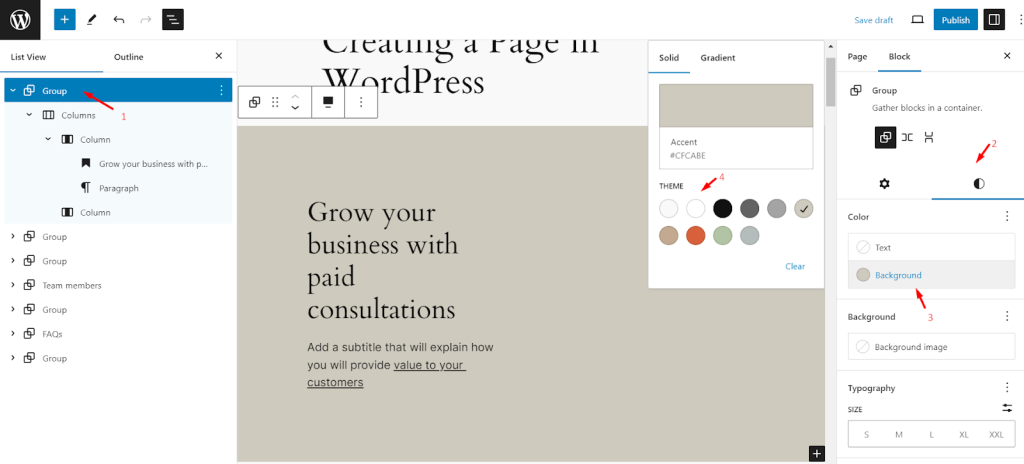
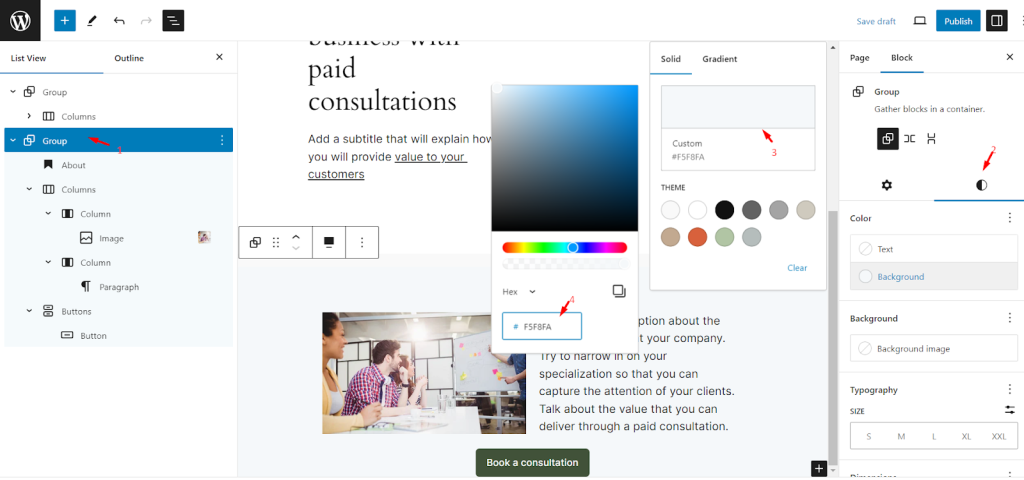
4. Change background color
To complete the first fold and match our HubSpot design, let’s change the background color to white.
Simply select the “Group” block on the left side (it likely represents your entire first fold content).
Then, navigate to “Styles” and choose “Background.” Set the background color to white to achieve that clean look from the HubSpot page.
We’ve successfully replicated the first fold of our HubSpot page, with the heading and paragraph in the left and right columns remaining blank.
Second Fold
Let’s move on to replicating the second fold from our HubSpot page.
Here’s what it includes and how to replicate it:
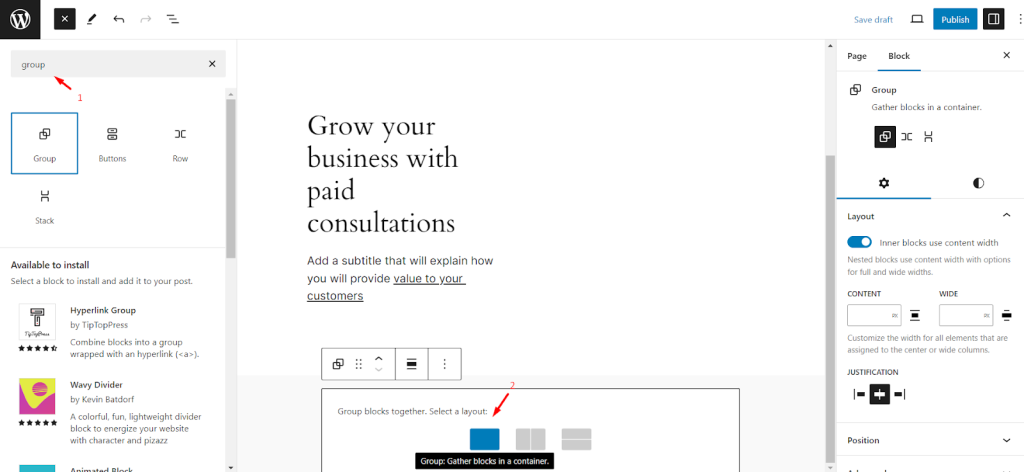
1. Add a Group block
We’ll add a “Group” block to achieve this layout. Then, we’ll add the individual blocks (heading, columns, button, etc.) within that group.
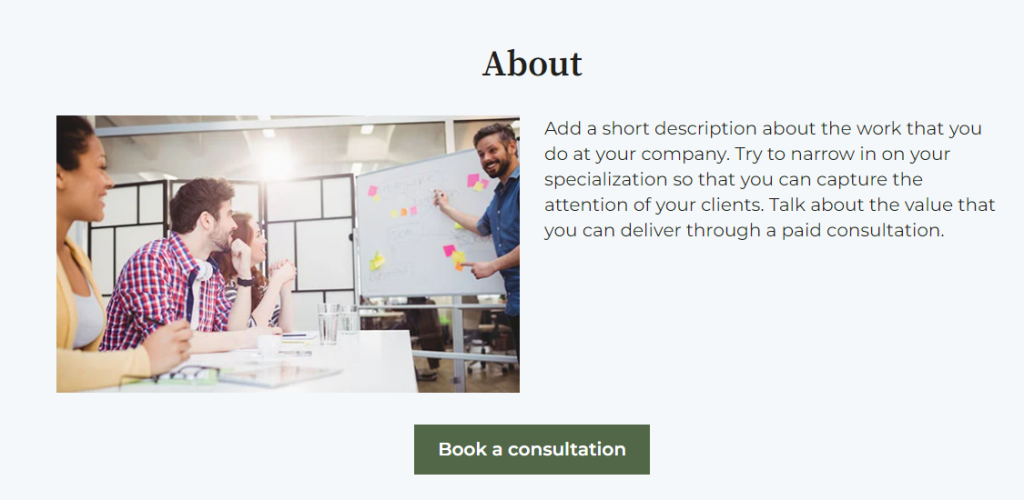
2. A heading with the text “About”
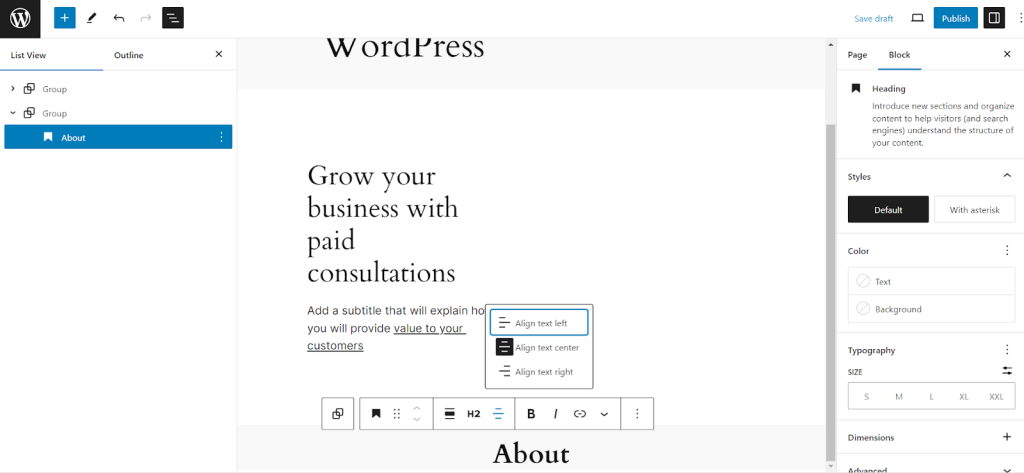
With the “Group” block added, let’s begin by replicating the heading from the HubSpot page.
Click the “+” icon and choose the “Heading” block. Enter the text “About” and center-align it to match our HubSpot layout.
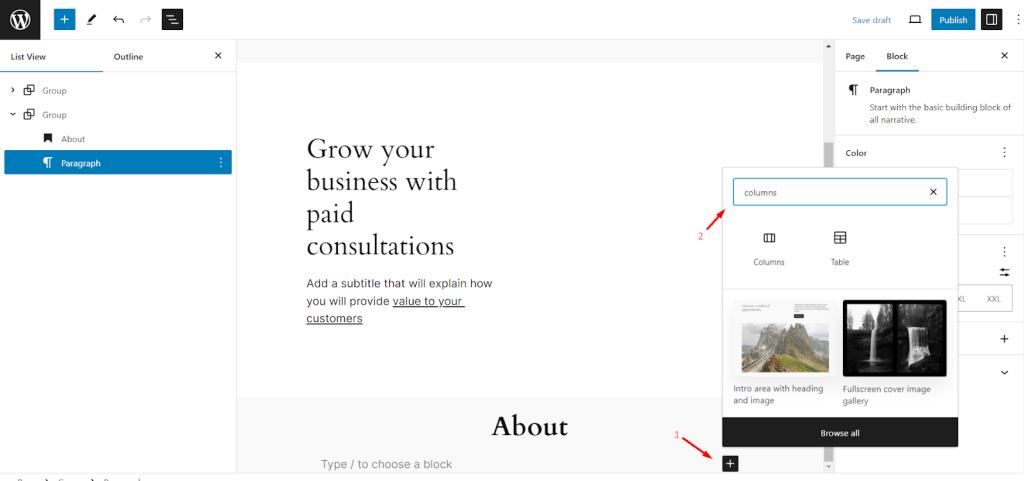
3. Replicate the two-column layout
Next, we need to replicate the two-column layout.
Click the “+” icon below the heading block and insert a new “Columns” block. To match the design, choose the option with two columns.
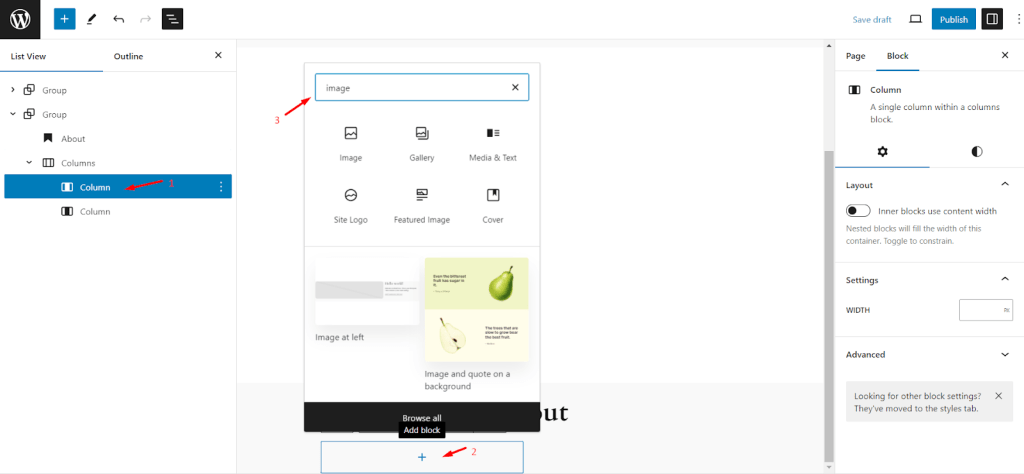
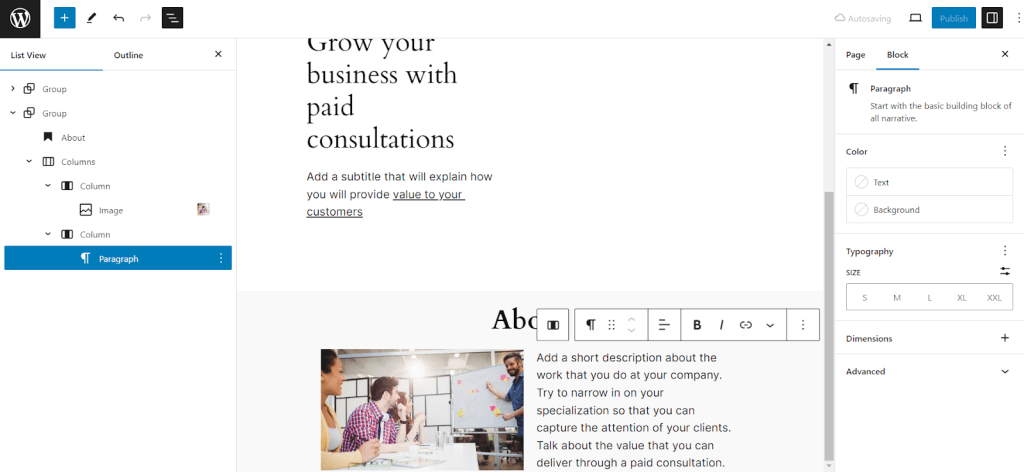
Once the two-column block has been added, let’s focus on the left column first. Click the “+” icon within the left column and choose the “Image” block.
Then, upload the image to match the HubSpot design.
Add a paragraph block and HubSpot’s text in the right column.
4. A call-to-action (CTA) button
Since the CTA button sits outside the columns in our HubSpot design, click the three dots (…) on the “Columns” block and choose “Add After.”
This will add a new block outside the columns, within the main “Group” block.
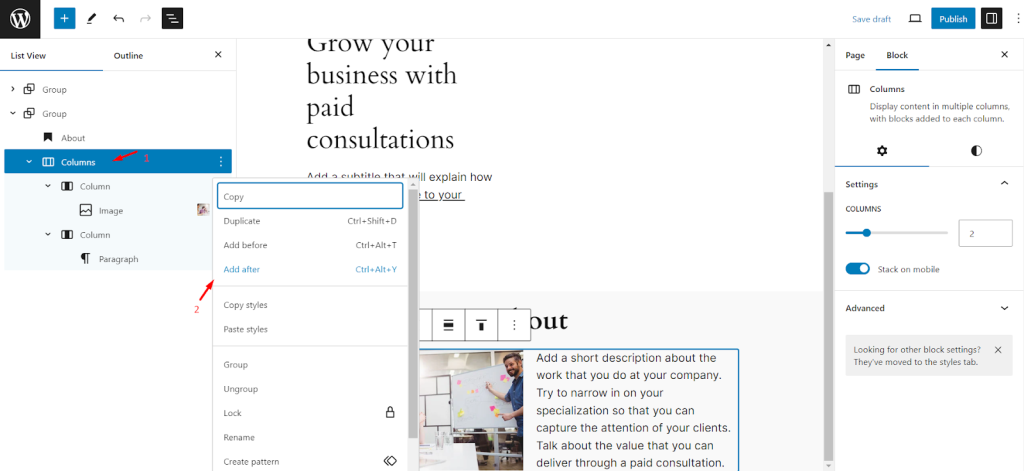
Now, select the “Buttons” block.
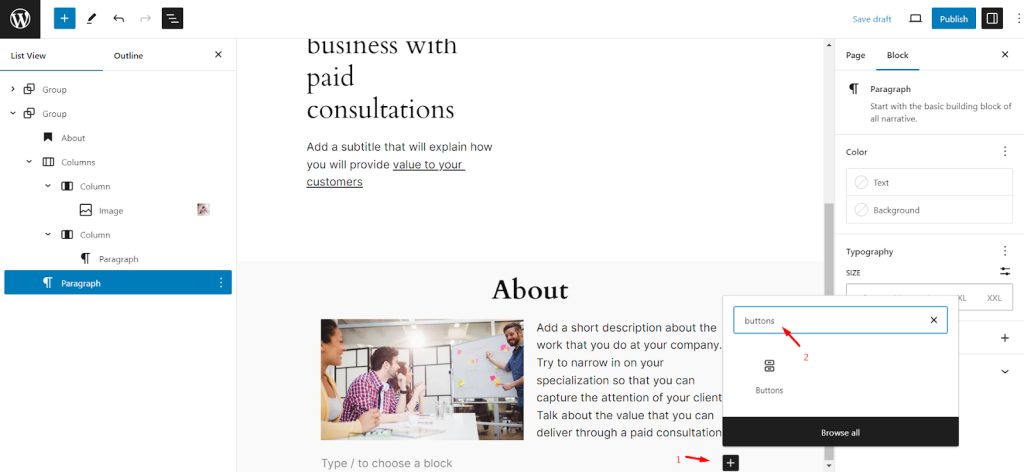
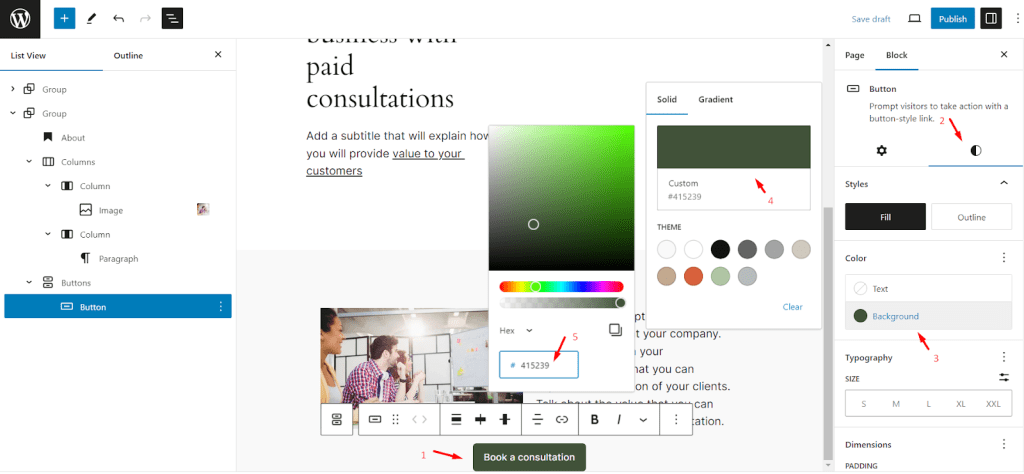
Now that we have a button block outside the columns, let’s create the CTA button.
Enter the desired call-to-action text, center-align it for visual appeal, and adjust the button’s background color using the “Styles” tab.
This will replicate the look and feel of the HubSpot button.
5. Change background color
Let’s address the background color to complete the second fold and match our HubSpot design.
Select the “Group” block and navigate to the “Styles”. Choose the same background color to achieve the final visual consistency with the HubSpot page.
Hurrah! We have successfully migrated some sections from our HubSpot page to the WordPress page.
This walkthrough demonstrated the basic steps of creating a page in WordPress and, more importantly, how you can easily replicate or even enhance the design you had on your HubSpot page.
By utilizing the block editor and its various customization options, you can achieve a visually consistent website and build any page design you want.
Built-in Blocks in WordPress
There’s a huge list of built-in blocks in WordPress ranging from:
- Text Blocks
- Media Blocks
- Design Blocks
- Widgets Blocks
- Theme Blocks
- Embed Blocks
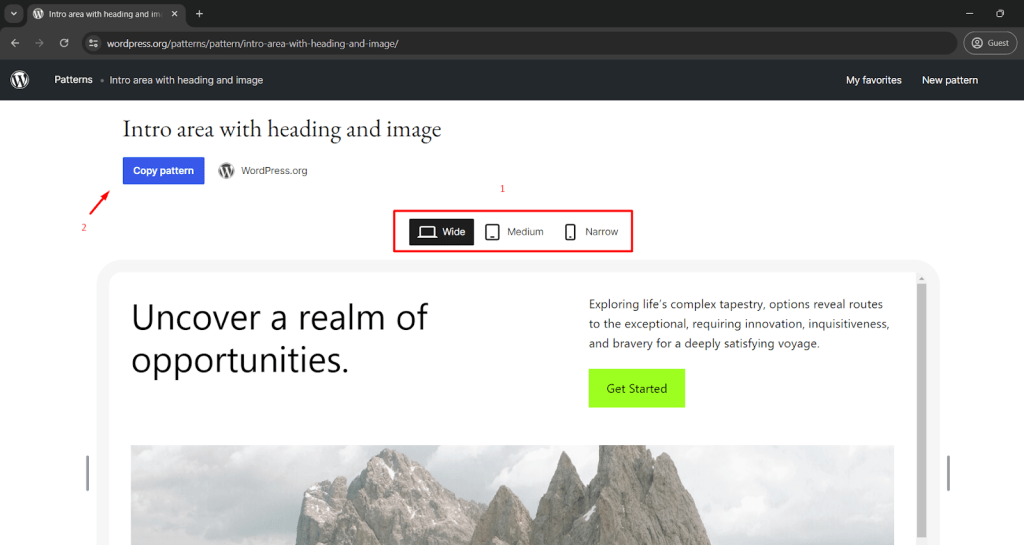
Pre-built Patterns in WordPress
In addition to the built-in blocks, WordPress offers a constantly expanding library of pre-designed patterns.
These patterns act as shortcuts, allowing you to build specific sections of your page with minimal effort quickly.
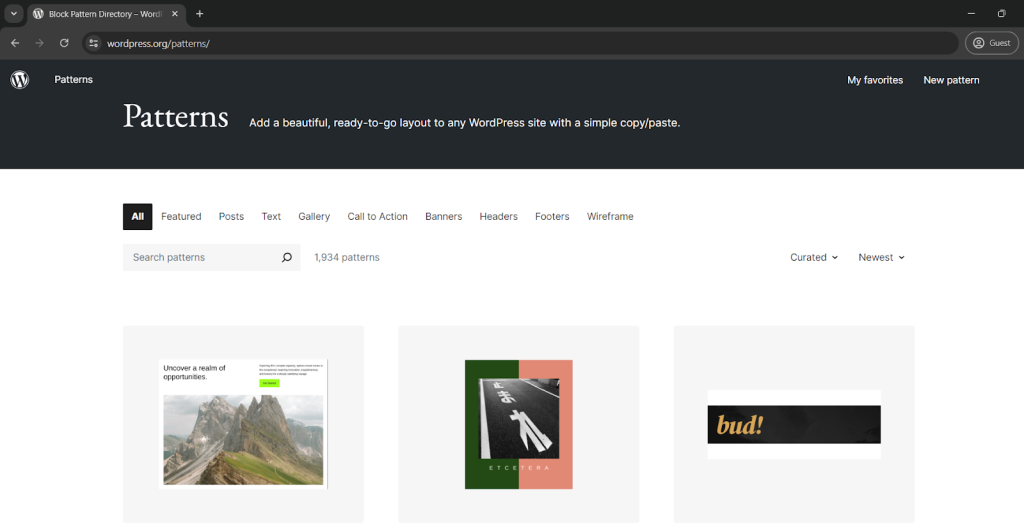
The beauty of patterns lies in their easy integration.
Once you find a pattern that closely resembles the section you want to create, simply copy/paste it directly into your WordPress page editor.
5. Recreating HubSpot Forms, CTAs, and Setting up SEO
While text and images form the foundation of engaging web pages (as discussed earlier), they often work with two other essential elements: Calls to Action (CTA) and forms.
- CTAs: These are clear prompts that encourage visitors to take a specific action, like subscribing to your newsletter, downloading an ebook, or making a purchase.
- Forms: Forms capture user information, allowing visitors to sign up for something, submit feedback, or request a quote.
You can easily import HubSpot forms, as explained in our HubSpot to WordPress migration guide, or recreate the forms and CTAs from your HubSpot pages within your new WordPress website.
Here’s a breakdown:
CTAs (Calls to Action)
- The “Buttons” Block: The built-in “Buttons” block within the WordPress editor allows you to create attractive and functional buttons for your CTAs easily. You can customize the button text, color, and style and even add hover effects to grab visitor attention.
- Placement and Design: Strategically place your CTAs within your webpage content, often near the end of informative sections or calls to action. Use clear and concise button text that entices visitors to take the desired action.
Forms
- Form Plugins: A vast array of powerful form creation plugins are available. We recommend checking out our guide, “Essential Plugins for HubSpot Migrants,” for some popular options.
- Choosing the Right Plugin: The best plugin depends on your specific needs. Consider factors like the types of forms you need (contact forms, registration forms, etc.) and the level of customization you desire.
SEO
- Heads up: Moving your HubSpot pages to WordPress means you’ll need to handle SEO a little differently. While HubSpot has built-in essential SEO tools, WordPress has a vast list of advanced SEO plugins to achieve better results.
- Don’t worry: Our guide, “Essential Plugins for HubSpot Migrants,” recommends some great SEO plugins for WordPress. These plugins can help you maintain your website’s search ranking after the move.
Conclusion
The decision to migrate your website pages and landing pages from HubSpot to WordPress can open doors to a world of design flexibility, control, and potentially lower costs.
This guide streamlines the process of downloading your HubSpot content, choosing a WordPress theme (if needed), and rebuilding your pages using the block editor.
Remember to optimize for SEO and performance. Use plugins to recreate functionalities and test thoroughly to improve the user experience on your new WordPress site.
Ready to take the next step? Contact us today for a personalized quote and start on your journey toward a successful migration to WordPress with Multidots.
