Designing a Unique 404 Error Page for Your WordPress Site
Learn how to create a custom 404 error page in WordPress to improve user experience, reduce bounce rates, and guide visitors to helpful content

Table of Contents
You visit a link only to see a 404 "Page Not Found" error instead of a working page.
As a website owner, there are a few things more frustrating than stumbling upon a 404 error. Your site’s visitors may experience the same frustration, potentially souring their user experience, especially if it’s their first visit to your site.
However, a thoughtfully designed custom 404 error page can transform even these frustrating scenarios into a positive experience, guiding your users on what to do next. It’s an essential part of website design and user experience, offering a silver lining to what could have been a frustrating situation.
And the best part? You can achieve this without the need for redirect plugins or coding knowledge. This article will walk you through the basics of 404 errors and how to create a custom 404 page in WordPress.
What Is an HTTP "404 Not Found" Error?
Whenever the server can’t find the resource a browser requests, it returns an HTTP 404 Not Found response. Such links are called dead, broken, or orphaned links.

Example of a 404 error page (source)
You can use various methods to track and log "404 Not Found" errors. For instance, you can use Google Analytics or WordPress error monitoring plugins.
Like most errors, you can prevent them by double-checking all your links. You can also fix most of them, but as your site grows and evolves, you’ll find that it’s almost impossible to avoid all of them. That brings us to the next section!
Why Make a Custom 404 Error Page?
As per Google, most 404 errors aren’t worth fixing because they don’t harm your site’s indexing or ranking. That may explain why Google’s 404 page is a simple 404. That’s an error. page.

Google’s 404 error page (source)
But SEO is just one part of the equation. 404 errors can also harm your site’s user experience, and you should take that seriously.
Typically, most users leave the page after coming across an error page. However, if you have a custom 404 error page pointing your users towards more relevant website sections, you can still retain them. It can help reduce your site’s bounce rate and increase user engagement.
And if you can make this page a little more humorous and fun—in moderation, without confusing your users—there’s nothing like it!
Examples of Great Custom 404 Error Pages
Below are a few examples of excellent custom 404 error pages. In later sections, we’ll show you how you can create similar custom error pages for your WordPress site.

Mozilla’s custom 404 error page (source)
Mozilla’s 404 error page is simple and to the point. It includes a helpful Go Back browser prompt and links to other important website areas.

Pixar’s custom 404 error page (source)
Pixar’s 404 error page is a humorous take on one of their famous characters. Brands with constantly updated content can stay relevant by updating their 404 pages regularly.

Amazon.com’s custom 404 error page (source)
Amazon may sell almost everything under the sun, but with such an extensive catalog, some of its product links eventually go extinct. While that may be frustrating for shoppers, Amazon uses cute dogs to cheer them up. They also add links to retain users on their site and encourage them to continue shopping. It’s an essential part of improving the checkout workflow.
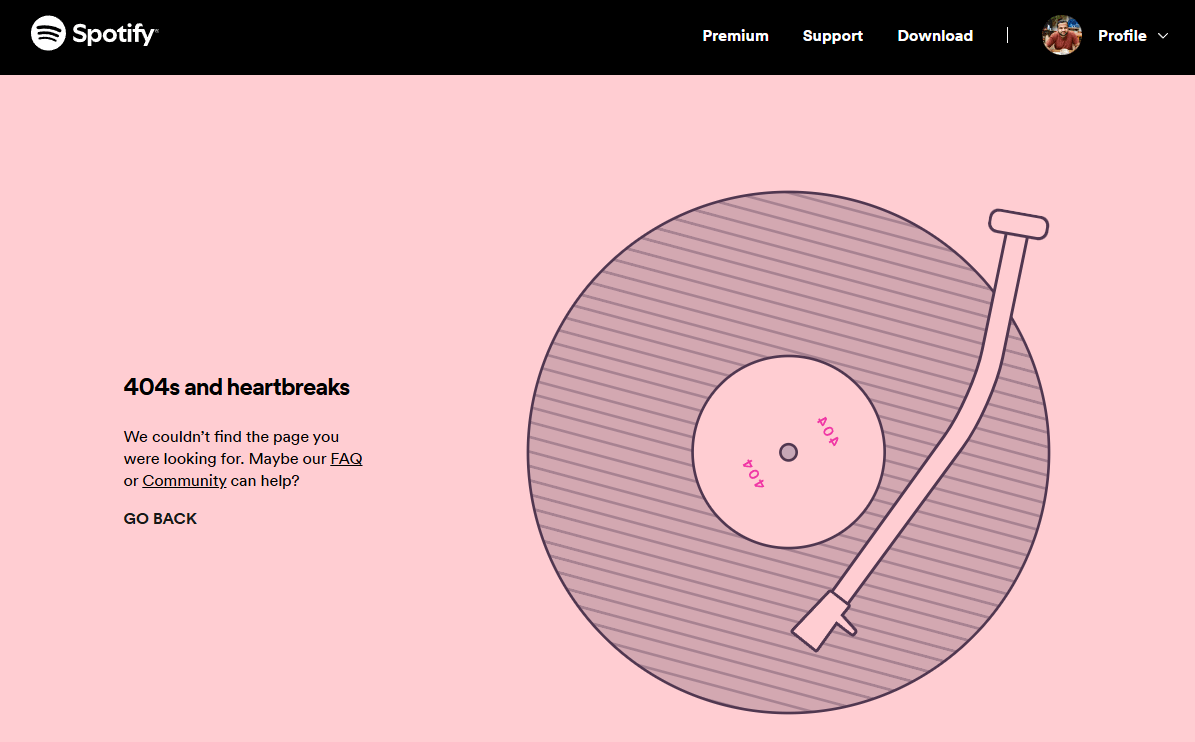
Spotify’s custom 404 error page (source)
Spotify’s 404 error page remains on-brand by referencing a popular Kanye West album. The page also includes helpful links for the user to navigate through.
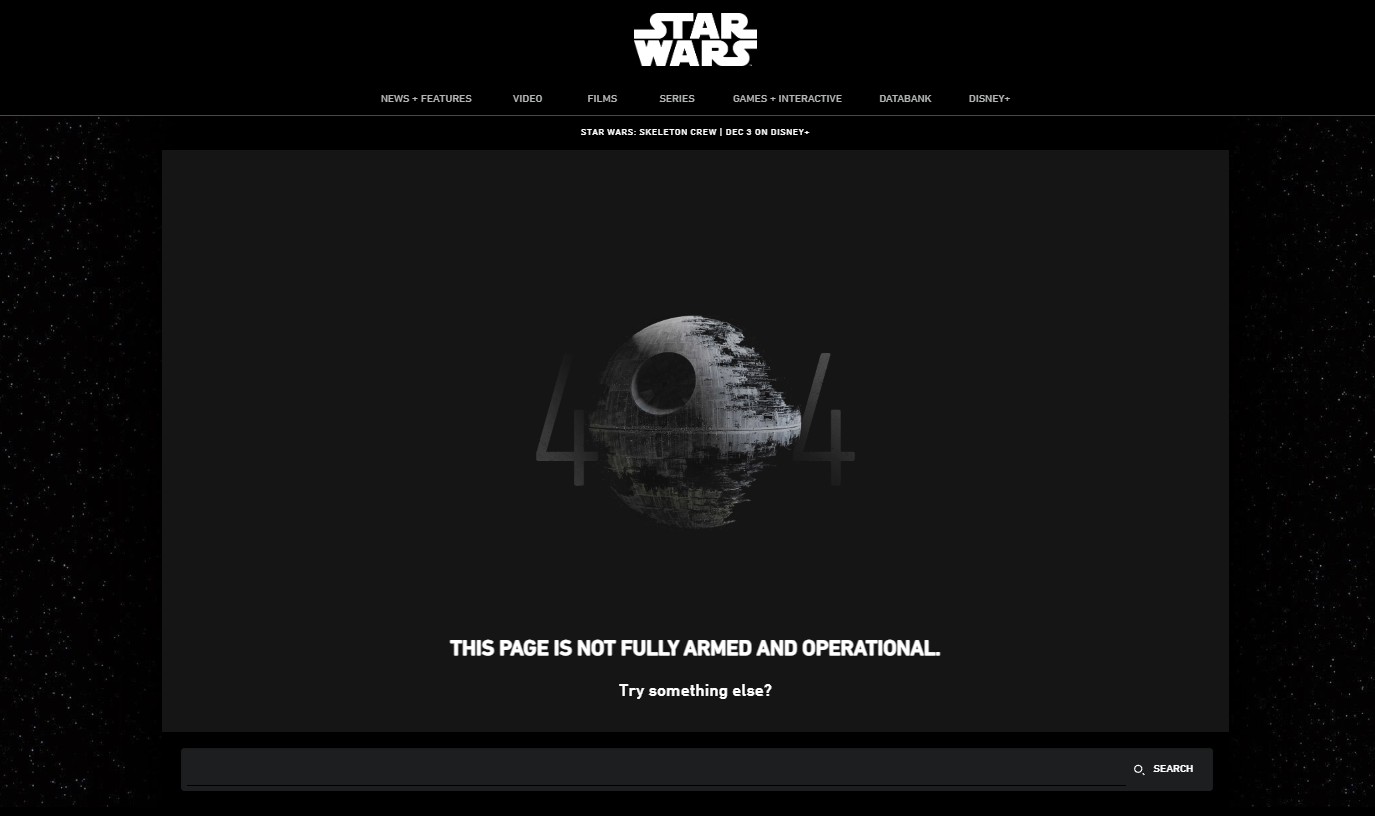
StarWars.com’s custom 404 error page (source)
The Star Wars website’s 404 error page uses its iconic Death Star weapon to drive home the point. It also includes a Try something else? link and a search bar at the bottom.
Can you see the common theme here? All these custom 404 error pages are simple, fun, branded, and functional. The following section elaborates on these points to help you better design your 404 error pages.
Tip: Want more 404 error page ideas? Go to your favorite website—or even a competitor—and mistype any of their page URLs.
Tips To Create a Good Custom 404 Error Page
The primary goal of a custom 404 page is to make it fun and engaging. Here are a few tips you can use to make that happen:
- Have a clear error message indicating that it’s a 404 "Page Not Found" error, so the user isn’t confused about why they’re on the wrong page. Make it the center focus of your page.
- Add links to important areas of your website, such as the homepage, site map, contact us, help page, and social links. You can include a section for recent and popular pages if you’re a news or blog site, or for your most popular products or categories if you’re an ecommerce store. That said, avoid unnecessary distractions if they don’t add to your site’s goals.
- Try to include a search bar, so users can immediately search for what they’re looking for.
- Keep the error page’s design and tone consistent with the rest of your website. Use a friendly tone and add engaging visual elements like custom graphics and illustrations to make the user’s experience less frustrating.
- Have an option for users to report the broken link. While you can log 404 errors and view them, having the report function is worth it.
- Don’t automatically redirect a 404 page to your homepage or any other website page. Doing this will lead to a bad user experience, as users will not know why they’re being redirected. Instead, guide them to where to go from the custom 404 error page.
How To Create a Custom 404 Page in WordPress
Now that you’ve learned what 404 error pages are, why you need them, and what they need, let’s explore how to create a custom 404 error page in WordPress. There are many ways to go about this.
1. Edit the WordPress Theme’s 404 Template
WordPress uses templates to let developers create the layout and structure for posts and pages, including 404 error pages. Hence, almost every WordPress theme, including its default themes, ships with its own template page. WordPress automatically shows this template to users when a 404 Page Not Found error occurs.
Typically, you’ll find this template under the filename 404.php or 404.html. Read the theme’s documentation to see where you can find this file.
For instance, classic WordPress themes like Twenty Twenty include a 404.php template for showing a 404 error page.
You can find this file by going to Dashboard ➡️ Appearance ➡️ Theme File Editor, and clicking the 404 Template (404.php) file under the Theme Files sidebar section.

Finding the default WordPress 404 Template
Let’s explore the above code in detail to understand its various parts.
<?php
/**
 * The template for displaying the 404 template in the Twenty Twenty theme.
 *
 * @package WordPress
 * @subpackage Twenty_Twenty
 * @since Twenty Twenty 1.0
 */

get_header();
?>

<main id="site-content">

	<div class="section-inner thin error404-content">

		<h1 class="entry-title"><?php _e( 'Page Not Found', 'twentytwenty' ); ?></h1>

		<div class="intro-text"><p><?php _e( 'The page you were looking for could not be found. It might have been removed, renamed, or did not exist in the first place.', 'twentytwenty' ); ?></p></div>

		<?php
		get_search_form(
			array(
				'aria_label' => __( '404 not found', 'twentytwenty' ),
			)
		);
		?>

	</div><!-- .section-inner -->

</main><!-- #site-content -->

<?php get_template_part( 'template-parts/footer-menus-widgets' ); ?>

<?php
get_footer();
Here’s a brief explanation of the 404 template file’s code:
- The topmost comment block between the
<?phpand?>tags is for documentation purposes. It’s optional and explains what the file is for. - The
get_header()function loads theheader.phpfile, which typically contains elements like the site logo, navigation menu, and other items. - The page’s content is wrapped between the
<main>tags, which also contain many<div>tags with relevant classes to define the structure and style of the page. - The h1 tag sets the page heading, and the
intro-textclass sets the message. - The
get_search_form()function inserts a search form into the page, letting the users quickly search for what they want on the site. - And finally, the
get_template_part()andget_footer()functions load the footer elements, which usually contain the footer menus, site credits, copyright information, etc.
The default 404 Template includes a "Page Not Found" header, an intro text section, and a search form. This is how it looks by default:
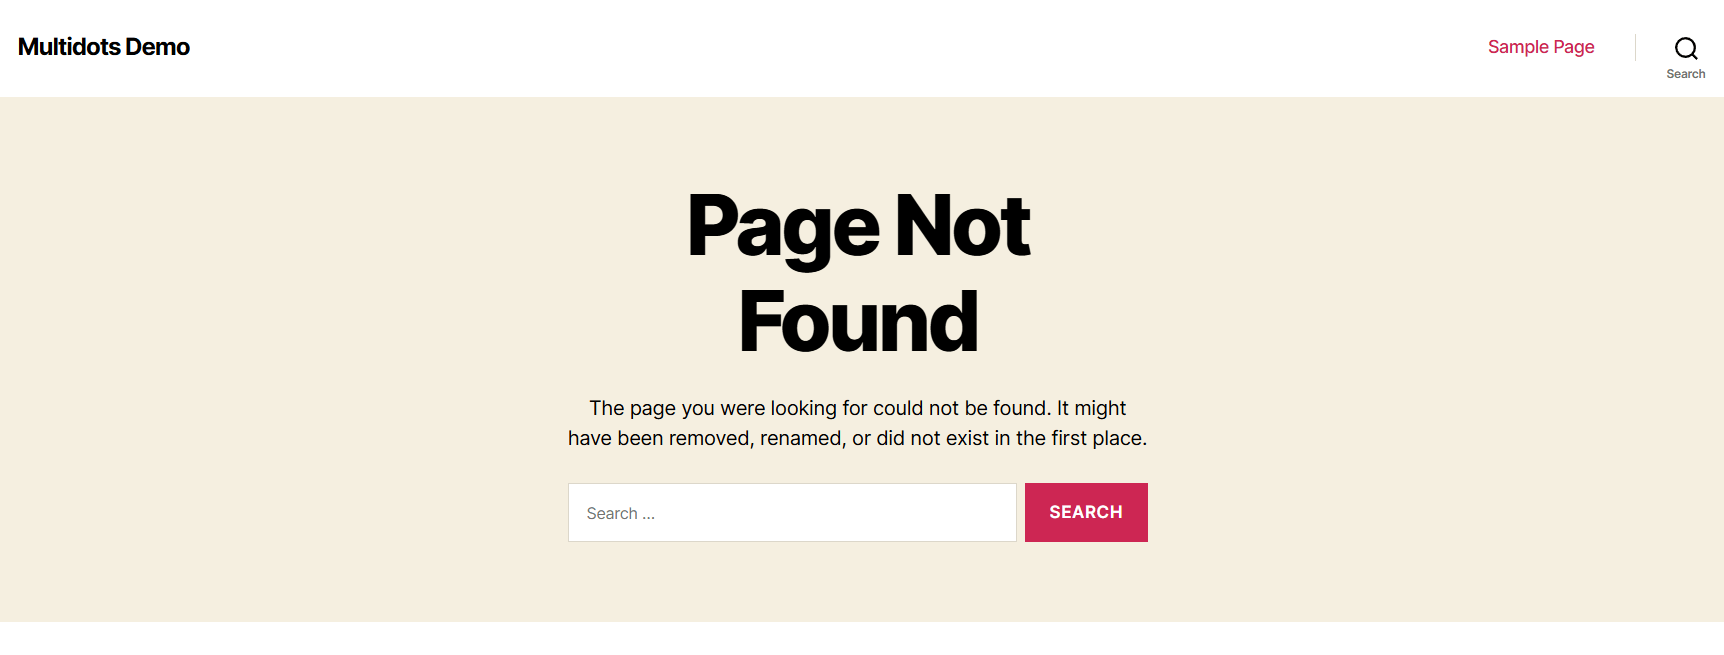
The default 404 page template for the Twenty Twenty theme
You can personalize this template by modifying its PHP code to add custom text, images, and other elements.
Let’s modify this template file’s header and intro text, and add an image and homepage button. Here’s the updated code:
......
<main id="site-content">

	<div class="section-inner thin error404-content">

		<h1 class="entry-title"><?php _e( 'Well, this is awkward...', 'twentytwenty' ); ?></h1>

		<div class="404-image">
            <img src="http://multidots-demo.test/wp-content/uploads/Catnapping.png?quality=90" alt="<?php esc_html_e( 'Catnapping', 'twentytwenty' ); ?>">
        </div>

		<div class="intro-text"><p><?php _e( "You've reached a 404 error page. Where's the page you're looking for? Maybe it's hiding? Or taking a nap? Either way, let's get you back on track!", 'twentytwenty' ); ?></p></div>

		 <div class="404-links">
            <a href="<?php echo esc_url( home_url( '/' ) ); ?>" class="button">
                <?php esc_html_e( "Let's Go Home", 'twentytwenty' ); ?>
            </a>
        </div>
</main>
......
Notice the new <div> tags with 404-image and 404-links classes, which add an image and button to the homepage, respectively.
After making the above changes, hit the Update File button to save your modified 404 template. You can test the changes by intentionally mistyping any of your site’s URLs. The new 404 error page will be as shown below.
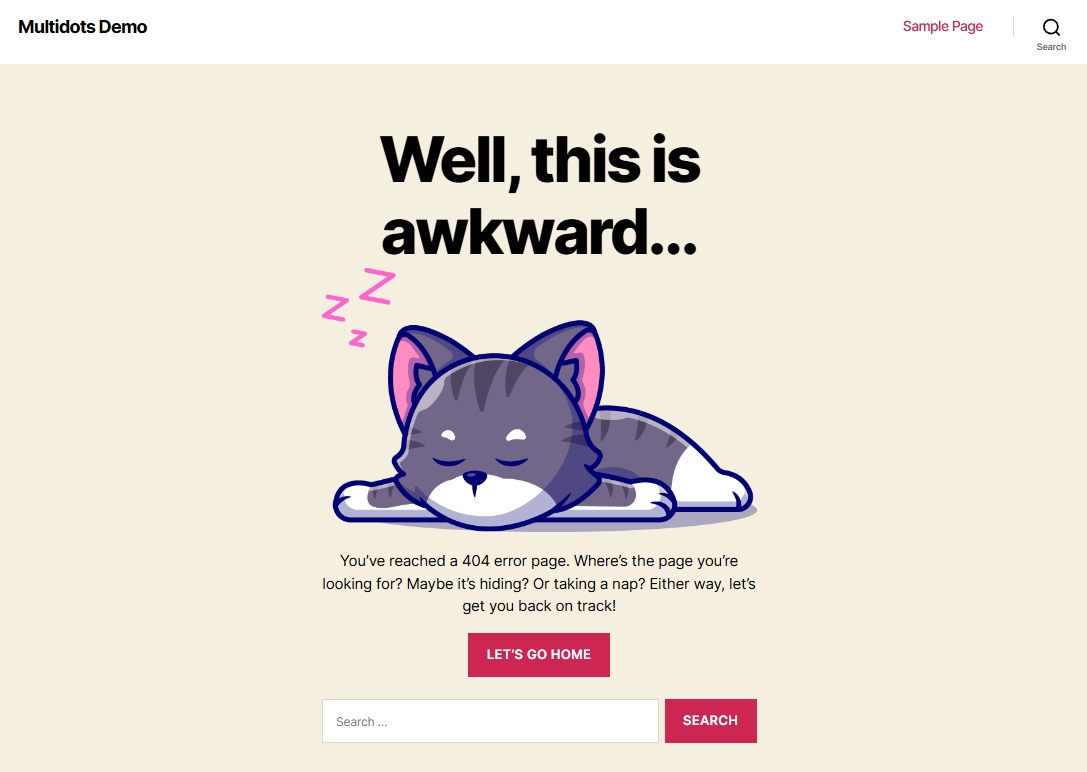
The modified 404 error page
With basic HTML, PHP, and CSS skills, you can customize this page further to be more creative, have more features, and better reflect your brand’s identity.
2. Use WordPress Template Editor with a Block Theme
WordPress has supported Full-Site Editing since version 5.9, allowing you to make sweeping design changes across your entire website using its easy-to-use site editor. Its default theme, Twenty Twenty-Two, was WordPress's first default block theme.
Block themes—as the name suggests—use blocks to build all parts of your WordPress site, including the header, footer, navigation menus, and site content.
Notably, block themes also support Template Editor for creating and editing WordPress templates, like its 404 error page template. You can edit this template just like any other page on your website using blocks.
To use the Template Editor, you must first install a block theme. We’ll use the current default WordPress theme, Twenty Twenty-Four, which is also a block theme.
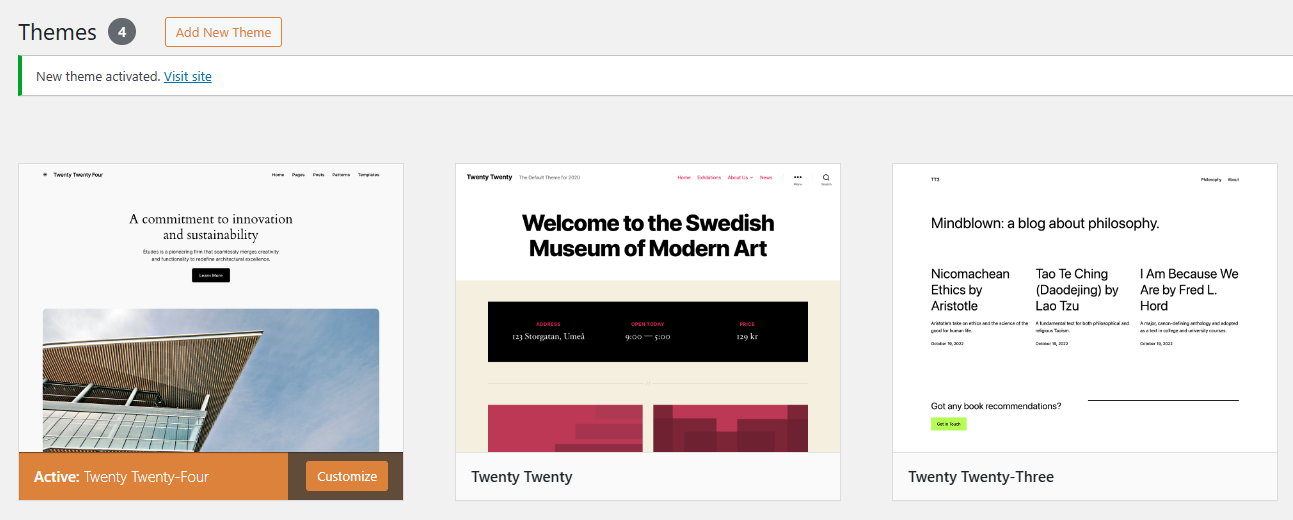
Twenty Twenty-Four, WordPress 6.6’s default block theme
Here’s how Twenty Twenty-Four’s default 404 error page looks:

Twenty Twenty-Four’s default 404 error page
Next, go to Appearance ➡️ Editor to access the Template Editor. Alternatively, click the Customize button under the Themes panel to reach the same place.
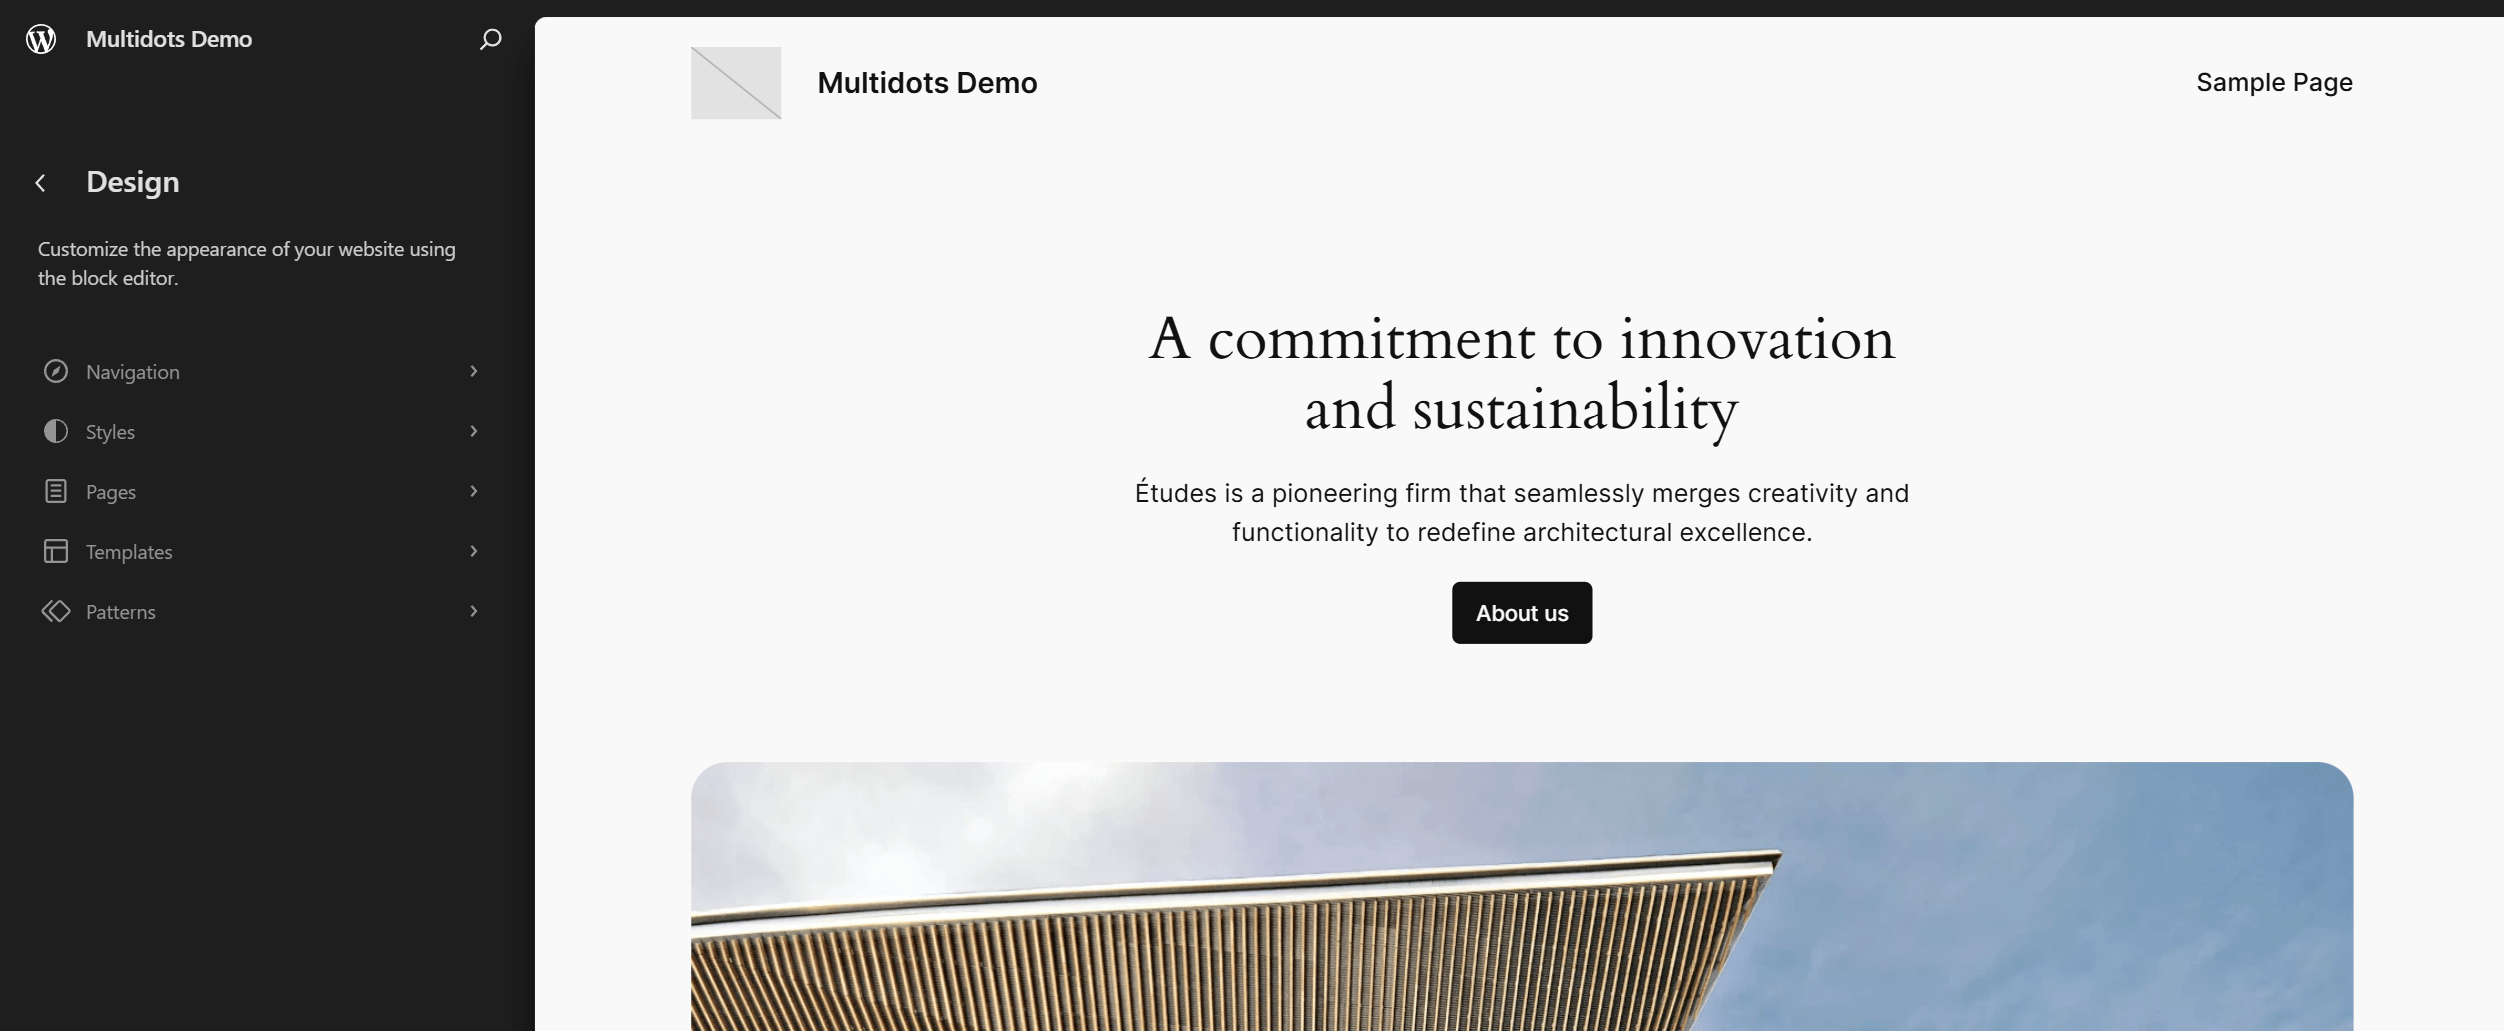
WordPress Site Editor for block themes
Now click Templates under the left Design menu to see all the theme’s available templates.
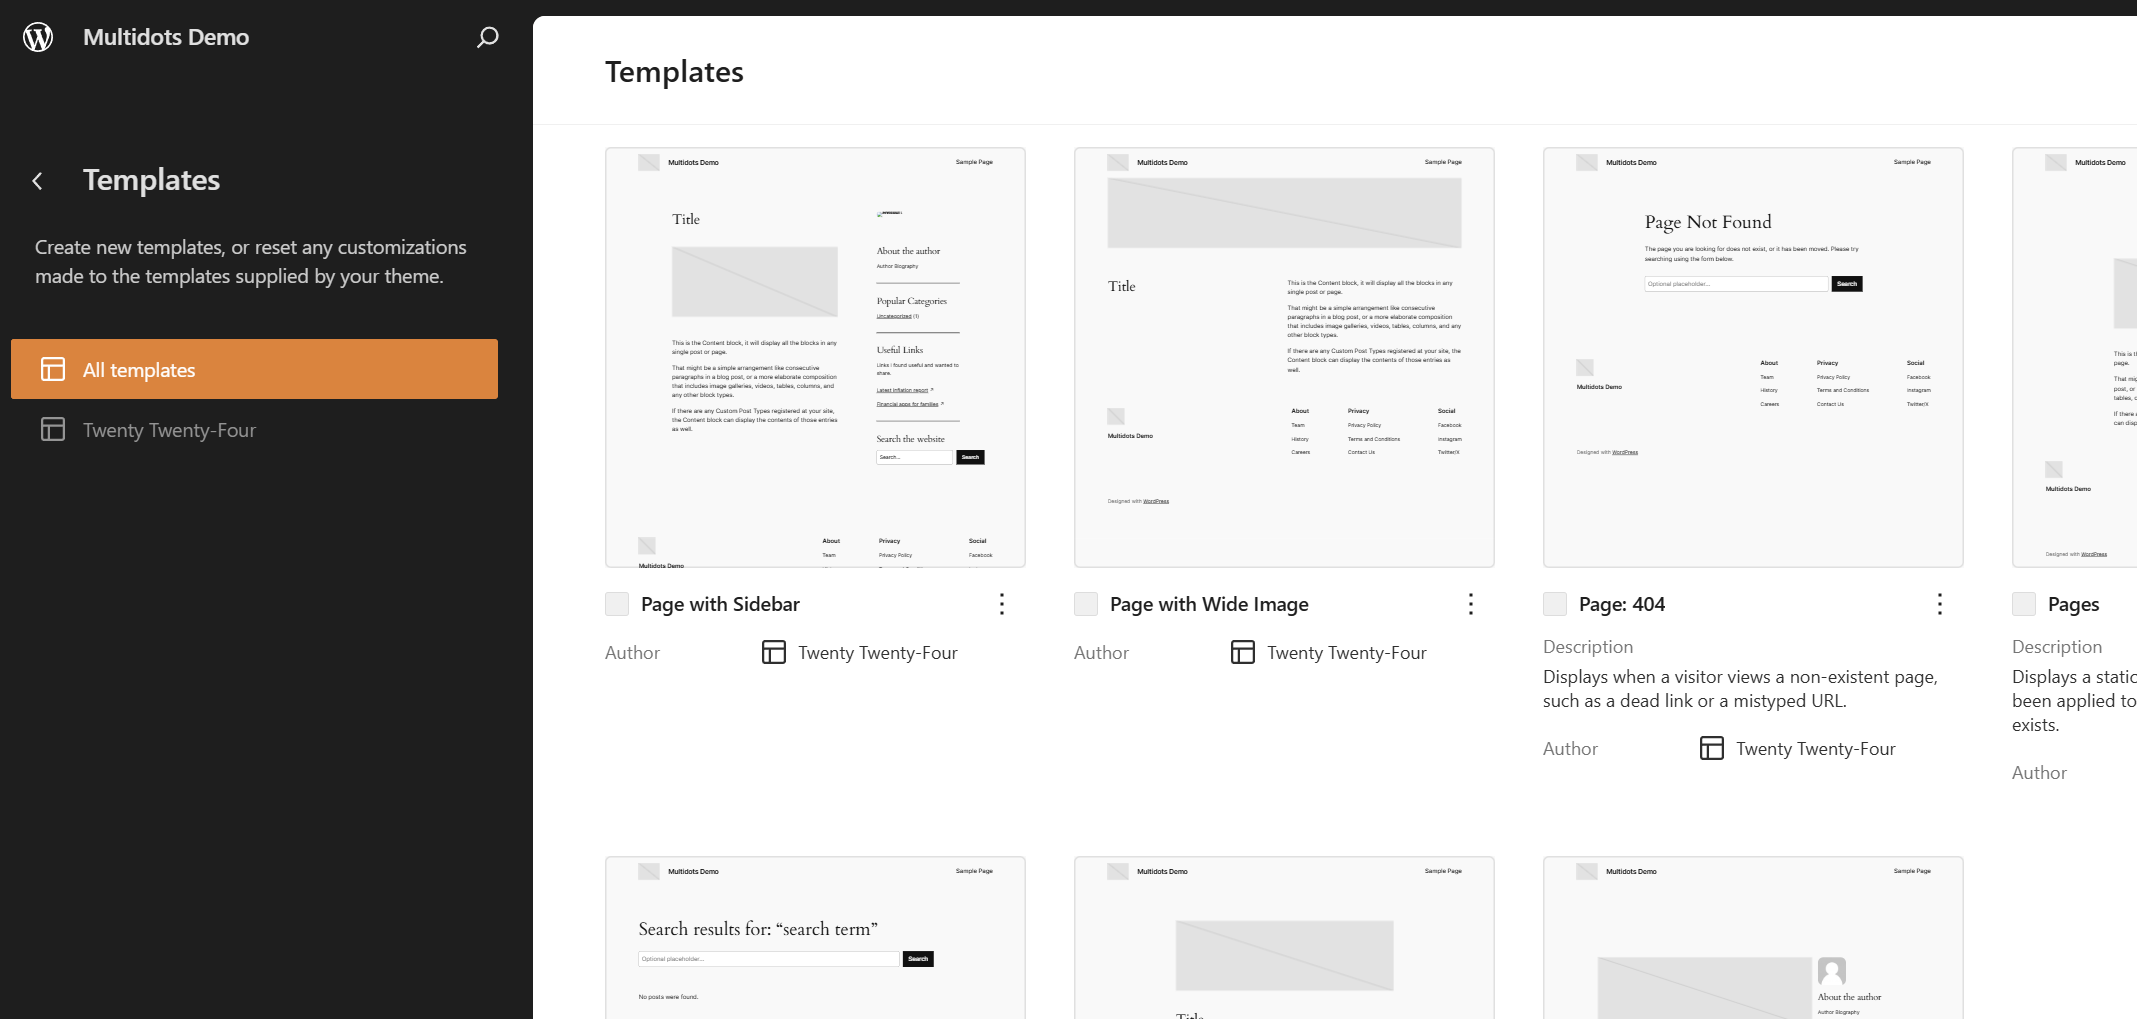
Find the "Page: 404" template
Here, you can also create a new custom template and apply it to any page or post on your WordPress site. However, we’re only interested in editing the Page: 404 template.
Click the Page:404 link to load the template in the Template Editor.
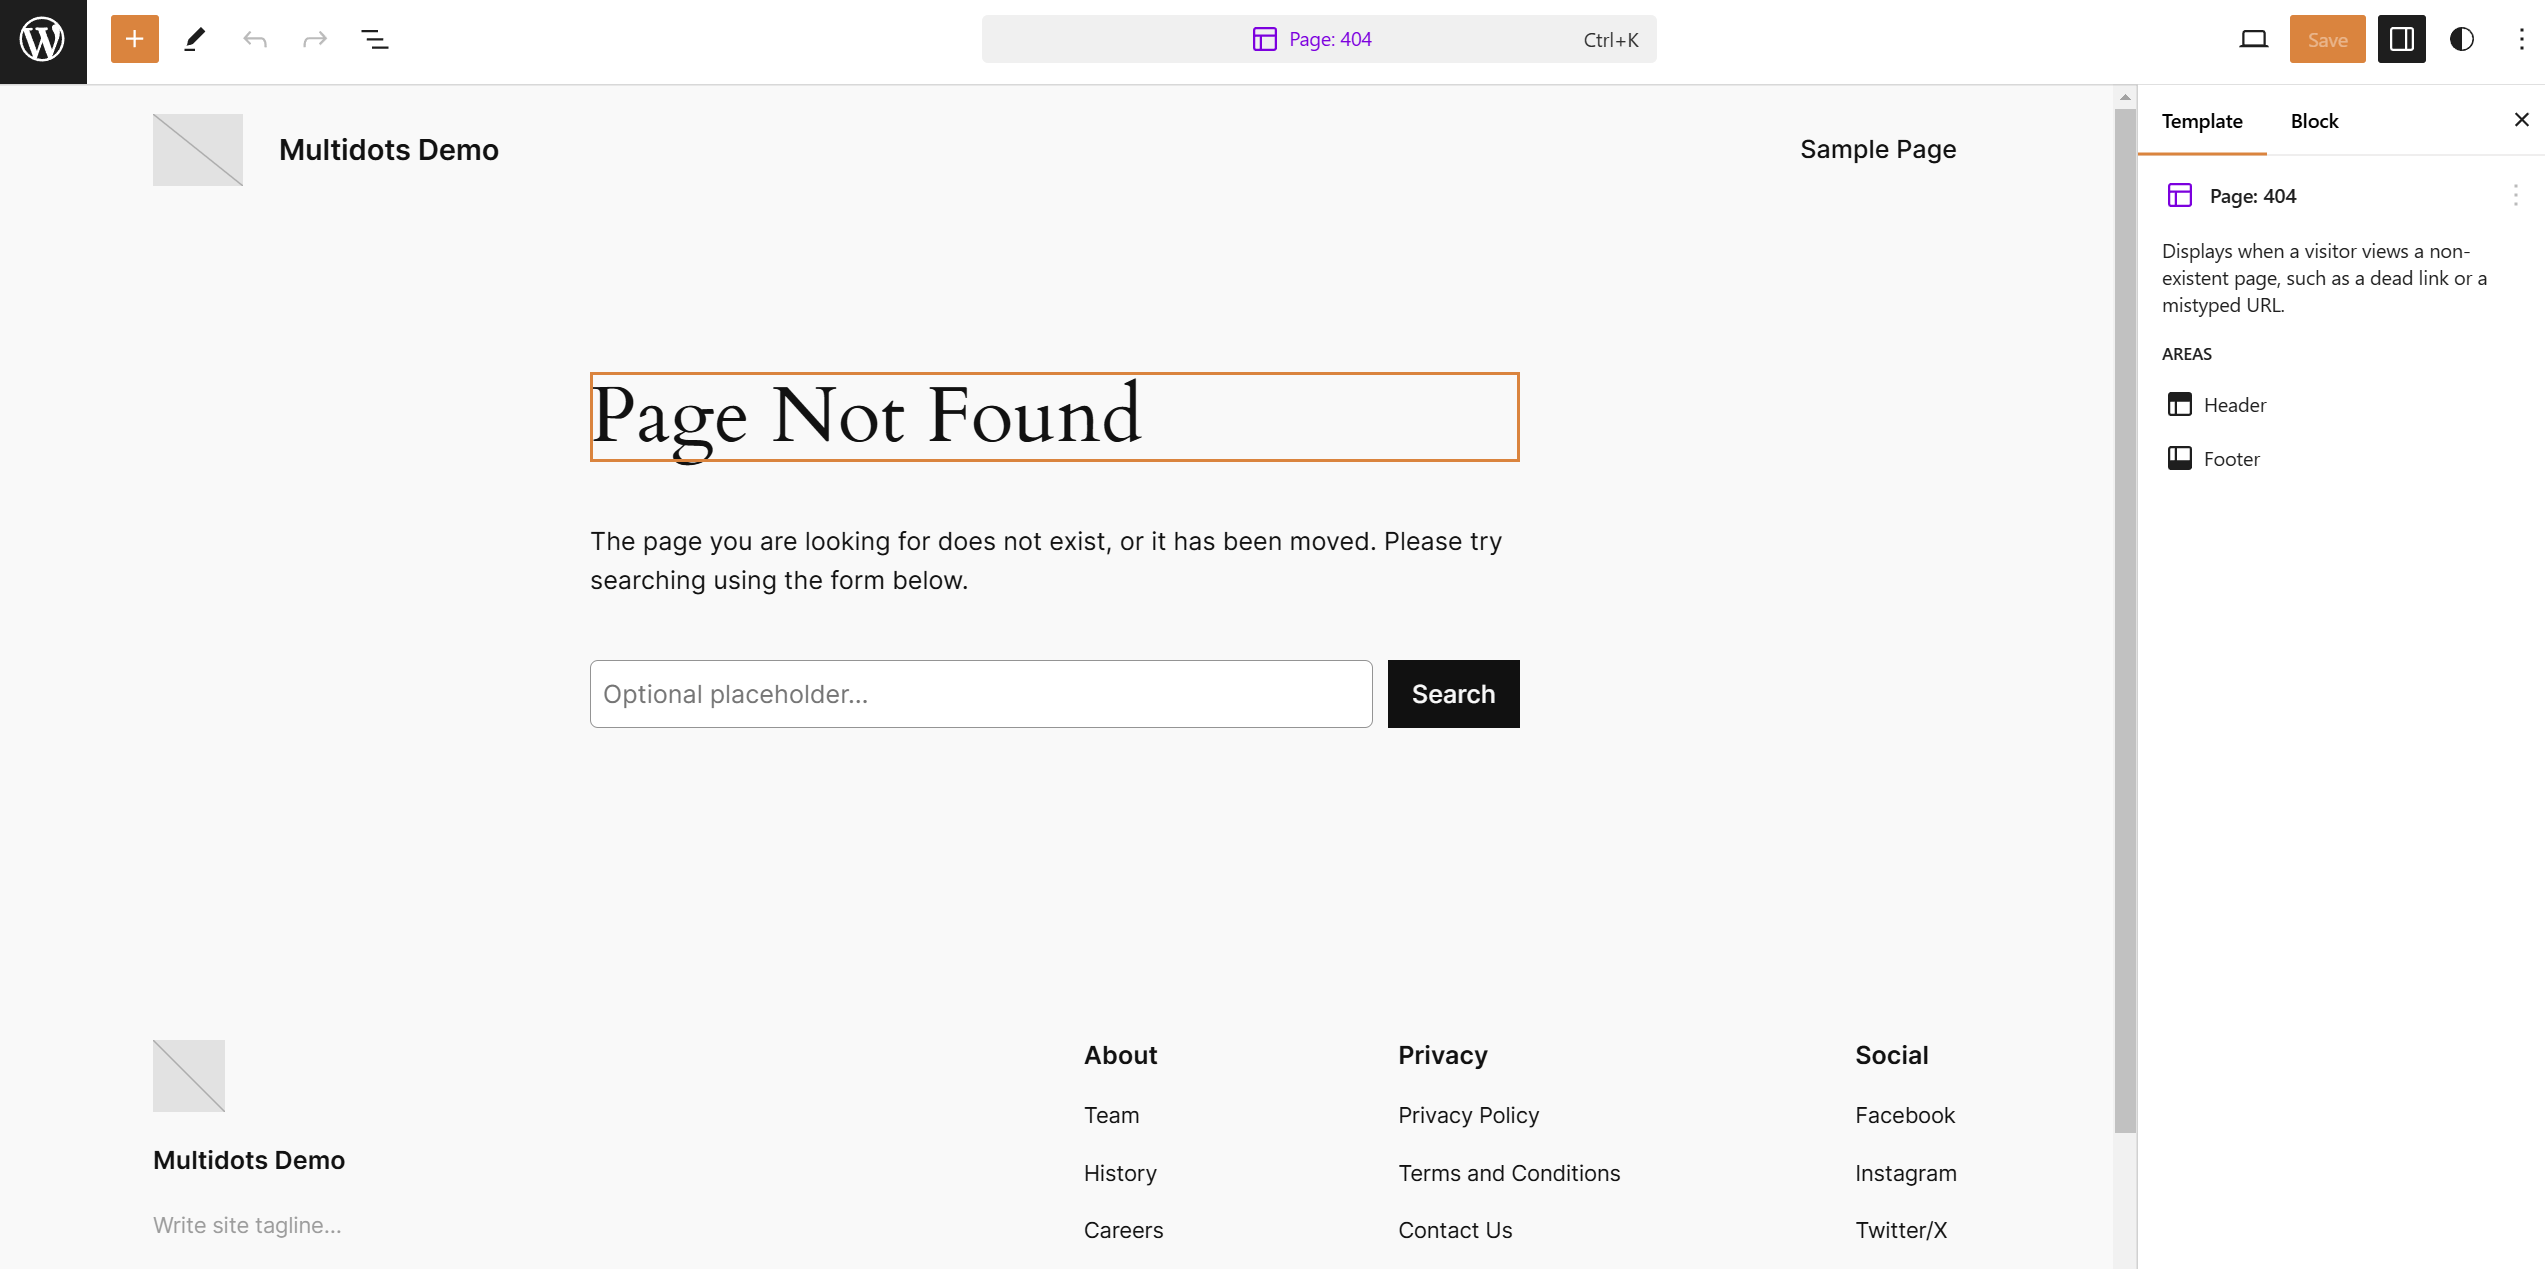
The "Page: 404" template in the Template Editor
Then click on any section of the template page on the right you want to edit. You’ll then be able to edit that block.
Here, you can edit the template blocks, add new blocks, or remove existing ones. It works similarly to how you edit pages and posts. When you’re finished editing, click Save to confirm the changes.
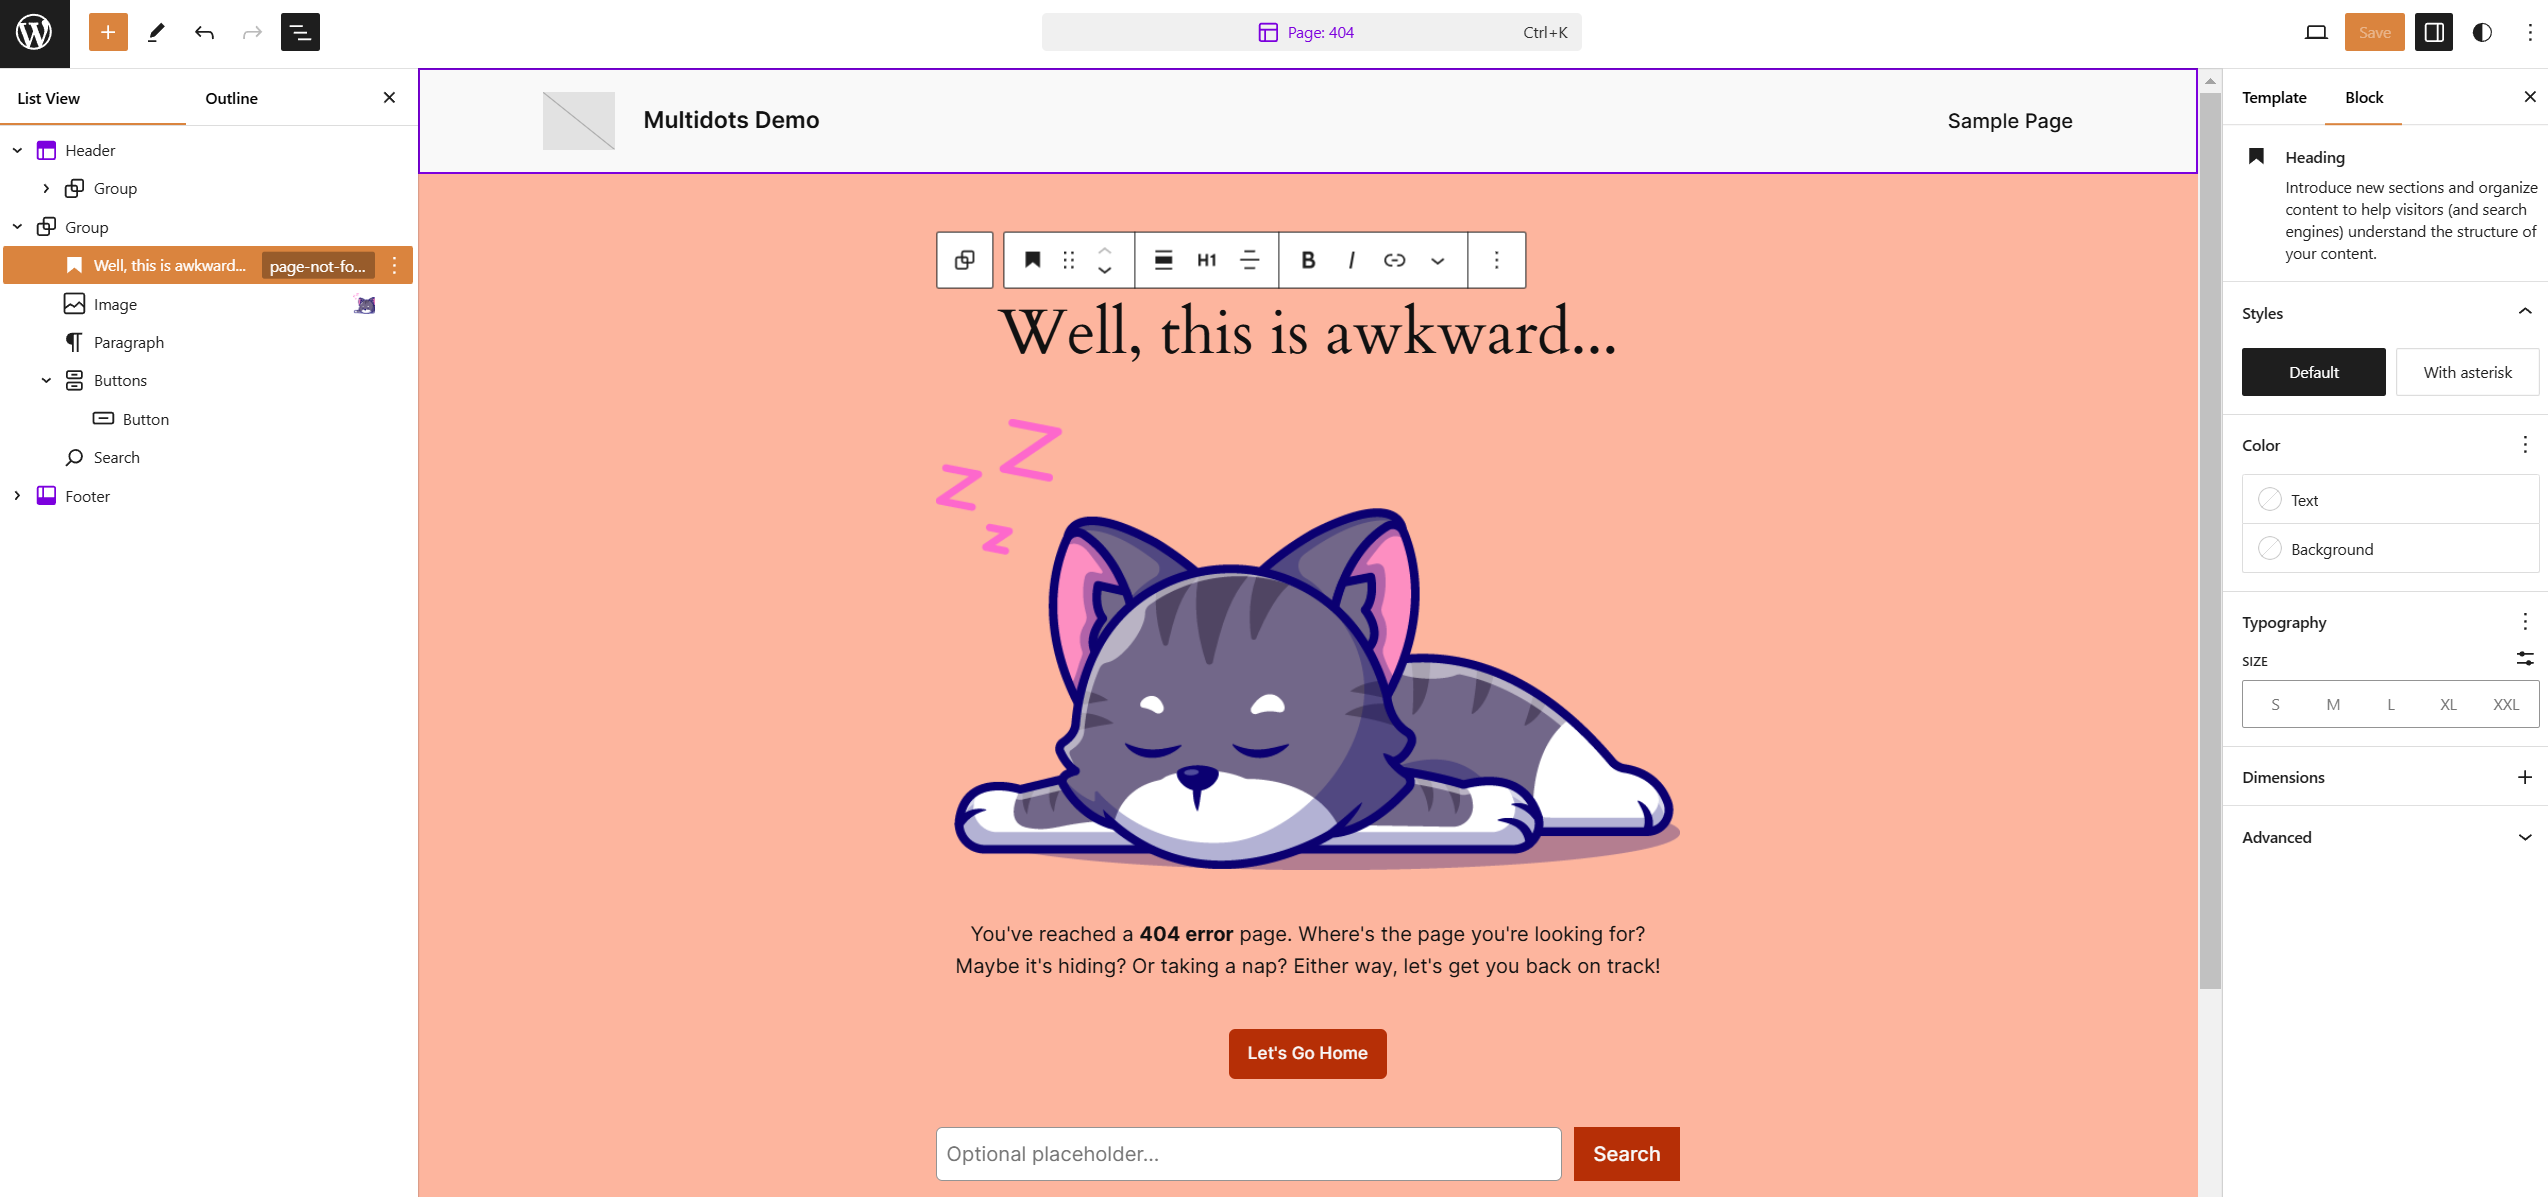
Editing the 404 template page
We edited the existing copy, added new image and button blocks, and changed the background color. Below is the new custom 404 error page:
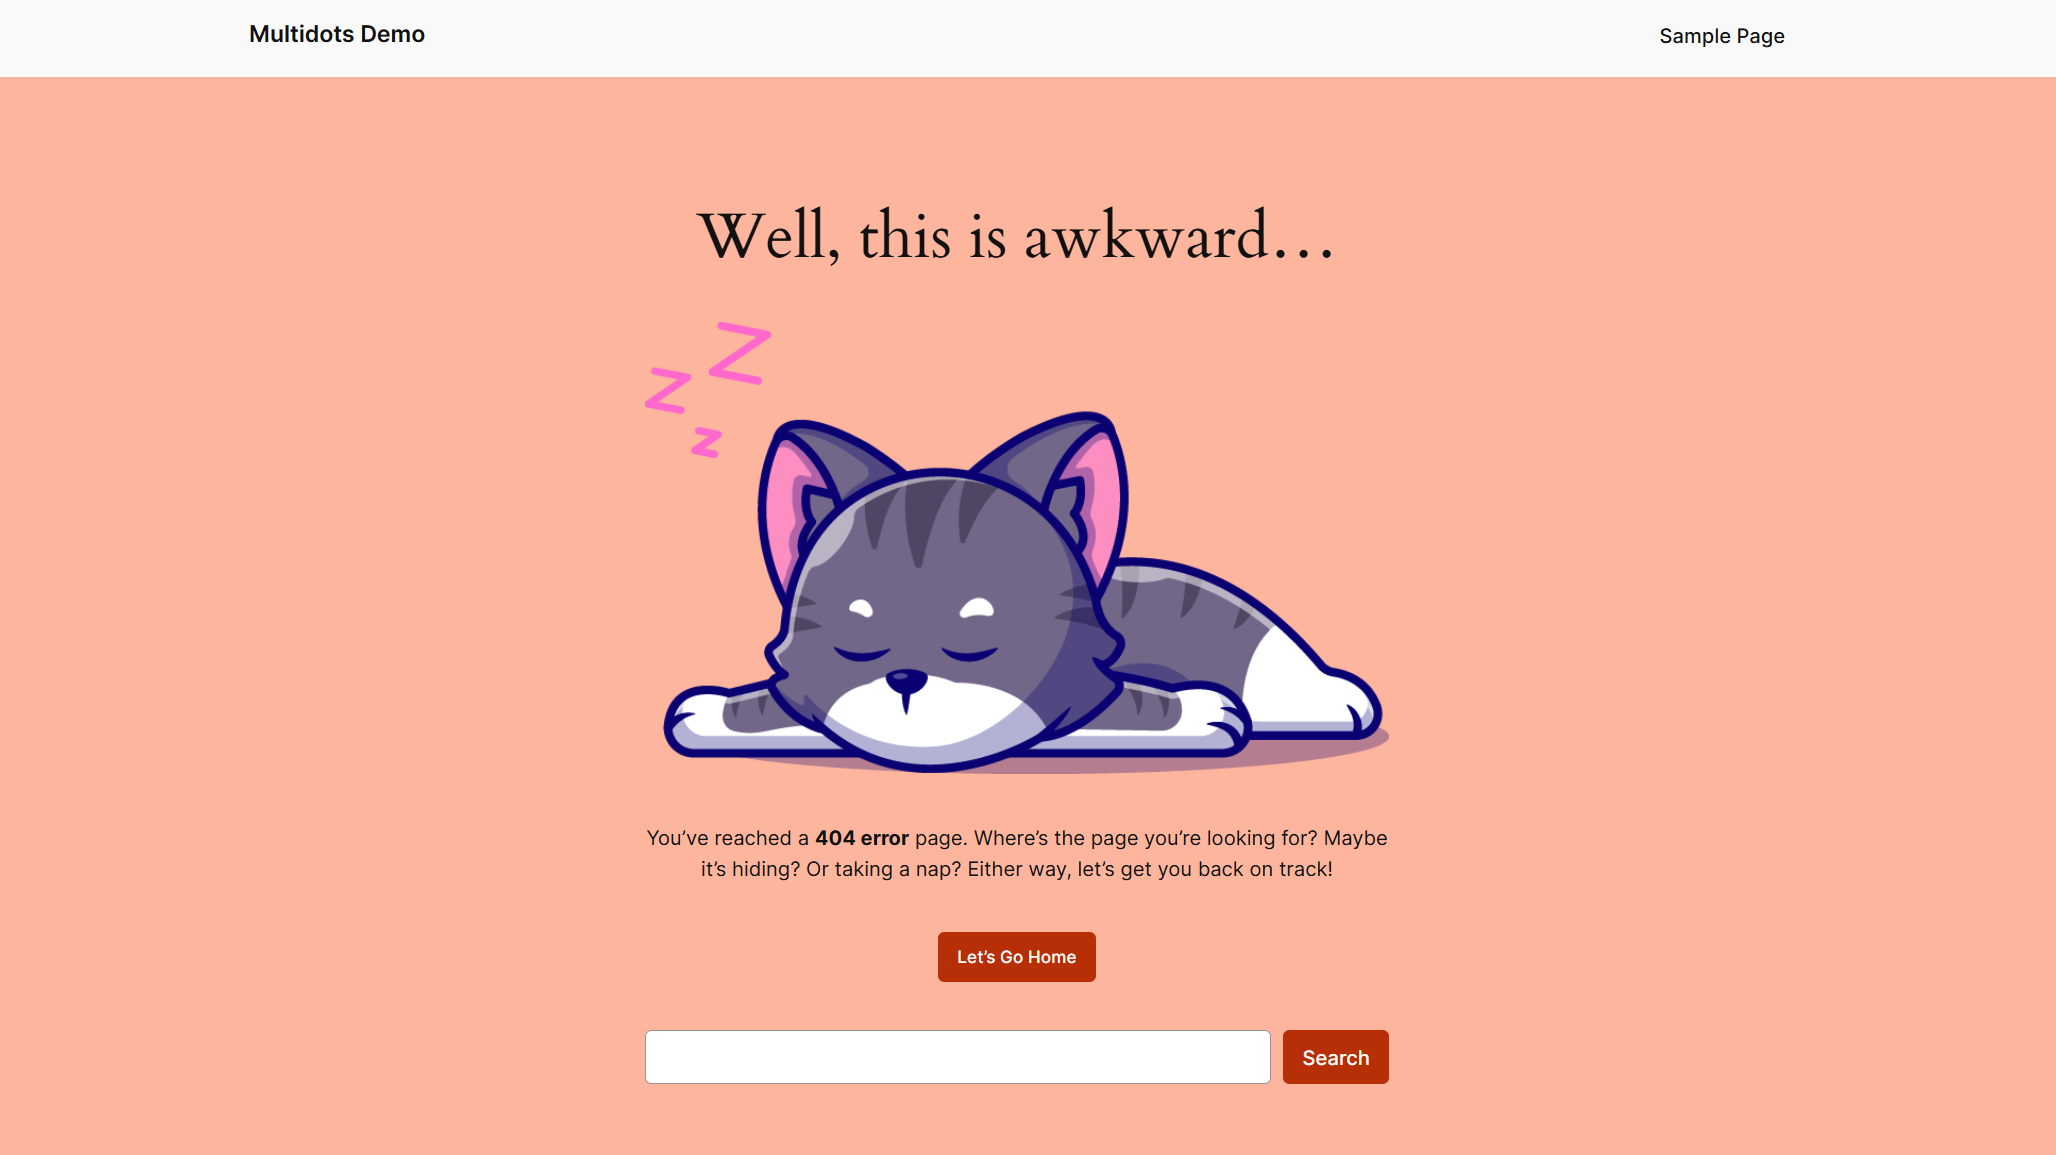
The new custom 404 error page
WordPress.tv has a video tutorial on using the Template Editor to personalize your 404 template.
Since its release in 2022, the number of block themes supporting Full-Site Editing has only grown. You can find more block themes in WordPress’ official Themes directory under the Block themes tab.
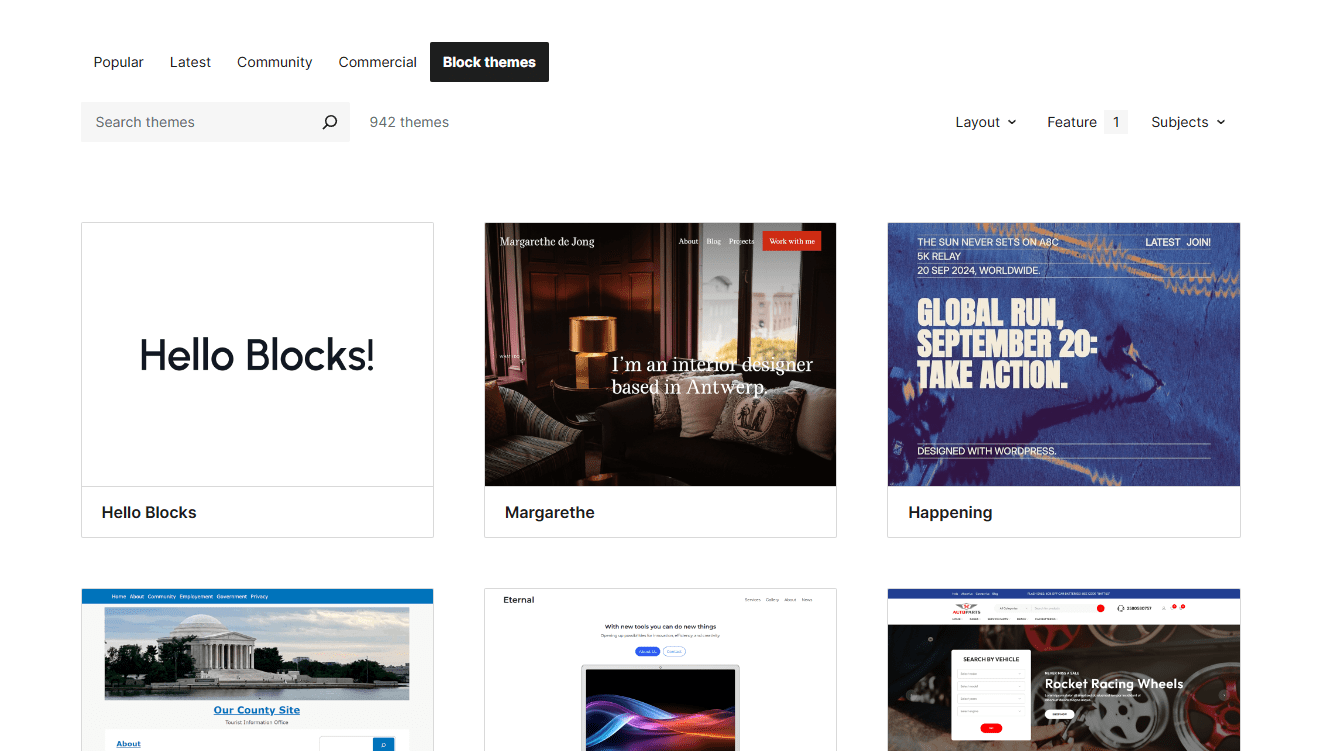
Block themes in the WordPress themes directory
As of writing this, there are 942 block themes in the Themes directory.
3. Create the 404 Template with WordPress Page Builders
Most WordPress page builders like Elementor, Beaver Builder, and Divi include an option in their interface to build 404 templates using their builders.
For instance, you can create a custom 404 error page using Elementor’s Theme Builder. However, it’s only available for Elementor’s premium subscribers.
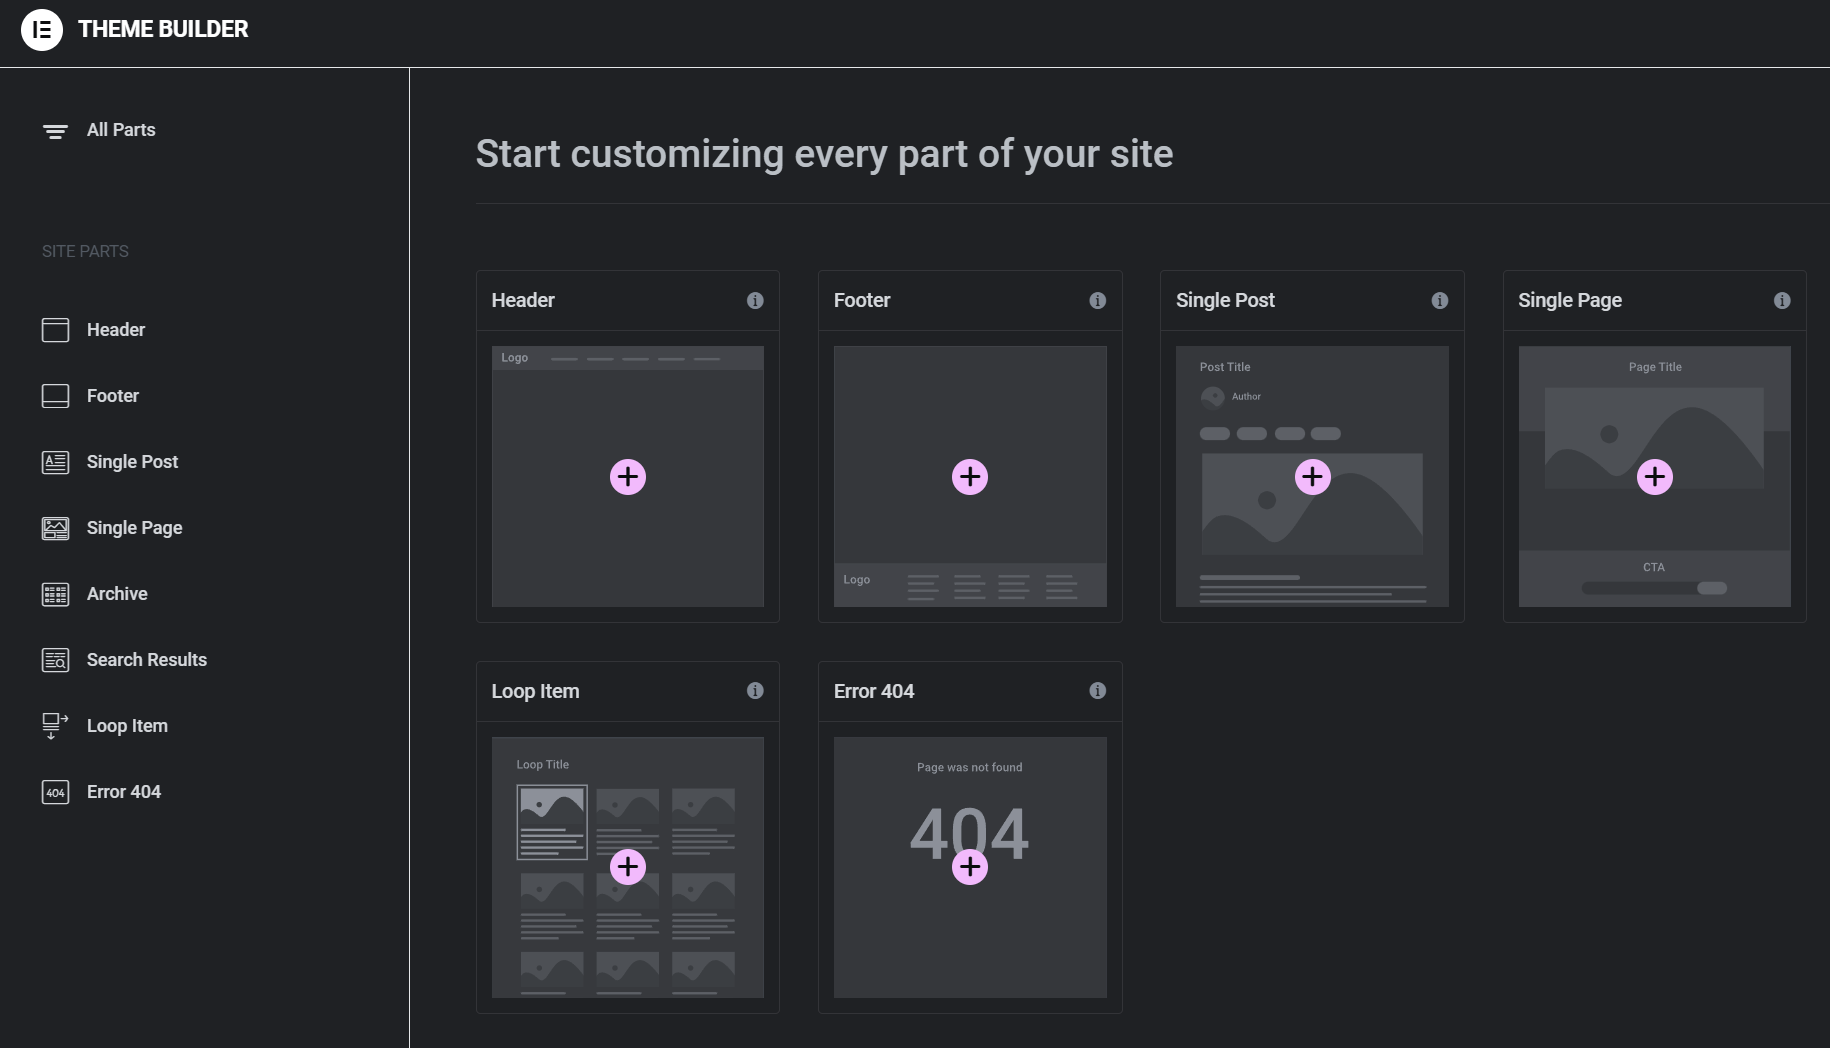
Elementor’s Theme Builder panel
If you have Elementor Pro, go to Templates ➡️ Theme Builder and click the 404 page to pull up all their 404 template designs.

Elementor Pro’s Error 404 template library
Choosing any of the template designs here and clicking the Insert button will pull it onto your site’s 404 page template. You can then make any changes, as you would with the Elementor page builder, and save your changes.

One of Elementor Pro’s 404 page templates
To customize our 404 page, we pulled the template design above, changed the text, and hit the Save button.
Likewise, Beaver Builder needs its premium Beaver Themer add-on to customize their 404 templates.
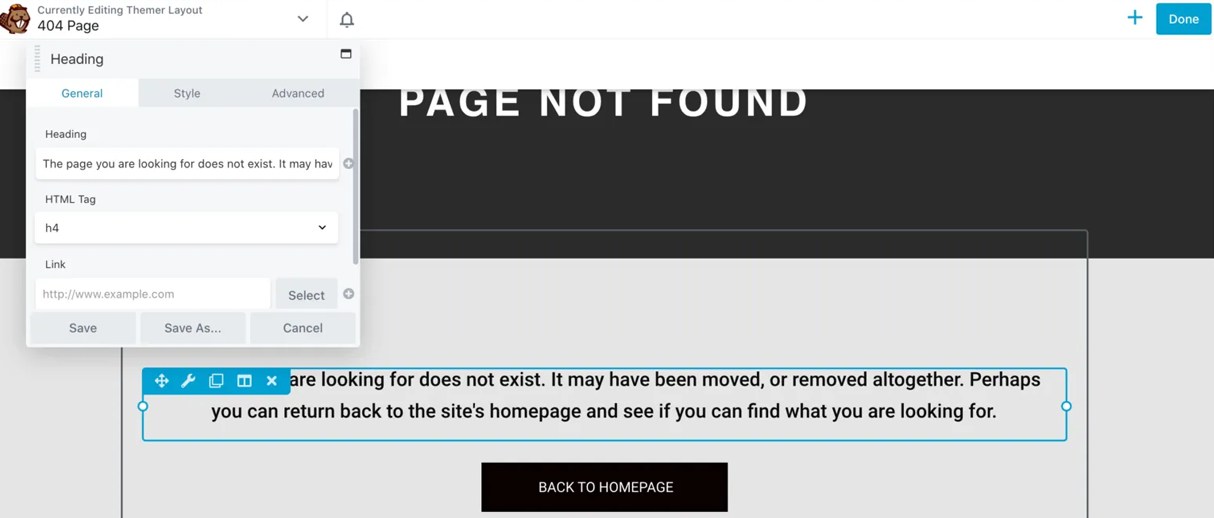
Beaver Builder’s 404 Page template editor (source)
Refer to your page builder’s documentation for more information on how you can create and set custom 404 pages.
4. Install WordPress 404 Error Page Plugins
WordPress plugins are another easy way to create and set 404 pages on any WordPress site. Here are some plugins you can use to get the job done.
Smart Custom 404 Error Page (404page)
The 404page WordPress plugin lets you set any page as your 404 error page. This plugin is a simple workaround if your theme or page builder doesn’t let you edit your 404 pages.
Smart Custom 404 Error Page (404page) plugin
Furthermore, this plugin also offers Block and Shortcode features to insert the requested URL into your custom 404 error page. Read the plugin’s documentation for more information. For example, you can use this functionality to make a simple 404 error page like Google’s
Note: The 404 page plugin is not under active development, but all its features work without issues with the latest WordPress version (6.6).
Colorlib 404 Customizer
Colorlib 404 Customizer is another plugin that can create custom 404 error pages for your WordPress site. With this plugin, you use its Live Customizer to make all the customizations.

Colorlib 404 Customizer plugin
This plugin comes with 20 built-in 404 page templates. They’re good to start with if you don’t feel like customizing your own or starting from scratch. You can also check how the page looks on smaller screens, like tablets and smartphones, by clicking their respective icons in the Live Customizer at the bottom left.
Custom 404 Pro
The Custom 404 Pro plugin lets you set custom page and URL redirects for 404 errors. You can use this plugin to redirect your 404 errors to another page.
Custom 404 Pro plugin
You can also set this plugin to capture 404 error logs and view them. To do this, set the Logging Status to Enabled under its Settings ➡️ General tab.
Create a Fun and Engaging Custom 404 Page in WordPress
A custom 404 "Page Not Found" error page is vital to any website. It positively impacts your users after encountering a broken link on your site.
By creating a custom 404 error page, you can guide users back to helpful content, keeping them engaged on your site. It not only improves user experience but also reduces bounce rates.
In this article, you learned many ways to go about creating it:
- Directly editing the theme’s 404 template PHP file
- Working with WordPress block theme’s Template Editor
- Using WordPress page builders
- Installing 404 page WordPress plugins
Now, what are you waiting for? Go and make your 404 error pages fun and engaging for your users!
Schedule a consultation call and discuss your migration requirements.
Contact Us